When an Ubuntu system is first installed, it is not configured by default to allow remote command-line access via Secure Shell (SSH) connections. When installed, SSH provides password-protected and encrypted access to the system for the root account and any other users added during the installation phase. This level of security is far from adequate and should be upgraded to SSH key-based authentication as soon as possible.
This chapter will outline the steps to increase the security of an Ubuntu system by implementing key-based SSH authentication.
An Overview of Secure Shell (SSH)
SSH is designed to allow secure remote access to systems for the purposes of gaining shell access and transferring files and data. As will be covered in “Ubuntu Remote Desktop Access with Vino”, SSH can also be used to provide a secure tunnel through which remote access to the GNOME desktop can be achieved over a network connection.
A basic SSH configuration consists of a client (used on the computer establishing the connection) and a server (running on the system to which the connection is to be established). A user might, for example, use an SSH client running on a Linux, Windows, or macOS system to connect to the SSH server running on an Ubuntu system to gain access to a shell command-line prompt or to perform file transfers. All of the communications between client and server, including the password entered to gain access, are encrypted to prevent outside parties from intercepting the data.
The inherent weakness in a basic SSH implementation is that it depends entirely on the strength of the passwords assigned to the accounts on the system. If a malicious party is able to identify the password for an account (either through guesswork, subterfuge, or a brute force attack), the system becomes vulnerable. This weakness can be addressed by implementing SSH key-based authentication.
 |
You are reading a sample chapter from Ubuntu 22.04 Essentials. Buy the full book now in eBook ($24.99) format. Includes 36 chapters. Learn more. |
SSH Key-based Authentication
SSH key-based authentication makes use of asymmetric public key encryption to add an extra layer of security to remote system access. The concept of public key encryption was devised in 1975 by Whitfield Diffie and Martin Hellman and is based on the concept of using a pair of keys, one private and one public.
In a public key encryption system, the public key is used to encrypt data that can only be decrypted by the owner of the private key.
In the case of SSH key-based authentication, the private key is held by the host on which the SSH client is located, while the corresponding public key resides on the system on which the SSH server is running. It is important to protect the private key, since ownership of the key will allow anyone to log into the remote system. As an added layer of protection, therefore, the private key may also be encrypted and protected by a password which must be entered each time a connection is established to the server.
Setting Up Key-based Authentication
There are four steps to setting up key-based SSH authentication, which can be summarized as follows:
- Generate the public and private keys.
- Install the public key on the server.
- Test authentication.
- Disable password-based authentication on the server.
The remainder of this chapter will outline these steps in greater detail for Linux, macOS, and Windows-based client operating systems.
|
You are reading a sample chapter from Ubuntu 22.04 Essentials. Buy the full book now in eBook ($24.99) format. Includes 36 chapters. Learn more. |
Installing and Starting the SSH Service
If the SSH server is not already installed and running on the system, it can be added using the following commands:
# apt install openssh-server
# systemctl start sshd.service
# systemctl enable sshd.serviceCode language: plaintext (plaintext)
SSH Key-based Authentication from Linux and macOS Clients
The first step in setting up SSH key-based authentication is to generate the key pairs on the client system. If the client system is running Linux or macOS, this is achieved using the ssh-keygen utility:
# ssh-keygenCode language: plaintext (plaintext)This will result in output similar to the following:
Generating public/private rsa key pair.
Enter file in which to save the key (/home/<username>/.ssh/id_rsa):Code language: plaintext (plaintext)
Press the Enter key to accept the default location for the key files. This will place two files in the .ssh sub-directory of the current user’s home directory. The private key will be stored in a file named id_rsa while the public key will reside in the file named id_rsa.pub.
Next, ssh-keygen will prompt for a passphrase with which to protect the private key. If a passphrase is provided, the private key will be encrypted on the local disk and the passphrase required in order to gain access to the remote system. For better security, use of a passphrase is recommended.
|
You are reading a sample chapter from Ubuntu 22.04 Essentials. Buy the full book now in eBook ($24.99) format. Includes 36 chapters. Learn more. |
Enter passphrase (empty for no passphrase):Code language: plaintext (plaintext)Finally, the ssh-keygen tool will generate the following output indicating that the keys have been generated:
Your identification has been saved in /home/neil/.ssh/id_rsa.
Your public key has been saved in /home/neil/.ssh/id_rsa.pub.
The key fingerprint is:
SHA256:FOLGWEEGFIjWnCT5wtTOv5VK4hdimzWghZizUEMYbfo <username>@<hostname>
The key's randomart image is:
+---[RSA 2048]----+
|.BB+=+*..        |
|o+B= * . .       |
|===.. + .        |
|*+ * . .         |
|.++ o   S        |
|..E+ * o         |
|  o B *          |
|   + +           |
|    .            |
+----[SHA256]-----+Code language: plaintext (plaintext)
The next step is to install the public key onto the remote server system. This can be achieved using the ssh-copy-id utility as follows:
$ ssh-copy-id username@remote_hostname Code language: plaintext (plaintext)For example:
For example:
$ ssh-copy-id [email protected]
/usr/bin/ssh-copy-id: INFO: Source of key(s) to be installed: "/home/neil/.ssh/id_rsa.pub"
/usr/bin/ssh-copy-id: INFO: attempting to log in with the new key(s), to filter out any that are already installed
/usr/bin/ssh-copy-id: INFO: 1 key(s) remain to be installed -- if you are prompted now it is to install the new keys
[email protected]'s password:

Number of key(s) added: 1

Now try logging into the machine, with:   "ssh '[email protected]'"
and check to make sure that only the key(s) you wanted were added.Code language: plaintext (plaintext)
Once the key is installed, test that the authentication works by attempting a remote login using the ssh client:
$ ssh -l <username> <hostname>Code language: plaintext (plaintext)If the private key is encrypted and protected with a passphrase, enter the phrase when prompted to complete the authentication and establish remote access to the Ubuntu system:
|
You are reading a sample chapter from Ubuntu 22.04 Essentials. Buy the full book now in eBook ($24.99) format. Includes 36 chapters. Learn more. |
Enter passphrase for key '/home/neil/.ssh/id_rsa':
Last login: Thu Feb 21 13:41:23 2019 from 192.168.1.101
[neil@demosystem02 ~]$Code language: plaintext (plaintext)
Repeat these steps for any other accounts on the server for which remote access is required. If access is also required from other client systems, simply copy the id_rsa private key file to the .ssh sub-directory of your home folder on the other systems.
As currently configured, access to the remote system can still be achieved using the less secure password authentication. Once you have verified that key-based authentication works, log into the remote system, edit the /etc/ssh/ssh_config file and change the PasswordAuthentication setting to no:
PasswordAuthentication noCode language: plaintext (plaintext)Save the file and restart the sshd service to implement the change:
# systemctl restart sshd.serviceCode language: plaintext (plaintext)From this point on, it will only be possible to remotely access the system using SSH key-based authentication.
Managing Multiple Keys
It is not uncommon for multiple private keys to reside on a client system, each providing access to a different server. There are a number of options for selecting a specific key when establishing a connection. It is possible, for example, to specify the private key file to be used when launching the ssh client as follows:
|
You are reading a sample chapter from Ubuntu 22.04 Essentials. Buy the full book now in eBook ($24.99) format. Includes 36 chapters. Learn more. |
$ ssh -l neilsmyth -i ~/.ssh/id_work 35.194.18.119Code language: plaintext (plaintext)Alternatively, the SSH client user configuration file may be used to associate key files with servers. The configuration file is named config, must reside in the .ssh directory of the user’s home directory and can be used to configure a wide range of options, including the private key file, the default port to use when connecting, the default user name, and an abbreviated nickname via which to reference the server. The following example config file defines different key files for two servers and allows them to be referenced by the nicknames home and work. In the case of the work system, the file also specifies the user name to be used when authenticating:
Host work
  HostName 35.194.18.119
  IdentityFile ~/.ssh/id_work
  User neilsmyth

Host home
  HostName 192.168.0.21
  IdentityFile ~/.ssh/id_homeCode language: plaintext (plaintext)
Prior to setting up the configuration file, the user would have used the following command to connect to the work system:
$ ssh -l neilsmyth -i ~/.ssh/id_work 35.194.18.119Code language: plaintext (plaintext)Now, however, the command can be shortened as follows:
$ ssh workCode language: plaintext (plaintext)A full listing of configuration file options can be found by running the following command:
$ man ssh_configCode language: plaintext (plaintext)SSH Key-based Authentication from Windows 10 Clients
Recent releases of Windows 10 include a subset of the OpenSSH implementation that is used by most Linux and macOS systems as part of Windows PowerShell. This allows SSH key-based authentication to be set up from a Windows 10 client using similar steps to those outlined above for Linux and macOS.
|
You are reading a sample chapter from Ubuntu 22.04 Essentials. Buy the full book now in eBook ($24.99) format. Includes 36 chapters. Learn more. |
On Windows, search for Windows PowerShell and select it from the results. Once running, the PowerShell window will appear, as shown in Figure 18-1:
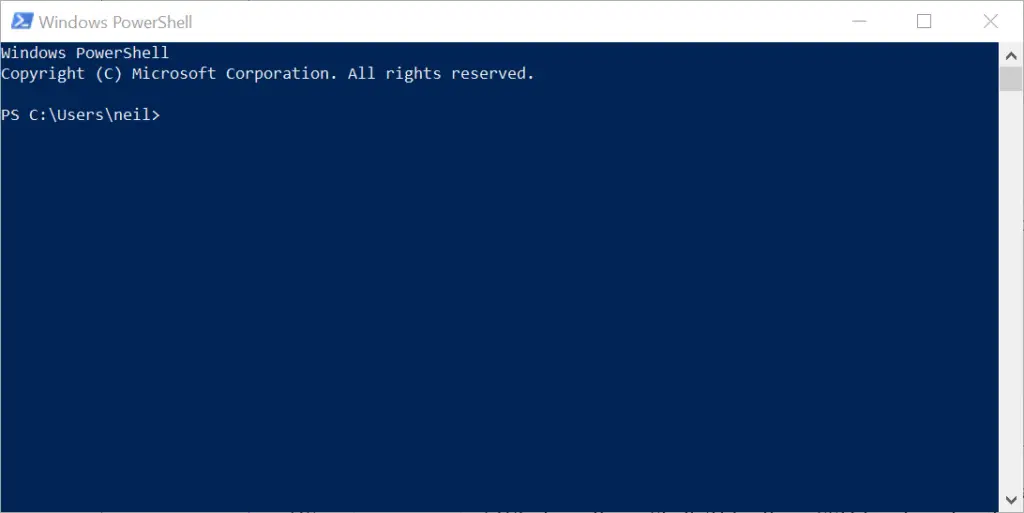
Figure 18-1
If you already have a private key from another client system, simply copy the id_rsa file to a folder named .ssh on the Windows 10 system. Once the file is in place, test the authentication within the PowerShell window as follows:
$ ssh -l <username>@<hostname> Code language: plaintext (plaintext)For example:
PS C:\Users\neil> ssh -l neil 192.168.1.101
Enter passphrase for key 'C:\Users\neil/.ssh/id_rsa':Code language: plaintext (plaintext)
Enter the passphrase when prompted and complete the authentication process.
|
You are reading a sample chapter from Ubuntu 22.04 Essentials. Buy the full book now in eBook ($24.99) format. Includes 36 chapters. Learn more. |
If an existing private key does not yet exist, generate a new private and public key pair within the PowerShell window using the ssh-keygen utility using the same steps as those outlined for Linux and macOS. Once the keys have been generated, they will once again be located in the .ssh directory of the current user’s home folder, and the public key file id_rsa.pub will need to be installed on the remote Ubuntu system. Unfortunately, Windows PowerShell does not include the ssh-copy-id utility, so this task will need to be performed manually.
Within the PowerShell window, change directory into the .ssh sub-directory and display the content of the public key id_rsa.pub file:
PS C:\Users\neil> cd .ssh
PS C:\Users\neil\.ssh> type id_rsa.pub
ssh-rsa AAAAB3NzaC1yc2EAAAADAQABAAABAQDFgx1vzu59lll6/uQw7FbmKVsQ3fzLz9MW1fgo4sdsxXp81wCHNAlqcjx1Pgr9BJPXWUMInQOi7BQ5I+vc2xQ2AS0kMq3ZH9ybWuQe/U2GjueXZd0FKrEXrT55wM36Rm6Ii3roUCoGCzGR8mn95JvRB3VtCyDdzTWSi8JBpK5gV5oOxNTNPsewlLzouBlCT1qW3CKwEiIwu8S9MTL7m3nrcaNeLewTTHevvHw4QDwzFQ+B0PDg96fzsYoTXVhzyHSWyo6H0gqrft7aKgILBtEIhWTkSVEMAzy1piKtCr1IYTmVK6engv0aoGtMUq6FnOeGp5FjvKkF4aQkh1QR28r neil@DESKTOP-S8P8D3NCode language: plaintext (plaintext)
Highlight the content of the file and copy it using the Ctrl-C keyboard shortcut.
Remaining within the PowerShell window, log into the remote system using password authentication:
PS C:\Users\neil\.ssh> ssh -l <username> <hostname>Code language: plaintext (plaintext)Once signed in, check if the .ssh sub-directory exists. If it does not, create it as follows:
|
You are reading a sample chapter from Ubuntu 22.04 Essentials. Buy the full book now in eBook ($24.99) format. Includes 36 chapters. Learn more. |
$ mkdir .sshCode language: plaintext (plaintext)Change directory into .ssh and check whether a file named authorized_keys already exists. If it does not, create it and paste the content of the public key file from the Windows 10 system into it.
If the authorized_keys file already exists it most likely already contains other keys. If this is the case, edit the file and paste the new public key at the end of the file. The following file, for example, contains two keys:
ssh-rsa AAAAB3NzaC1yc2EAAAADAQABAAABAQCzRWH27Xs8ZA5rIbZXKgxFY5XXauMv+6F5PljBLJ6j+9nkmykVe3GjZTp3oD+KMRbT2kTEPbDpFD67DNL0eiX2ZuEEiYsxZfGCRCPBGYmQttFRHEAFnlS1Jx/G4W5UNKvhAXWyMwDEKiWvqTVy6syB2Ritoak+D/Sc8nJflQ6dtw0jBs+S7Aim8TPfgpi4p5XJGruXNRScamk68NgnPfTL3vT726EuABCk6C934KARd+/AXa8/5rNOh4ETPstjBRfFJ0tpmsWWhhNEnwJRqS2LD0ug7E3yFI2qsNKGEzvAYUC8Up45MRP7liR3aMlCBil1tsy9R+IB7oMEycZAe/qj [email protected]
ssh-rsa AAAAB3NzaC1yc2EAAAADAQABAAABAQDFgx1vzu59lll6/uQw7FbmKVsQ3fzLz9MW1fgo4sdsxXp81wCHNAlqcjx1Pgr9BJPXWUMInQOi7BQ5I+vc2xQ2AS0kMq3ZH9ybWuQe/U2GjueXZd0FKrEXrT55wM36Rm6Ii3roUCoGCzGR8mn95JvRB3VtCyDdzTWSi8JBpK5gV5oOxNTNPsewlLzouBlCT1qW3CKwEiIwu8S9MTL7m3nrcaNeLewTTHevvHw4QDwzFQ+B0PDg96fzsYoTXVhzyHSWyo6H0gqrft7aK+gILBtEIhWTkSVEMAzy1piKtCr1IYTmVK6engv0aoGtMUq6FnOeGp5FjvKkF4aQkh1QR28r neil@DESKTOP-S8P8D3NCode language: plaintext (plaintext)
Once the public key is installed on the server, test the authentication by logging in to the server from within the Windows 10 PowerShell window, for example:
PS C:\Users\neil\.ssh> ssh -l neil 192.168.1.100
Enter passphrase for key 'C:\Users\neil/.ssh/id_rsa':
When key-based authentication has been set up for all the accounts and verified, disable password authentication on the Ubuntu system as outlined at the end of the previous section.
SSH Key-based Authentication using PuTTY
For Windows systems that do not have OpenSSH available or as a more flexible alternative to using PowerShell, the PuTTY tool is a widely used alternative. The first step in using PuTTY is to download and install it on any Windows systems that need an SSH client. PuTTY is a free utility and can be downloaded using the following link:
|
You are reading a sample chapter from Ubuntu 22.04 Essentials. Buy the full book now in eBook ($24.99) format. Includes 36 chapters. Learn more. |
https://www.chiark.greenend.org.uk/~sgtatham/putty/latest.html
Download the Windows installer executable that matches your Windows system (32-bit and 64-bit versions are available), then execute the installer to complete the installation.
If a private key already exists on another system, create the .ssh folder in the home folder of the current user and copy the private id_rsa key into it.
Next, the private key file needs to be converted to a PuTTY private key format file using the PuTTYgen tool. Locate this utility in the Windows Start menu and launch it:
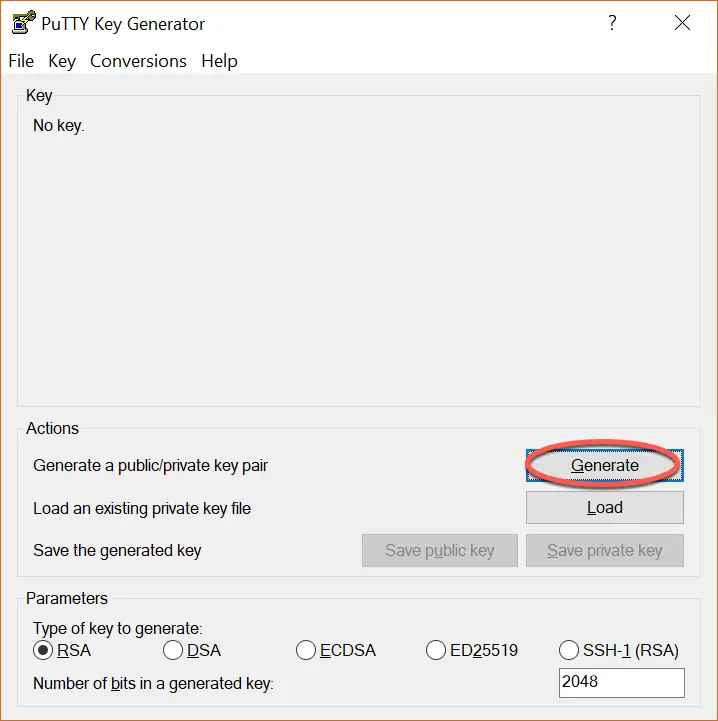
Figure 18-2
|
You are reading a sample chapter from Ubuntu 22.04 Essentials. Buy the full book now in eBook ($24.99) format. Includes 36 chapters. Learn more. |
Once launched, click on the Load button located in the Actions section and navigate to the private key file previously copied to the .ssh folder (note that it may be necessary to change the file type filter to All Files (*.*) in order for the key file to be visible). Once located, select the file and load it into PuttyGen. When prompted, enter the passphrase originally used to encrypt the file. Once the private key has been imported, save it as a PuTTY key file by clicking on the Save Private Key button. For consistency, save the key file to the .ssh folder but give it a different name to differentiate it from the original key file.
Launch PuTTY from the Start menu and enter the IP address or host name of the remote server into the main screen before selecting the Connection -> SSH -> Auth category in the left-hand panel, as highlighted in Figure 18-3:

Figure 18-3
Click on the Browse button next to the Private key for authentication field and navigate to and select the previously saved PuTTY private key file. Optionally, scroll to the top of the left-hand panel, select the Session entry, and enter a name for the session in the Saved Sessions field before clicking on the Save button. This will save the session configuration so that it can be used in the future without having to re-enter the settings each time.
Finally, click on the Open button to establish the connection to the remote server, entering the user name and passphrase when prompted to do so to complete the authentication.
|
You are reading a sample chapter from Ubuntu 22.04 Essentials. Buy the full book now in eBook ($24.99) format. Includes 36 chapters. Learn more. |
Generating a Private Key with PuTTYgen
The previous section explored the use of existing private and public keys when working with PuTTY. If keys do not already exist, they can be created using the PuTTYgen tool, which is included with the main PuTTY installation.
To create new keys, launch PuttyGen and click on the Generate button highlighted in Figure 18-4:

Figure 18-4
Move the mouse pointer around to generate random data as instructed, then enter an optional passphrase with which to encrypt the private key. Once the keys have been generated, save the files to suitable locations using the Save public key and Save private key buttons. The private key can be used with PuTTY as outlined in the previous section. To install the public key on the remote server use the steps covered in the earlier section on using SSH within PowerShell on Windows 10.
Installing the Public Key for a Google Cloud Instance
If your Ubuntu system is hosted by Google Cloud, for example as a Compute Engine instance, there are a number of different ways to gain SSH access to the server using key-based authentication. Perhaps the most straightforward is to add your public key to the metadata for your Google Cloud account. This will make the public key available for all Virtual Machine instances that you create within Google Cloud. To add the public key, log into the Google Cloud Platform console, select the Metadata option from the left-hand navigation panel as highlighted in Figure 18-5 followed by the SSH keys tab:
|
You are reading a sample chapter from Ubuntu 22.04 Essentials. Buy the full book now in eBook ($24.99) format. Includes 36 chapters. Learn more. |
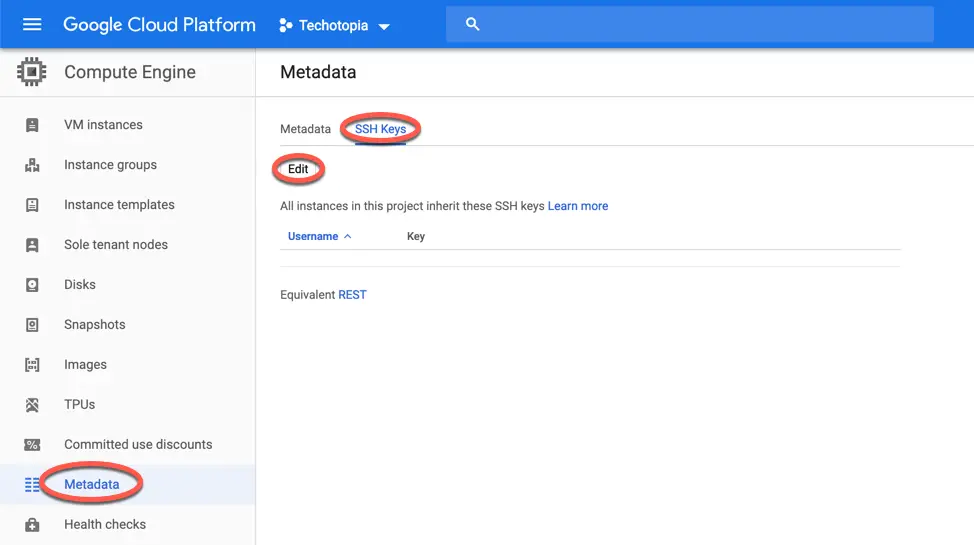
Figure 18-5
On the SSH Keys screen, click on the Edit button (also highlighted in Figure 18-5) to edit the list of keys. Scroll down to the bottom of the current list and click on the + Add Item button. A new field will appear into which you will need to paste the entire public key as it appears in your id_rsa.pub file. Once the key has been entered, click on the Save button to add the key.
The public key will now appear in the list of SSH Keys. Note that the key entry also includes the username which must be used when logging into any Google Cloud instances:
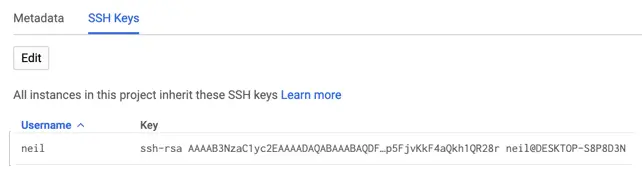
Figure 18-6
With the public key added to the metadata it should be possible to access any virtual machine instance from any client on which the corresponding private key has been installed and on which the user has an account. In fact, behind the scenes, all Google Cloud has done to enable this is add the public key to the .ssh/authorized_keys file in the user’s home directory on any virtual machines on which the account exists.
|
You are reading a sample chapter from Ubuntu 22.04 Essentials. Buy the full book now in eBook ($24.99) format. Includes 36 chapters. Learn more. |
Summary
It is important that any remote access to an Ubuntu system be implemented in a way that provides a high level of security. By default, SSH allows remote system access using password-based authentication. This leaves the system vulnerable to anyone who can either guess a password or find out the password through other means. For this reason, the use of key-based authentication is recommended to protect system access. Key-based authentication uses the concept of public key encryption involving public and private keys. When implemented, users are only able to connect to a server if they are using a client which has a private key that matches a public key on the server. As an added layer of security, the private key may also be encrypted and password protected. Once key-based encryption has been implemented, the server system is then configured to disable support for the less secure password-based authentication.
This chapter has provided an overview of SSH key-based authentication and outlined the steps involved in generating keys and configuring clients on macOS, Linux, and Windows, in addition to the installation and management of public keys on an Ubuntu server.