
It can be frustrating when a Live Activity fails to update in response to a push notification, and identifying the cause can initially seem challenging. Part of the problem is that push notifications and Live Activities use systems over which we have little control, such as the APNs, the predictive engine that decides when the device is ready to accept a push notification, and the background process on the device that automatically updates the Live Activity’s content state when the notification is received.
As we will explain in this chapter, while diagnosing a push notification problem may seem daunting, some steps can be taken to identify and correct potential problems.
Push Notification Problems
A push notification will typically fail either because the APNs did not send the notification, the device did not receive the notification, or the Live Activity could not process the notification. In the rest of this chapter, we will explore some of these areas and provide tips to identify and correct the issue.
Push Notification Delivery
A common issue with push notifications is that the device may ask the APNs to store the notification and retry sending it later. Much like background updates, this can be for various reasons, including battery status, low power mode being active, or because the Live Activity has exceeded the notification frequency budget. When a Live Activity does not update, the first step is to check the log for the notification.
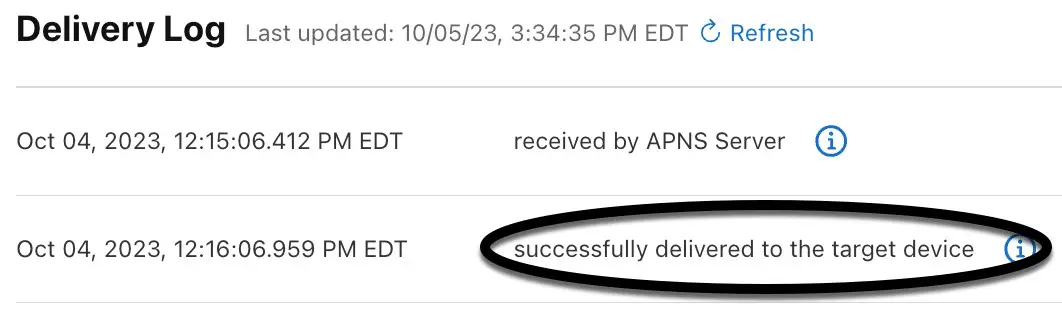
After the notification has been sent using the CloudKit console, it will appear in the left side panel. Select the notification and look for the Delivery Log section of the detail page, as shown in Figure 1-1. If the notification was delivered, the final log entry will read “successfully delivered to the target device”:
 |
You are reading a sample chapter from an old edition of iOS App Development Essentials. Purchase the fully updated iOS 18 App Development Essentials book. The full book contains 71 chapters, over 612 pages of in-depth information, downloadable source code, and access to over 50 SwiftUI knowledge test quizzes. |
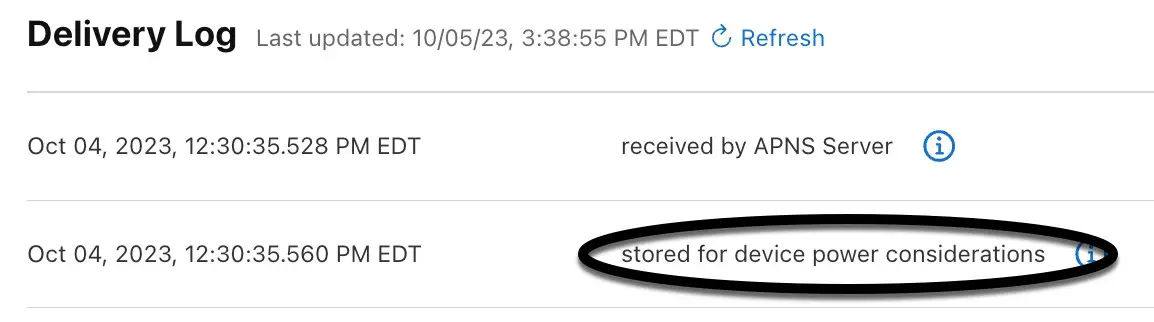
If the notification has been delayed, the log will state the reason. In Figure 1-2, for example, the device has requested that the notification be stored and retried later to conserve battery life:
Hover the mouse pointer over the information icon next to the log entry for a description of the status. Refresh the log until it reports a successful delivery. If there is no change to the status, try sending another notification (remembering to provide an updated timestamp in the payload).
If you send notifications from the command line, copy the unique id from the curl output, select the Delivery Log tab in the Cloudkit console Push Notifications screen, and paste the id into the search field. Select the id in the search results to display the log history and check the most recent status.
If the device continues to defer the notification delivery, sending another notification with the priority set to 10 (High) will typically result in a successful delivery.
Check the Payload Structure
A successful push notification delivery does not guarantee that the Live Activity will update. A common cause for this is a mismatch between the payload and the Live Activity content state model. Before moving on to the next steps, verify that the variable names and data types in the payload precisely match the dynamic variables declared in the Live Activity’s widget attributes declaration.
|
You are reading a sample chapter from an old edition of iOS App Development Essentials. Purchase the fully updated iOS 18 App Development Essentials book. The full book contains 71 chapters, over 612 pages of in-depth information, downloadable source code, and access to over 50 SwiftUI knowledge test quizzes. |
Validating the Push and Authentication Tokens
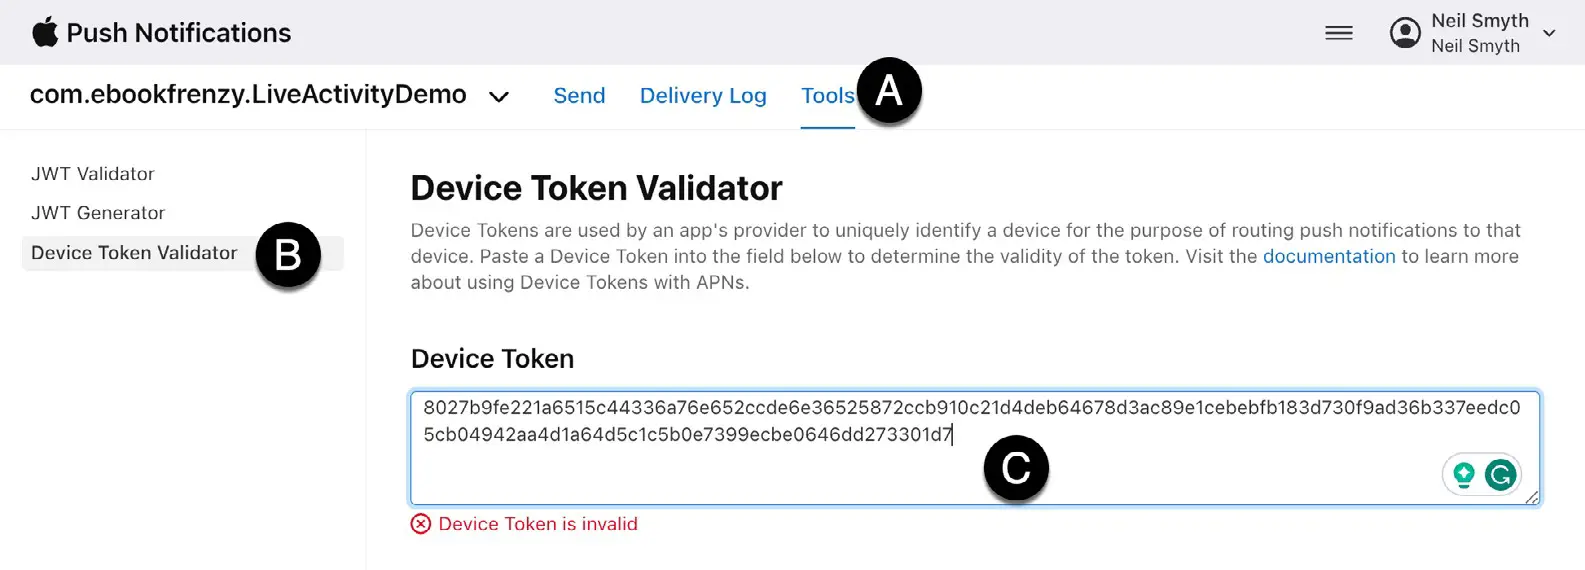
Although the CloudKit console will typically report an invalid push token, it is worth checking that the one you are using is still valid. To do so, click on the Tools tab (marked A in Figure 1-3) in the console, select Device Token Validator (B), and paste your push token into the text box (C):
Note that just because a token passes the validation test, it does not necessarily mean that it is still the token that your app is using. Check the Xcode console to verify that you are still using the correct token to send the notification.
Checking the Device Log
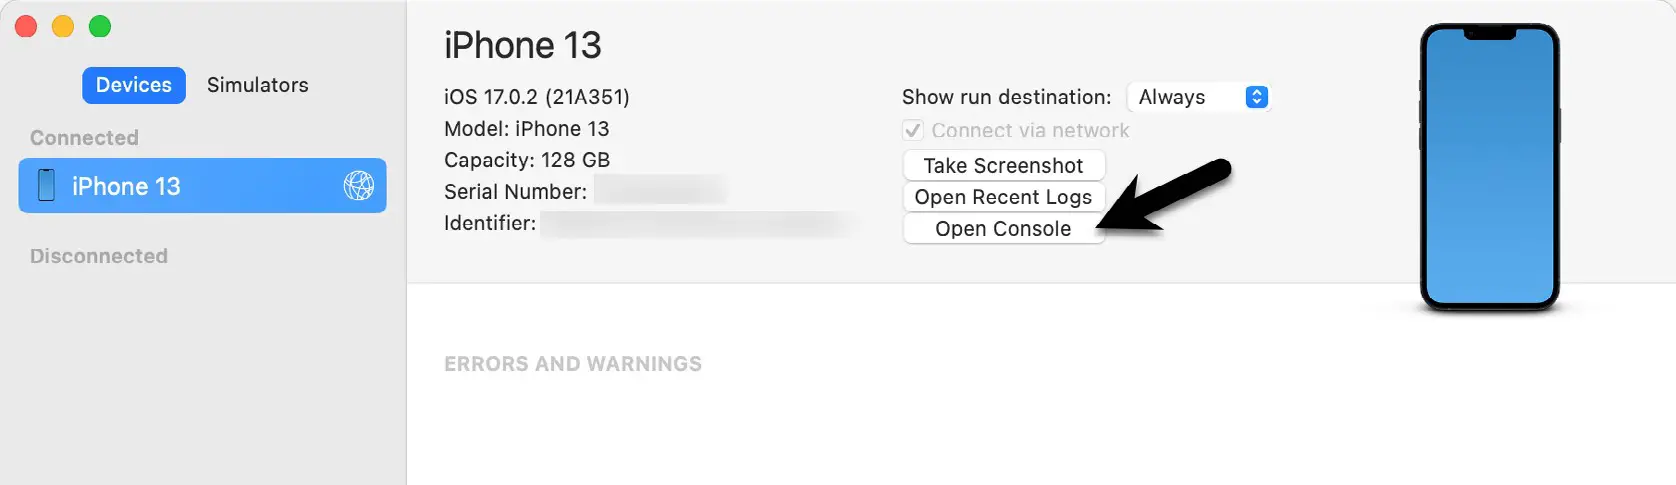
If the notification was delivered and the push token is correct, the next step is to check the device log for error messages. This can often highlight problems such as a bundle identifier mismatch or the payload structure not matching the widget attributes. Within Xcode, select the Window -> Devices and Simulators menu option and, in the resulting dialog, select your device before clicking the Open Console button as indicated in the figure below:
Within the Console window, click the button to start streaming and select the Errors and Faults tab. In the search bar at the top of the window, insert liveactivity after the “fault” message type:

Keep the device console open while sending another notification and check for any warnings and errors that might provide insight into the problem.
|
You are reading a sample chapter from an old edition of iOS App Development Essentials. Purchase the fully updated iOS 18 App Development Essentials book. The full book contains 71 chapters, over 612 pages of in-depth information, downloadable source code, and access to over 50 SwiftUI knowledge test quizzes. |
Summary
While the system may seem opaque, there are only a few possible reasons why Live Activity may not update in response to a push notification. Either the APNs identified a problem with the notification (such as an expired token), the device requested a deferred delivery, or the Bundle ID or payload data did not match the Live Activity. As outlined in this chapter, there are several ways to investigate push notification problems, including using the CloudKit and Device consoles.