
Prior to the introduction of SwiftUI, all iOS apps were developed using UIKit together with a collection of UIKit-based supporting frameworks. Although SwiftUI is provided with a wide selection of components with which to build an app, there are instances where there is no SwiftUI equivalent to options provided by the other frameworks.
Given the quantity of apps that were developed before the introduction of SwiftUI it is also important to be able to integrate existing non-SwiftUI functionality with SwiftUI development projects and vice versa. Fortunately, SwiftUI includes several options to perform this type of integration.
SwiftUI and UIKit Integration
Before looking in detail at integrating SwiftUI and UIKit it is worth taking some time to explore whether a new app project should be started as a UIKit or SwiftUI project, and whether an existing app should be migrated entirely to SwiftUI. When making this decision, it is important to remember that apps containing SwiftUI code can only be used on devices running iOS 13 or later.
If you are starting a new project, then the best approach may be to build it as a SwiftUI project (support for older iOS versions not withstanding) and then integrate with UIKit when required functionality is not provided directly by SwiftUI. Although Apple continues to enhance and support the UIKit way of developing apps, it is clear that Apple sees SwiftUI as the future of app development. SwiftUI also makes it easier to develop and deploy apps for iOS, macOS, tvOS, iPadOS and watchOS without making major code changes.
If, on the other hand, you have existing projects that pre-date the introduction of SwiftUI then it probably makes sense to leave the existing code unchanged, build any future additions to the project using SwiftUI and to integrate those additions into your existing code base.
 |
You are reading a sample chapter from an old edition of iOS App Development Essentials. Purchase the fully updated iOS 18 App Development Essentials book. The full book contains 71 chapters, over 612 pages of in-depth information, downloadable source code, and access to over 50 SwiftUI knowledge test quizzes. |
SwiftUI provides three options for performing integrations of these types. The first, and the topic of this chapter, is to integrate individual UIKit-based components (UIViews) into SwiftUI View declarations.
For those unfamiliar with UIKit, a screen displayed within an app is typically implemented using a view controller (implemented as an instance of UIViewController or a subclass thereof). The subject of integrating view controllers into SwiftUI will be covered in the chapter entitled “Integrating UIViewControllers with SwiftUI”.
Finally, SwiftUI views may also be integrated into existing UIKit-based code, a topic which will be covered in the chapter entitled “Integrating SwiftUI with UIKit”.
Integrating UIViews into SwiftUI
The individual components that make up the user interface of a UIKit-based application are derived from the UIView class. Buttons, labels, text views, maps, sliders and drawings (to name a few) are all ultimately subclasses of the UIKit UIView class.
To facilitate the integration of a UIView based component into a SwiftUI view declaration, SwiftUI provides the UIViewRepresentable protocol. To integrate a UIView component into SwiftUI, that component needs to be wrapped in a structure that implements this protocol.
|
You are reading a sample chapter from an old edition of iOS App Development Essentials. Purchase the fully updated iOS 18 App Development Essentials book. The full book contains 71 chapters, over 612 pages of in-depth information, downloadable source code, and access to over 50 SwiftUI knowledge test quizzes. |
At a minimum the wrapper structure must implement the following methods to comply with the UIViewRepresentable protocol:
- makeUIView() – This method is responsible for creating an instance of the UIView-based component, performing any necessary initialization and returning it.
- updateView() – Called each time a change occurs within the containing SwiftUI view that requires the UIView to update itself.
The following optional method may also be implemented:
- dismantleUIView() – Provides an opportunity to perform cleanup operations before the view is removed.
As an example, assume that there is a feature of the UILabel class that is not available with the SwiftUI Text view. To wrap a UILabel view using UIViewRepresentable so that it can be used within SwiftUI, the structure might be implemented as follows:
import SwiftUI

struct MyUILabel: UIViewRepresentable {

    var text: String

    func makeUIView(context: UIViewRepresentableContext<MyUILabel>)
                             -> UILabel {
        let myLabel = UILabel()
        myLabel.text = text
        return myLabel
    }

    func updateUIView(_ uiView: UILabel,
                    context: UIViewRepresentableContext<MyUILabel>) {
        // Perform any update tasks if necessary
    }
}

struct MyUILabel_Previews: PreviewProvider {
    static var previews: some View {
        MyUILabel(text: "Hello")
    }
}Code language: Swift (swift)
With the UILabel view wrapped, it can now be referenced within SwiftUI as though it is a built-in SwiftUI component:
struct ContentView: View {
    var body: some View {

        VStack {
            MyUILabel(text: "Hello UIKit")
        }
    }
}

struct ContentView_Previews: PreviewProvider {
    static var previews: some View {
        ContentView()
    }
}Code language: Swift (swift)
Obviously, UILabel is a static component that does not need to handle any user interaction events. For views that need to respond to events, however, the UIViewRepresentable wrapper needs to be extended to implement a coordinator.
|
You are reading a sample chapter from an old edition of iOS App Development Essentials. Purchase the fully updated iOS 18 App Development Essentials book. The full book contains 71 chapters, over 612 pages of in-depth information, downloadable source code, and access to over 50 SwiftUI knowledge test quizzes. |
Adding a Coordinator
A coordinator takes the form of a class that implements the protocols and handler methods required by the wrapped UIView component to handle events. An instance of this class is then applied to the wrapper via the makeCoordinator() method of the UIViewRepresentable protocol.
As an example, consider the UIScrollView class. This class has a feature whereby a refresh control (UIRefreshControl) may be added such that when the user attempts to scroll beyond the top of the view, a spinning progress indicator appears and a method called allowing the view to be updated with the latest content. This is a common feature used by news apps to allow the user to download the latest news headlines. Once the refresh is complete, this method needs to call the endRefreshing() method of the UIRefreshControl instance to remove the progress spinner.
Clearly, if the UIScrollView is to be used with SwiftUI, there needs to be a way for the view to be notified that the UIRefreshControl has been triggered and to perform the necessary steps.
The Coordinator class for a wrapped UIScrollView with an associated UIRefreshControl object would be implemented as follows:
class Coordinator: NSObject {
    var control: MyScrollView

    init(_ control: MyScrollView) {
        self.control = control
    }

    @objc func handleRefresh(sender: UIRefreshControl) {
        sender.endRefreshing()
    }
}Code language: Swift (swift)
In this case the initializer for the coordinator is passed the current UIScrollView instance, which it stores locally. The class also implements a function named handleRefresh() which calls the endRefreshing() method of the scrolled view instance.
|
You are reading a sample chapter from an old edition of iOS App Development Essentials. Purchase the fully updated iOS 18 App Development Essentials book. The full book contains 71 chapters, over 612 pages of in-depth information, downloadable source code, and access to over 50 SwiftUI knowledge test quizzes. |
An instance of the Coordinator class now needs to be created and assigned to the view via a call to the makeCoordinator() method as follows:
func makeCoordinator() -> Coordinator {
     Coordinator(self)
}Code language: Swift (swift)
Finally, the makeUIView() method needs to be implemented to create the UIScrollView instance, configure it with a UIRefreshControl and to add a target to call the handleRefresh() method when a value changed event occurs on the UIRefreshControl instance:
func makeUIView(context: Context) -> UIScrollView {
    let scrollView = UIScrollView()
    scrollView.refreshControl = UIRefreshControl()

    scrollView.refreshControl?.addTarget(context.coordinator,
            action: #selector(Coordinator.handleRefresh),
                                      for: .valueChanged)

    return scrollView
}Code language: Swift (swift)
Handling UIKit Delegation and Data Sources
Delegation is a feature of UIKit that allows an object to pass the responsibility for performing one or more tasks on to another object and is another area in which extra steps may be necessary if events are to be handled by a wrapped UIView.
The UIScrolledView, for example, can be assigned a delegate which will be notified when certain events take place such as the user performing a scrolling motion or when the user scrolls to the top of the content. The delegate object will need to conform to the UIScrolledViewDelegate protocol and implement the specific methods that will be called automatically when corresponding events take place in the scrolled view.
Similarly, a data source is an object which provides a UIView based component with data to be displayed. The UITableView class, for example, can be assigned a data source object to provide the cells to be displayed in the table. This data object must conform with the UITableViewDataSource protocol.
|
You are reading a sample chapter from an old edition of iOS App Development Essentials. Purchase the fully updated iOS 18 App Development Essentials book. The full book contains 71 chapters, over 612 pages of in-depth information, downloadable source code, and access to over 50 SwiftUI knowledge test quizzes. |
To handle delegate events when integrating UIViews into SwiftUI, the coordinator class needs to be declared as implementing the appropriate delegate protocol and must include the callback methods for any events of interest to the scrolled view instance. The coordinator must then be assigned as the delegate for the UIScrolledView instance. The previous coordinator implementation can be extended to receive notification that the user is currently scrolling as follows:
class Coordinator: NSObject, UIScrollViewDelegate {
    var control: MyScrollView

    init(_ control: MyScrollView) {
        self.control = control
    }

    func scrollViewDidScroll(_ scrollView: UIScrollView) {
        // User is currently scrolling
    }

    @objc func handleRefresh(sender: UIRefreshControl) {
        sender.endRefreshing()
    }
}Code language: Swift (swift)
The makeUIView() method must also be modified to access the coordinator instance (which is accessible via the representable context object passed to the method) and add it as the delegate for the UIScrolledView instance:
func makeUIView(context: Context) -> UIScrollView {
    let scrollView = UIScrollView()
    scrollView.delegate = context.coordinator
.
.Code language: Swift (swift)
In addition to providing access to the coordinator, the context also includes an environment property which can be used to access both the SwiftUI environment and any @EnvironmentObject properties declared in the SwiftUI view. Now, while the user is scrolling, the scrollViewDidScroll delegate method will be called repeatedly.
An Example Project
The remainder of this chapter will work through the creation of a simple project that demonstrates the use of the UIViewRepresentable protocol to integrate a UIScrolledView into a SwiftUI project. Begin by launching Xcode and creating a new SwiftUI Multiplatform App project named UIViewDemo.
Wrapping the UIScrolledView
The first step in the project is to use the UIViewRepresentable protocol to wrap the UIScrollView so that it can be used with SwiftUI. Right-click on the Shared folder entry in the project navigator panel, select the New File… menu option and create a new file named MyScrollView using the SwiftUI View template.
|
You are reading a sample chapter from an old edition of iOS App Development Essentials. Purchase the fully updated iOS 18 App Development Essentials book. The full book contains 71 chapters, over 612 pages of in-depth information, downloadable source code, and access to over 50 SwiftUI knowledge test quizzes. |
With the new file loaded into the editor, delete the current content and modify it so it reads as follows:
import SwiftUI

struct MyScrollView: UIViewRepresentable {

    var text: String

    func makeUIView(context: UIViewRepresentableContext<MyScrollView>)
               -> UIScrollView {
        let scrollView = UIScrollView()
        scrollView.refreshControl = UIRefreshControl()
        let myLabel = UILabel(frame:
                   CGRect(x: 0, y: 0, width: 300, height: 50))
        myLabel.text = text
        scrollView.addSubview(myLabel)
        return scrollView
    }

    func updateUIView(_ uiView: UIScrollView,
        context: UIViewRepresentableContext<MyScrollView>) {

    }

}

struct MyScrollView_Previews: PreviewProvider {
    static var previews: some View {
        MyScrollView(text: "Hello World")
    }
}Code language: Swift (swift)
If the above code generates syntax errors, make sure that an iOS device is selected as the run target in the Xcode toolbar instead of macOS. Use the Live Preview to build and test the view so far. Once the Live Preview is active and running, click and drag downwards so that the refresh control appears as shown in Figure 52-1:
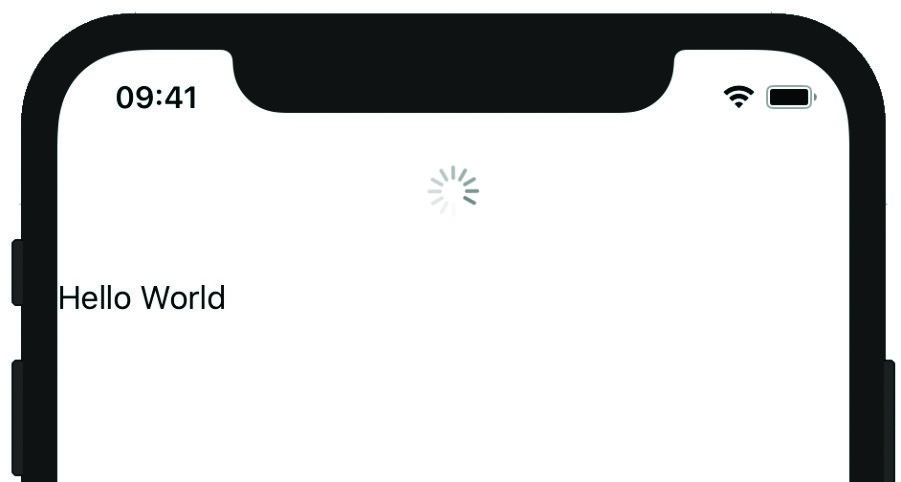
Figure 52-1
Release the mouse button to stop the scrolling and note that the refresh indicator remains visible because the event is not being handled. Clearly, it is now time to add a coordinator.
struct MyScrollView: UIViewRepresentable {
.
.
    func updateUIView(_ uiView: UIScrollView, context: UIViewRepresentableContext<MyScrollView>) {

    }

    class Coordinator: NSObject, UIScrollViewDelegate {
        var control: MyScrollView

        init(_ control: MyScrollView) {
            self.control = control
        }

        func scrollViewDidScroll(_ scrollView: UIScrollView) {
            print("View is Scrolling")
        }

        @objc func handleRefresh(sender: UIRefreshControl) {
            sender.endRefreshing()
        }
    }
}Code language: Swift (swift)
Implementing the Coordinator
Remaining within the MyScrollView.swift file, add the coordinator class declaration so that it reads as follows:
|
You are reading a sample chapter from an old edition of iOS App Development Essentials. Purchase the fully updated iOS 18 App Development Essentials book. The full book contains 71 chapters, over 612 pages of in-depth information, downloadable source code, and access to over 50 SwiftUI knowledge test quizzes. |
Next, modify the makeUIView() method to add the coordinator as the delegate and add the handleRefresh() method as the target for the refresh control:
func makeUIView(context: Context) -> UIScrollView {
    let scrollView = UIScrollView()
    scrollView.delegate = context.coordinator

    scrollView.refreshControl = UIRefreshControl()
    scrollView.refreshControl?.addTarget(context.coordinator, action:
        #selector(Coordinator.handleRefresh),
                                      for: .valueChanged)
.
.
    return scrollView
}Code language: Swift (swift)
Finally, add the makeCoordinator() method so that it reads as follows:
func makeCoordinator() -> Coordinator {
     Coordinator(self)
}Code language: Swift (swift)
Before proceeding, test that the changes work by right-clicking on the Live Preview button in the preview canvas panel and selecting the Debug Preview option from the resulting menu (it may be necessary to stop the Live Preview first). Once the preview is running in debug mode, make sure that the refresh indicator now goes away when downward scrolling stops and that the “View is scrolling” diagnostic message appears in the console while scrolling is in effect.
Using MyScrollView
The final step in this example is to check that MyScrollView can be used from within SwiftUI. To achieve this, load the ContentView.swift file into the editor and modify it so that it reads as follows:
.
.
struct ContentView: View {
    var body: some View {
        MyScrollView(text: "UIView in SwiftUI")
    }
}
.
.Code language: Swift (swift)
Use Live Preview to test that the view works as expected.
|
You are reading a sample chapter from an old edition of iOS App Development Essentials. Purchase the fully updated iOS 18 App Development Essentials book. The full book contains 71 chapters, over 612 pages of in-depth information, downloadable source code, and access to over 50 SwiftUI knowledge test quizzes. |
Summary
SwiftUI includes several options for integrating with UIKit-based views and code. This chapter has focused on integrating UIKit views into SwiftUI. This integration is achieved by wrapping the UIView instance in a structure that conforms to the UIViewRepresentable protocol and implementing the makeUIView() and updateView() methods to initialize and manage the view while it is embedded in a SwiftUI layout. For UIKit objects that require a delegate or data source, a Coordinator class needs to be added to the wrapper and assigned to the view via a call to the makeCoordinator() method.