
The SwiftUI List view provides a way to present information to the user in the form of a vertical list of rows. Often the items within a list will navigate to another area of the app when tapped by the user. Behavior of this type is implemented in SwiftUI using the NavigationStack and NavigationLink components.
The List view can present both static and dynamic data and may also be extended to allow for the addition, removal, and reordering of row entries.
This chapter will provide an overview of the List View used in conjunction with NavigationStack and NavigationLink in preparation for the tutorial in the next chapter entitled A SwiftUI NavigationStack Tutorial.
SwiftUI Lists
The SwiftUI List control provides similar functionality to the UIKit TableView class in that it presents information in a vertical list of rows with each row containing one or more views contained within a cell. Consider, for example, the following List implementation:
struct ContentView: View {
    var body: some View {

        List {
            Text("Wash the car")
            Text("Vacuum house")
            Text("Pick up kids from school bus @ 3pm")
            Text("Auction the kids on eBay")
            Text("Order Pizza for dinner")
        }
    }
}Code language: Swift (swift)
When displayed in the preview, the above list will appear as shown in Figure 30-1:
 |
You are reading a sample chapter from an old edition of iOS App Development Essentials. Purchase the fully updated iOS 18 App Development Essentials book. The full book contains 71 chapters, over 612 pages of in-depth information, downloadable source code, and access to over 50 SwiftUI knowledge test quizzes. |
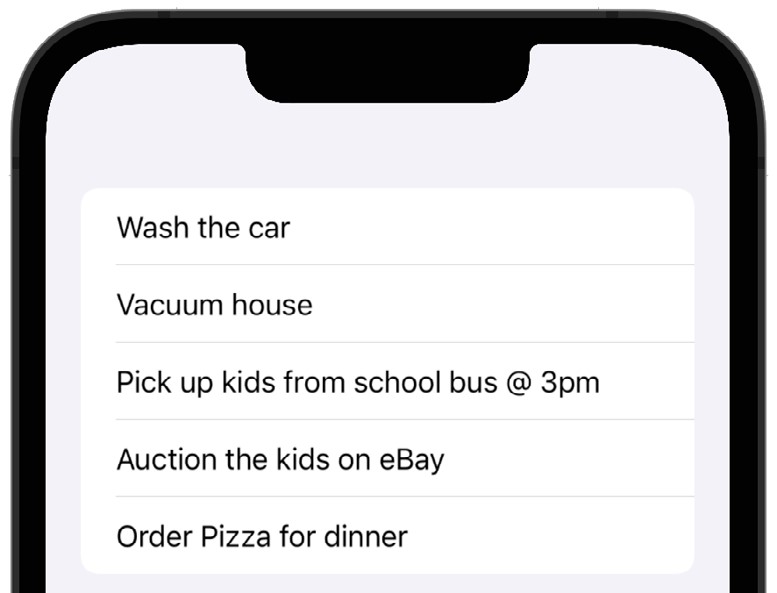
Figure 30-1
A list cell is not restricted to containing a single component. In fact, any combination of components can be displayed in a list cell. Each row of the list in the following example consists of an image and text component within an HStack:
List {
    HStack {
        Image(systemName: "trash.circle.fill")
        Text("Take out the trash")
    }
    HStack {
        Image(systemName: "person.2.fill")
        Text("Pick up the kids") }
    HStack {
        Image(systemName: "car.fill")
        Text("Wash the car")
    }
}Code language: Swift (swift)
The preview canvas for the above view structure will appear as shown in Figure 30-2 below:
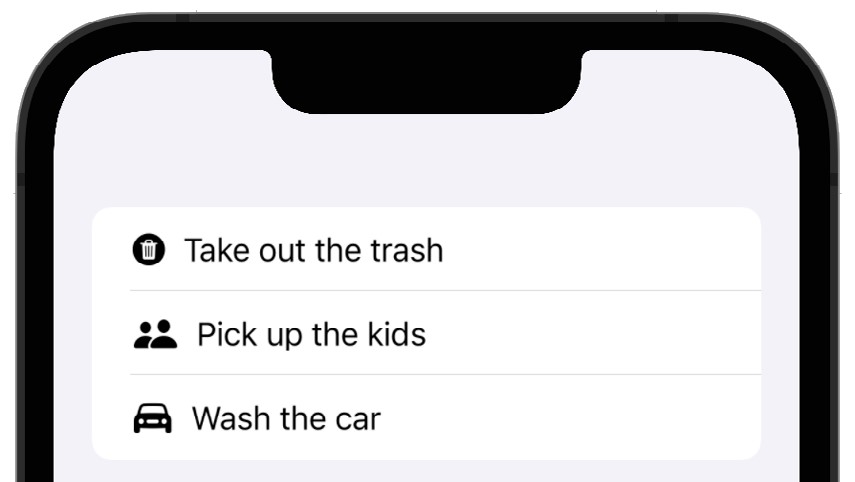
Figure 30-2
Modifying List Separators and Rows
The lines used by the List view to separate rows can be hidden by applying the listRowSeparator() modifier to the cell content views. The listRowSeparatorTint() modifier, on the other hand, can be used to change the color of the lines. It is even possible to assign a view to appear as the background of a row using the listRowBackground() modifier. The following code, for example, hides the first separator, changes the tint of the next two separators, and displays a background image on the final row:
|
You are reading a sample chapter from an old edition of iOS App Development Essentials. Purchase the fully updated iOS 18 App Development Essentials book. The full book contains 71 chapters, over 612 pages of in-depth information, downloadable source code, and access to over 50 SwiftUI knowledge test quizzes. |
List {
    Text("Wash the car")
        .listRowSeparator(.hidden)
    Text("Pick up kids from school bus @ 3pm")
        .listRowSeparatorTint(.green)
    Text("Auction the kids on eBay")
        .listRowSeparatorTint(.red)
    Text("Order Pizza for dinner")
        .listRowBackground(Image("MyBackgroundImage"))
}Code language: Swift (swift)
The above examples demonstrate the use of a List to display static information. To display a dynamic list of items a few additional steps are required.
SwiftUI Dynamic Lists
A list is considered to be dynamic when it contains a set of items that can change over time. In other words, items can be added, edited, and deleted and the list updates dynamically to reflect those changes.
To support a list of this type, each data element to be displayed must be contained within a class or structure that conforms to the Identifiable protocol. The Identifiable protocol requires that the instance contain a property named id which can be used to uniquely identify each item in the list. The id property can be any Swift or custom type that conforms to the Hashable protocol which includes the String, Int, and UUID types in addition to several hundred other standard Swift types. If you opt to use UUID as the type for the property, the UUID() method can be used to automatically generate a unique ID for each list item.
The following code implements a simple structure for the To Do list example that conforms to the Identifiable protocol. In this case, the id is generated automatically via a call to UUID():
struct ToDoItem : Identifiable {
    var id = UUID()
    var task: String
    var imageName: String
}Code language: JavaScript (javascript)
For example, an array of ToDoItem objects can be used to simulate the supply of data to the list which can now be implemented as follows:
|
You are reading a sample chapter from an old edition of iOS App Development Essentials. Purchase the fully updated iOS 18 App Development Essentials book. The full book contains 71 chapters, over 612 pages of in-depth information, downloadable source code, and access to over 50 SwiftUI knowledge test quizzes. |
struct ContentView: View {

    @State var listData: [ToDoItem] = [
       ToDoItem(task: "Take out trash", imageName: "trash.circle.fill"),
       ToDoItem(task: "Pick up the kids", imageName: "person.2.fill"),
       ToDoItem(task: "Wash the car", imageName: "car.fill")
       ]

    var body: some View {

        List(listData) { item in
            HStack {
                Image(systemName: item.imageName)
                Text(item.task)
            }
        }
    }
}
.
.Code language: Swift (swift)
Now the list no longer needs a view for each cell. Instead, the list iterates through the data array and reuses the same HStack declaration, simply plugging in the appropriate data for each array element.
In situations where dynamic and static content needs to be displayed together within a list, the ForEach statement can be used within the body of the list to iterate through the dynamic data while also declaring static entries. The following example includes a static toggle button together with a ForEach loop for the dynamic content:
struct ContentView: View {

    @State private var toggleStatus = true
.
.
    var body: some View {

        List {
            Toggle(isOn: $toggleStatus) {
                Text("Allow Notifications")
            }

            ForEach (listData) { item in
                HStack {
                    Image(systemName: item.imageName)
                    Text(item.task)
                }
            }
        }
    }
}Code language: Swift (swift)
Note the appearance of the toggle button and the dynamic list items in Figure 30-3:
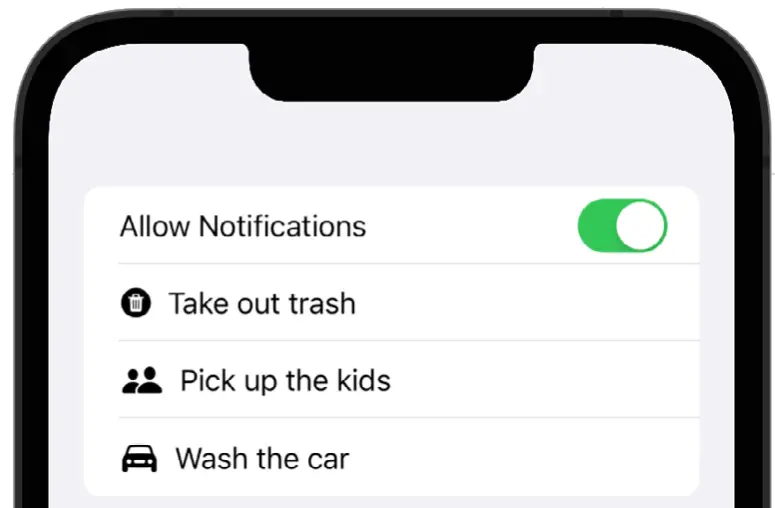
Figure 30-3
A SwiftUI List implementation may also be divided into sections using the Section view, including headers and footers if required. Figure 30-4 shows the list divided into two sections, each with a header:
|
You are reading a sample chapter from an old edition of iOS App Development Essentials. Purchase the fully updated iOS 18 App Development Essentials book. The full book contains 71 chapters, over 612 pages of in-depth information, downloadable source code, and access to over 50 SwiftUI knowledge test quizzes. |
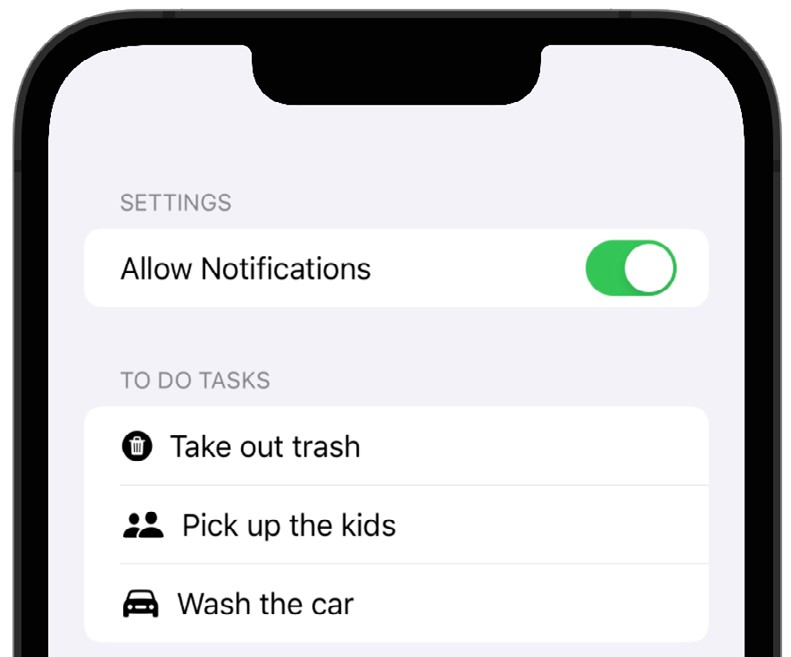
Figure 30-4
The changes to the view declaration to implement these sections are as follows:
List {
    Section(header: Text("Settings")) {
        Toggle(isOn: $toggleStatus) {
            Text("Allow Notifications")
        }
    }

    Section(header: Text("To Do Tasks")) {
        ForEach (listData) { item in
            HStack {
                Image(systemName: item.imageName)
                Text(item.task)
            }
        }
    }
}Code language: Swift (swift)
Often the items within a list will navigate to another area of the app when tapped by the user. Behavior of this type is implemented in SwiftUI using the NavigationStack and NavigationLink views.
Creating a Refreshable List
The data displayed on a screen is often derived from a dynamic source which is subject to change over time. The standard paradigm within iOS apps is for the user to perform a downward swipe to refresh the displayed data. During the refresh process, the app will typically display a spinning progress indicator after which the latest data is displayed. To make it easy to add this type of refresh behavior to your apps, SwiftUI provides the refreshable() modifier. When applied to a view, a downward swipe gesture on that view will display the progress indicator and execute the code in the modifier closure. For example, we can add refresh support to our list as follows:
List {
    Section(header: Text("Settings")) {
        Toggle(isOn: $toggleStatus) {
            Text("Allow Notifications")
        }
    }

    Section(header: Text("To Do Tasks")) {
        ForEach (listData) { item in
            HStack {
                Image(systemName: item.imageName)
                Text(item.task)
            }
        }
    }
}
.refreshable {
    listData = [
        ToDoItem(task: "Order dinner", imageName: "dollarsign.circle.fill"),
        ToDoItem(task: "Call financial advisor", imageName: "phone.fill"),
        ToDoItem(task: "Sell the kids", imageName: "person.2.fill")
        ]
}Code language: Swift (swift)
Figure 30-5 demonstrates the effect of performing a downward swipe gesture within the List view after adding the above modifier. Note both the progress indicator at the top of the list and the appearance of the updated to-do list items:
|
You are reading a sample chapter from an old edition of iOS App Development Essentials. Purchase the fully updated iOS 18 App Development Essentials book. The full book contains 71 chapters, over 612 pages of in-depth information, downloadable source code, and access to over 50 SwiftUI knowledge test quizzes. |
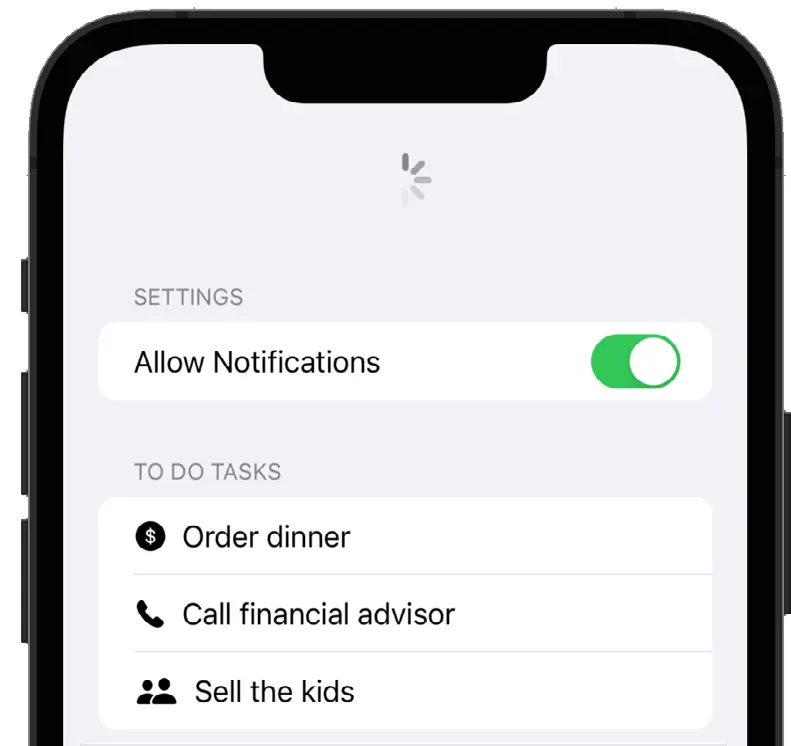
Figure 30-5
When using the refreshable() modifier, be sure to perform any time-consuming activities as an asynchronous task using structured concurrency (covered previously in the chapter entitled “An Overview of Swift Structured Concurrency”). This will ensure that the app remains responsive during the refresh.
SwiftUI NavigationStack and NavigationLink
To make items in a list navigable, the first step is to embed the entire list within a NavigationStack. Once the list is embedded, the individual rows must be wrapped in a NavigationLink control which is, in turn, passed a value that uniquely identifies each navigation link within the context of the NavigationStack.
The following changes to our example code embed the List view in a NavigationStack and wrap the row content in a NavigationLink:
NavigationStack {
    List {
        Section(header: Text("Settings")) {
            Toggle(isOn: $toggleStatus) {
                Text("Allow Notifications")
            }
        }

        Section(header: Text("To Do Tasks")) {
            ForEach (listData) { item in
                NavigationLink(value: item.task) {
                    HStack {
                        Image(systemName: item.imageName)
                        Text(item.task)
                    }
                }
            }
        }
    }
}Code language: Swift (swift)
Note that we have used the item task string as the NavigationLink value to uniquely identify each row. The next step is to specify the destination view to which the user is to be taken when the row is tapped. We achieve this by applying the navigationDestination(for:) modifier to the list. When adding this modifier, we need to pass it the value type for which it is to provide navigation. In our example we are using the task string, so we need to specify String.self as the value type. Within the trailing closure of the navigationDestination(for:) call we need to call the view that is to be displayed when the row is selected. This closure is passed the value from the NavigationLink, allowing us to display the appropriate view:
|
You are reading a sample chapter from an old edition of iOS App Development Essentials. Purchase the fully updated iOS 18 App Development Essentials book. The full book contains 71 chapters, over 612 pages of in-depth information, downloadable source code, and access to over 50 SwiftUI knowledge test quizzes. |
NavigationStack {
    List {
.
.
        Section(header: Text("To Do Tasks")) {
            ForEach (listData) { item in
                NavigationLink(value: item.task) {
                    HStack {
                        Image(systemName: item.imageName)
                        Text(item.task)
                    }
                }
            }
        }
    }
    .navigationDestination(for: String.self) { task in
        Text("Selected task = \(task)")
    }
}Code language: Swift (swift)
In this example, the navigation link will simply display a new screen containing the destination Text view displaying the item.task string value. The finished list will appear as shown in Figure 30-6 with the title and chevrons on the far right of each row now visible indicating that navigation is available. Tapping the links will navigate to and display the destination Text view.
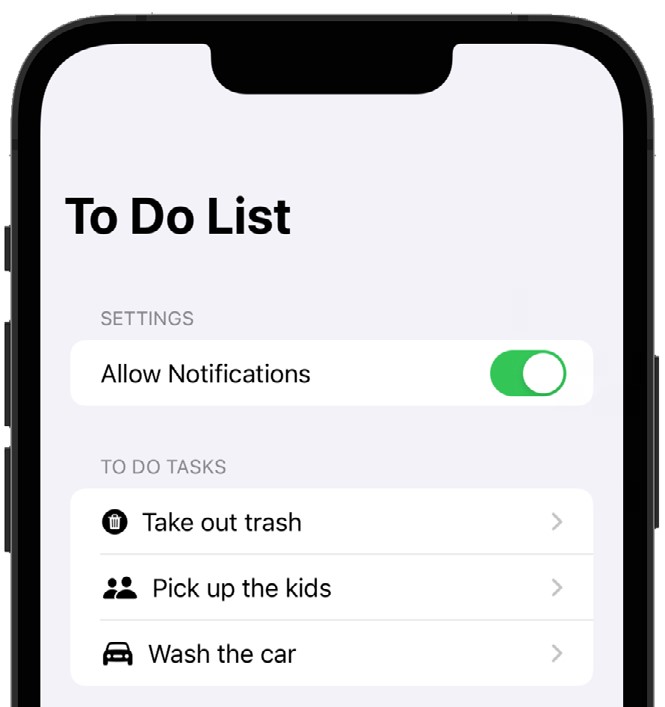
Figure 30-6
Navigation by Value Type
The navigationDestination() modifier is particularly useful for adding navigation support to lists containing values of different types, with each type requiring navigation to a specific view. Suppose, for example, that in addition to the string-based task navigation link, we also have a NavigationLink which is passed an integer value indicating the number of tasks in the list. This could be implemented in our example as follows:
NavigationStack {

    List {

        Section(header: Text("Settings")) {
            Toggle(isOn: $toggleStatus) {
                Text("Allow Notifications")
            }

            NavigationLink(value: listData.count) {
                Text("View Task Count")
            }
        }
.
.Code language: Swift (swift)
When this link is selected, we need the app to navigate to a Text view that displays the current task count. All this requires is a second navigationDestination() modifier, this time configured to handle Int instead of String values:
.
.
}
    .navigationDestination(for: String.self) { task in
        Text("Selected task = \(task)")
    }
    .navigationDestination(for: Int.self) { count in
        Text("Number of tasks = \(count)")
    }
.
.Code language: Swift (swift)
This technique allows us to configure multiple navigation destinations within a single navigation stack based solely on the value type passed to each navigation link.
|
You are reading a sample chapter from an old edition of iOS App Development Essentials. Purchase the fully updated iOS 18 App Development Essentials book. The full book contains 71 chapters, over 612 pages of in-depth information, downloadable source code, and access to over 50 SwiftUI knowledge test quizzes. |
Working with Navigation Paths
As the name suggests, NavigationStack provides a stack on which navigation targets are stored as the user navigates through the screens of an app. When a user navigates from one view to another, a reference to the originating view is pushed onto the stack. If the user then navigates to another view, the current view will also be placed onto the stack. At any point, the user can tap the back arrow displayed in the navigation bar to move back to the previous view. As the user navigates back through the views, each one is popped off the stack until the view from which navigation began is reached.
The views through which a user navigates are called the navigation path. SwiftUI allows us to provide our own path by passing an instance of NavigationPath to the NavigationStack instance as follows:
struct ContentView: View {

   @State private var stackPath = NavigationPath()

   var body: some View {

        NavigationStack(path: $stackPath) {
.
.Code language: Swift (swift)
With NavigationStack using our path, we can perform tasks such as manually popping targets off the stack to jump back multiple navigation levels instead of making the user navigate through the targets individually. We could, for example, configure a button on a view deep within the stack to take the user directly back to the home screen. We can do this by identifying how many navigation targets are in the stack and then removing them via a call to the removeLast() method of the path instance, for example:
var stackCount = stackPath.count
stackpath.removeLast(stackCount)Code language: Swift (swift)
We can also programmatically navigate to specific destination views by calling the navigation path’s append() method and passing through the navigation value associated with the destination:
stackPath.append(value)Code language: Swift (swift)Navigation Bar Customization
The NavigationStack title bar may also be customized using modifiers on the List component to set the title and to add buttons to perform additional tasks. In the following code fragment the title is set to “To Do List” and a button labeled “Add” is added as a bar item and configured to call a hypothetical method named addTask():
|
You are reading a sample chapter from an old edition of iOS App Development Essentials. Purchase the fully updated iOS 18 App Development Essentials book. The full book contains 71 chapters, over 612 pages of in-depth information, downloadable source code, and access to over 50 SwiftUI knowledge test quizzes. |
NavigationStack {
    List {
.
.
    }
    .navigationBarTitle(Text("To Do List"))
    .navigationBarItems(trailing: Button(action: addTask) {
        Text("Add")
     })
.
.
}Code language: Swift (swift)
Making the List Editable
It is common for an app to allow the user to delete items from a list and, in some cases, even move an item from one position to another. Deletion can be enabled by adding an onDelete() modifier to each list cell, specifying a method to be called which will delete the item from the data source. When this method is called it will be passed an IndexSet object containing the offsets of the rows being deleted and it is the responsibility of this method to remove the selected data from the data source. Once implemented, the user will be able to swipe left on rows in the list to reveal the Delete button as shown in Figure 30-7:
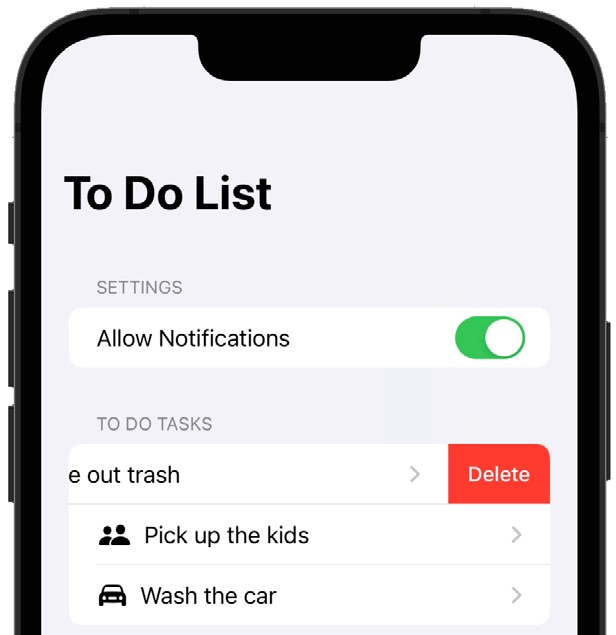
Figure 30-7
The changes to the example List to implement this behavior might read as follows:
.
.
List {
    Section(header: Text("Settings")) {
        Toggle(isOn: $toggleStatus) {
            Text("Allow Notifications")
        }
    }

    Section(header: Text("To Do Tasks")) {
        ForEach (listData) { item in
            NavigationLink(value: item.task) {
                HStack {
                    Image(systemName: item.imageName)
                    Text(item.task)
                }
            }
        }
        .onDelete(perform: deleteItem)
    }
}
.
.
func deleteItem(at offsets: IndexSet) {
    // Delete items from the data source here
}Code language: Swift (swift)
To allow the user to move items up and down in the list the onMove() modifier must be applied to the cell, once again specifying a method to be called to modify the ordering of the source data. In this case, the method will be passed an IndexSet object containing the positions of the rows being moved and an integer indicating the destination position.
In addition to adding the onMove() modifier, an EditButton instance needs to be added to the List. When tapped, this button automatically switches the list into editable mode and allows items to be moved and deleted by the user. This edit button is added as a navigation bar item which can be attached to a list by applying the navigationBarItems() modifier. The List declaration can be modified as follows to add this functionality:
|
You are reading a sample chapter from an old edition of iOS App Development Essentials. Purchase the fully updated iOS 18 App Development Essentials book. The full book contains 71 chapters, over 612 pages of in-depth information, downloadable source code, and access to over 50 SwiftUI knowledge test quizzes. |
List {
    Section(header: Text("Settings")) {
        Toggle(isOn: $toggleStatus) {
            Text("Allow Notifications")
        }
    }

    Section(header: Text("To Do Tasks")) {
        ForEach (listData) { item in
            NavigationLink(value: item.task) {
                HStack {
                    Image(systemName: item.imageName)
                    Text(item.task)
                }
            }
        }
        .onDelete(perform: deleteItem)
        .onMove(perform: moveItem)
    }

}
.navigationBarTitle(Text("To Do List"))
.navigationBarItems(trailing: EditButton())
.
.
func moveItem(from source: IndexSet, to destination: Int) {
    // Reorder items in source data here
}Code language: Swift (swift)
Viewed within the preview canvas, the list will appear as shown in Figure 30-8 when the Edit button is tapped. Clicking and dragging the three lines on the right side of each row allows the row to be moved to a different list position (in the figure below the “Pick up the kids” entry is in the process of being moved):
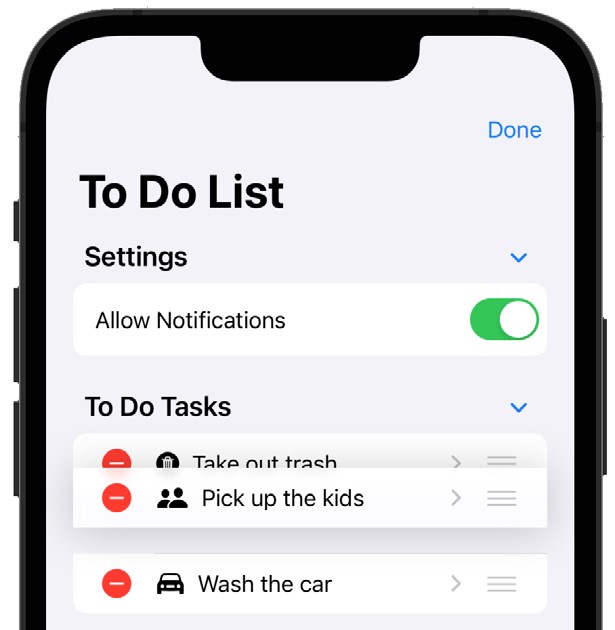
Figure 30-8
Hierarchical Lists
SwiftUI also includes support for organizing hierarchical data for display in list format as shown in Figure 30-9 below:
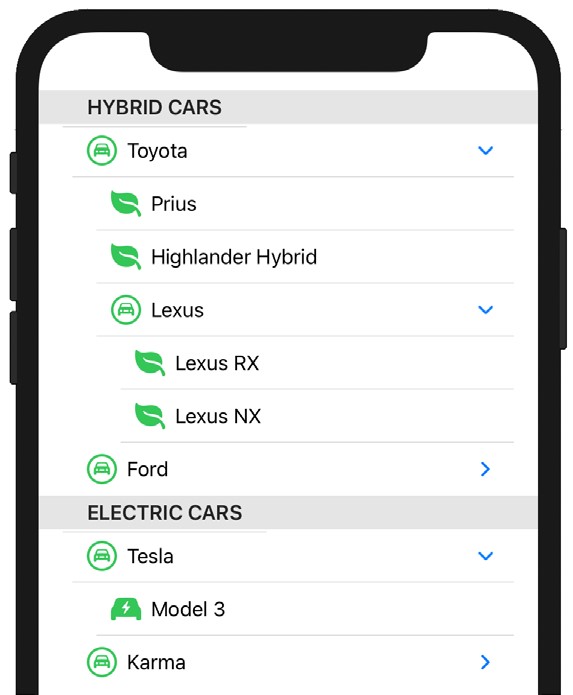
Figure 30-9
This behavior is achieved using features of the List view together with the OutlineGroup and DisclosureGroup views which automatically analyze the parent-child relationships within a data structure to create a browsable list containing controls to expand and collapse branches of data. This topic is covered in detail beginning with the chapter titled An Overview of SwiftUI List, OutlineGroup and DisclosureGroup.
|
You are reading a sample chapter from an old edition of iOS App Development Essentials. Purchase the fully updated iOS 18 App Development Essentials book. The full book contains 71 chapters, over 612 pages of in-depth information, downloadable source code, and access to over 50 SwiftUI knowledge test quizzes. |
Multicolumn Navigation
NavigationStack provides navigation between views where each destination occupies the entire device screen. SwiftUI also supports multicolumn navigation where the destinations appear together on the screen with each appearing in a separate column. Multicolumn navigation is provided by the NavigationSplitView component and will be covered beginning with the chapter titled Multicolumn Navigation in SwiftUI with NavigationSplitView.
Summary
The SwiftUI List view provides a way to order items in a single column of rows, each containing a cell. Each cell, in turn, can contain multiple views when those views are encapsulated in a container view such as a stack layout. The List view provides support for displaying both static and dynamic items or a combination of both. Lists may also be used to group, organize and display hierarchical data.
List views are used to allow the user to navigate to other screens. This navigation is implemented by wrapping the List declaration in a NavigationStack and each row in a NavigationLink, using the navigationDestination() modifier to define the navigation target view.
Lists can be divided into titled sections and assigned a navigation bar containing a title and buttons. Lists may also be configured to allow rows to be added, deleted, and moved.