
In this chapter, an example project will be created that uses the Photo domain of SiriKit to allow the user, via Siri voice commands, to search for and display a photo taken on a specified date. In the process of designing this app, the tutorial will also demonstrate the use of the NSUserActivity class to allow processing of the intent to be transferred from the Intents Extension to the main iOS app.
About the SiriKit Photo Search Project
The project created in this tutorial is going to take the form of an app that uses the SiriKit Photo Search domain to locate photos in the Photo library. Specifically, the app will allow the user to use Siri to search for photos taken on a specific date. In the event that photos matching the date criteria are found, the main app will be launched and used to display the first photo taken on the chosen day.
Creating the SiriPhoto Project
Begin this tutorial by launching Xcode and selecting the options to create a new Multiplatform App project named SiriPhoto.
Enabling the Siri Entitlement
Once the main project has been created the Siri entitlement must be enabled for the project. Select the SiriPhoto target located at the top of the Project Navigator panel (marked A in Figure 44-1) so that the main panel displays the project settings. From within this panel, select the Signing & Capabilities tab (B) followed by the SiriPhoto target entry (C):
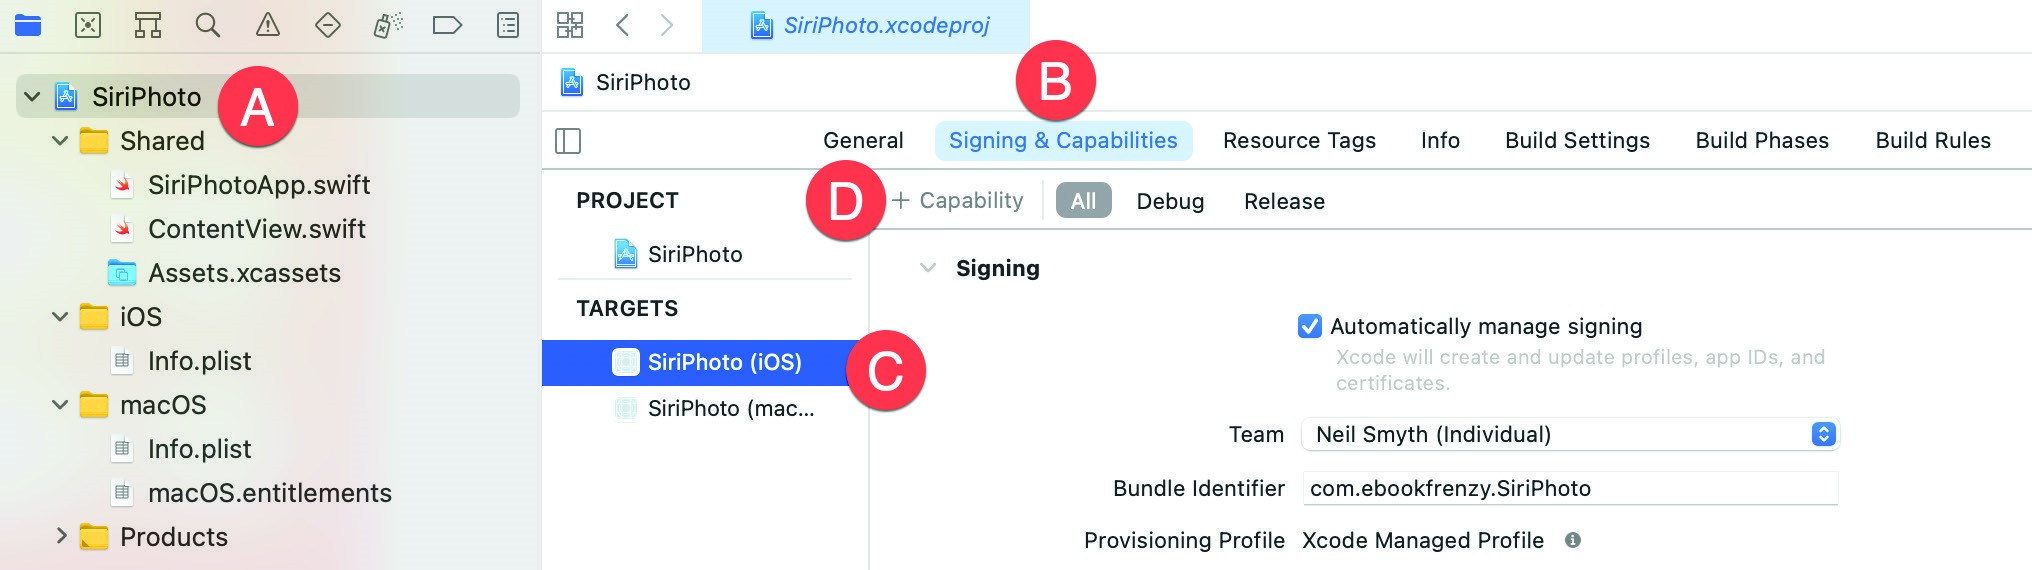
Figure 44-1
Click on the “+ Capability” button (D) to display the dialog shown in Figure 44-2 below. Enter Siri into the filter bar, select the result and press the keyboard enter key to add the capability to the project:
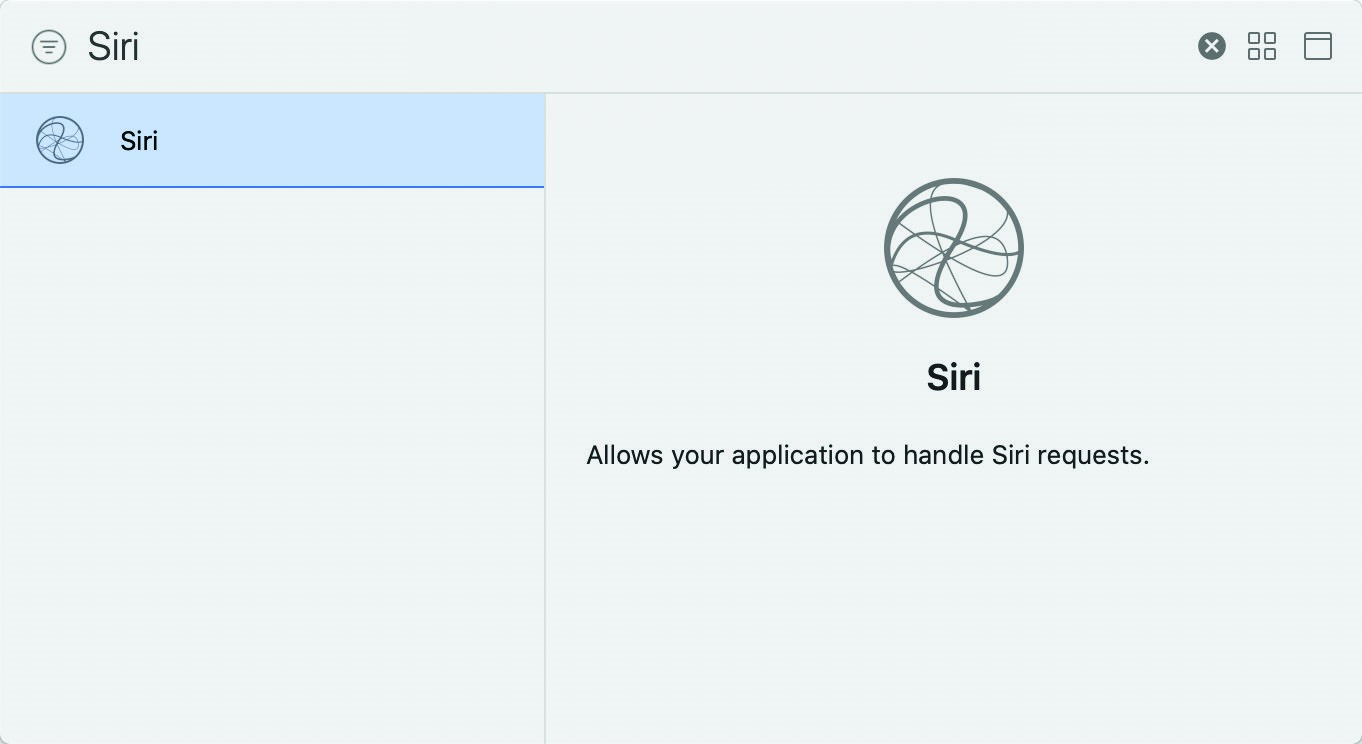
Figure 44-2
Seeking Siri Authorization
In addition to enabling the Siri entitlement, the app must also seek authorization from the user to integrate the app with Siri. This is a two-step process which begins with the addition of an entry to the Info.plist file of the iOS app target for the NSSiriUsageDescription key with a corresponding string value explaining how the app makes use of Siri.
Select the Info.plist file located within the iOS folder in the project navigator panel as shown in Figure 44-3:
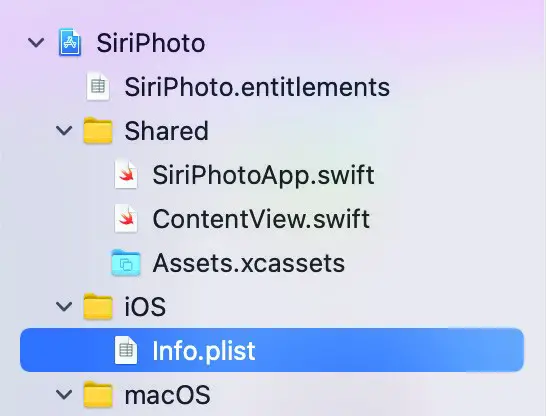
Figure 44-3
Once the file is loaded into the editor, locate the bottom entry in the list of properties and hover the mouse pointer over the item. When the ‘+’ button appears, click on it to add a new entry to the list. From within the drop-down list of available keys, locate and select the Privacy – Siri Usage Description option as shown in Figure 44-4:
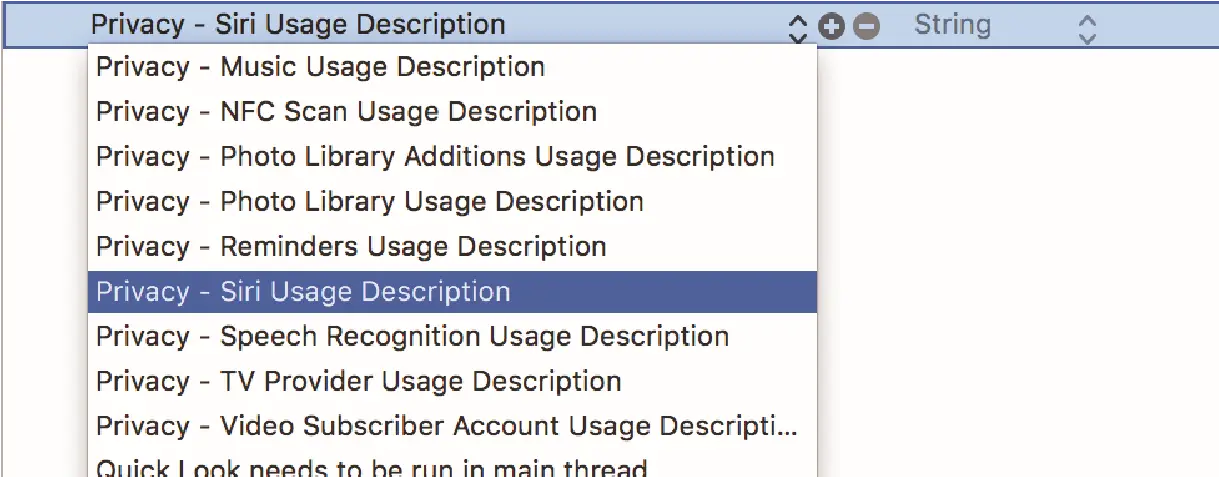
Figure 44-4
Within the value field for the property, enter a message to display to the user when requesting permission to use speech recognition. For example:
Siri support search and display photo library images.
Repeat the above steps to add a Privacy – Photo Library Usage Description entry set to the following to that the app is able to request photo library access permission from the user:
This app accesses your photo library to search and display photos.
In addition to adding the Siri usage description key, a call also needs to be made to the requestSiriAuthorization class method of the INPreferences class. Ideally, this call should be made the first time that the app runs, not only so that authorization can be obtained, but also so that the user learns that the app includes Siri support. For the purposes of this project, the call will be made within the onChange() modifier based on the scenePhase changes within the app declaration located in the SiriPhotoApp.swift file as follows:
import SwiftUI
import Intents

@main
struct SiriPhotoApp: App {

    @Environment(\.scenePhase) private var scenePhase

    var body: some Scene {
        WindowGroup {
            ContentView()
        }
        .onChange(of: scenePhase) { phase in
            INPreferences.requestSiriAuthorization({status in
                // Handle errors here
            })
        }
    }
}Code language: Swift (swift)
Before proceeding, compile and run the app on an iOS device or simulator. When the app loads, a dialog will appear requesting authorization to use Siri. Select the OK button in the dialog to provide authorization.
Adding an Image Asset
The completed app will need an image to display when no matching photo is found for the search criteria. This image is named image-missing.png and can be found in the project_images folder of the source code download archive available from the following URL:
https://www.ebookfrenzy.com/code/SwiftUI-iOS14-CodeSamples.zip
Within the Xcode project navigator, locate and select the Assets.xcassets file located in the Shared folder. In a separate Finder window, locate the project_images folder from the sample code and drag and drop the image into the asset catalog as shown in Figure 44-5 below:
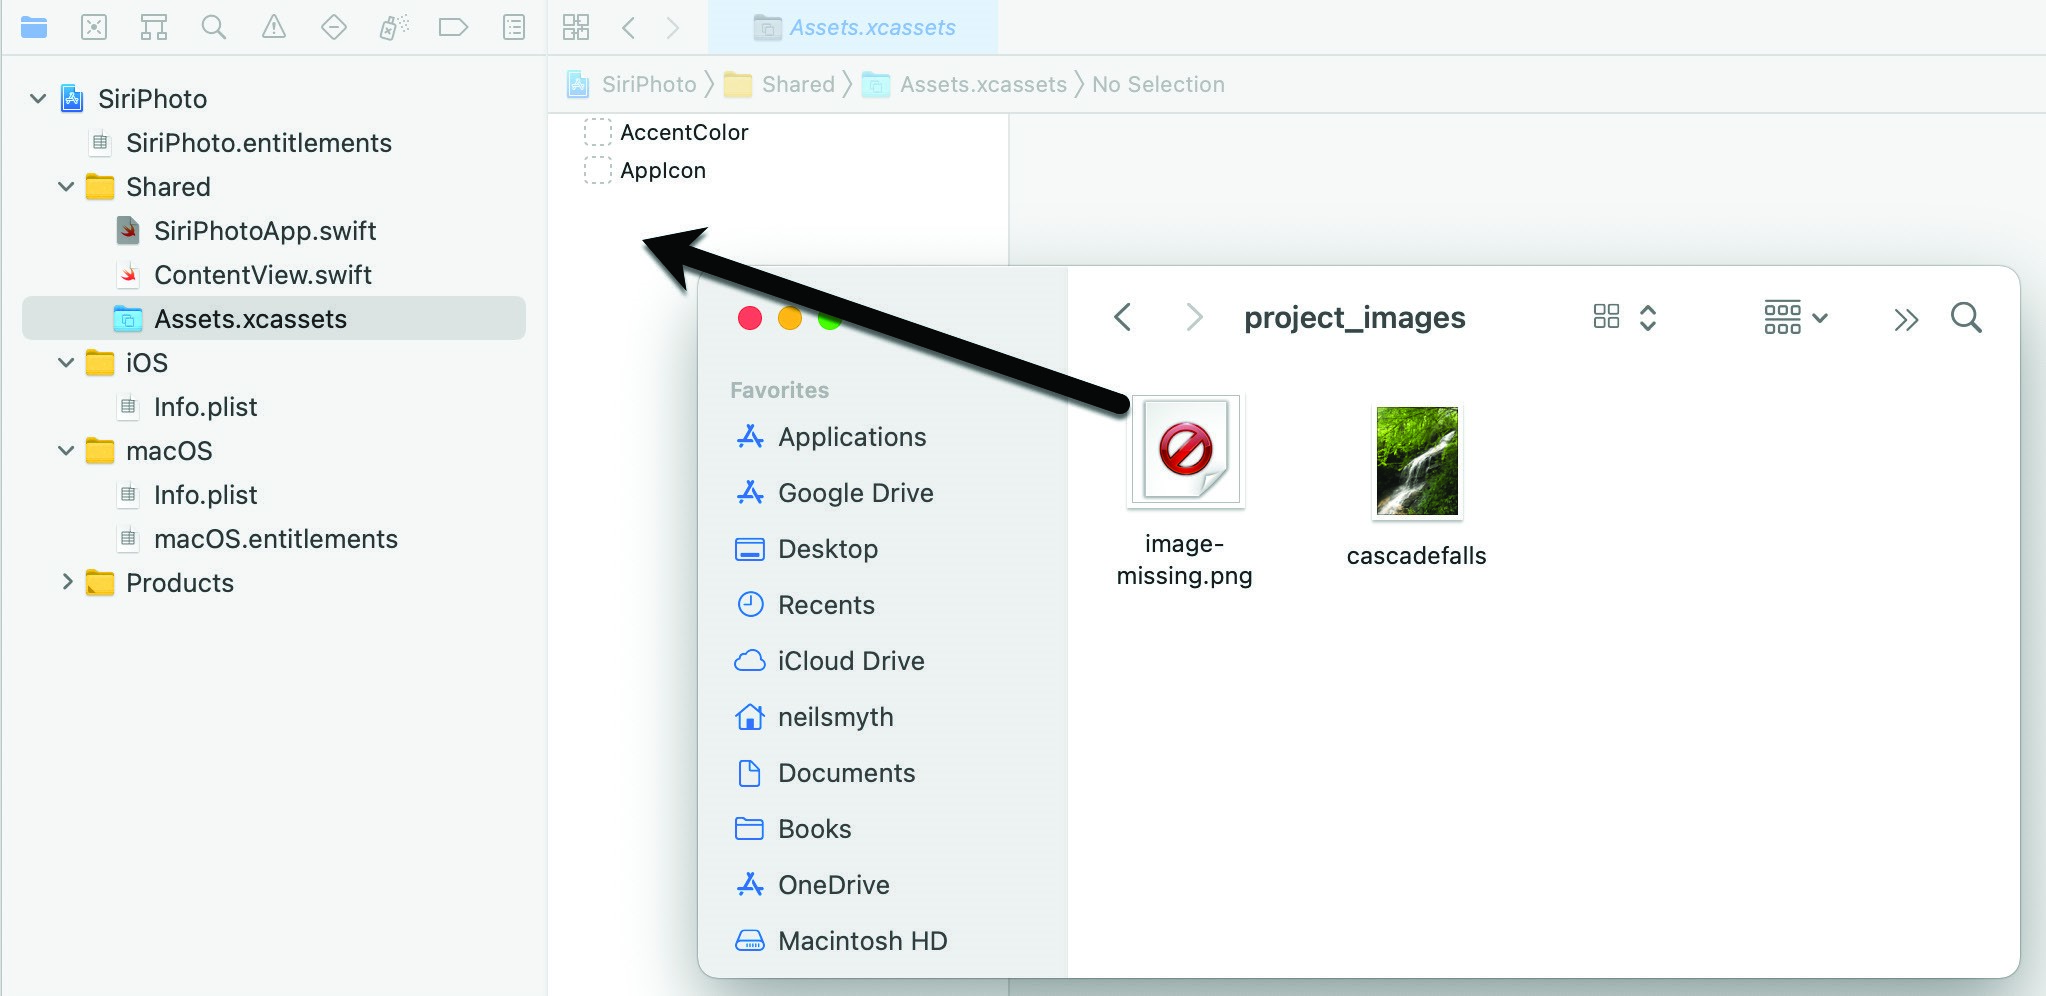
Figure 44-5
Adding the Intents Extension to the Project
With some of the initial work on the iOS app complete, it is now time to add the Intents Extension to the project. Select Xcode’s File -> New -> Target… menu option to display the template selection screen. From the range of available templates, select the Intents Extension option as shown in Figure 44-6:
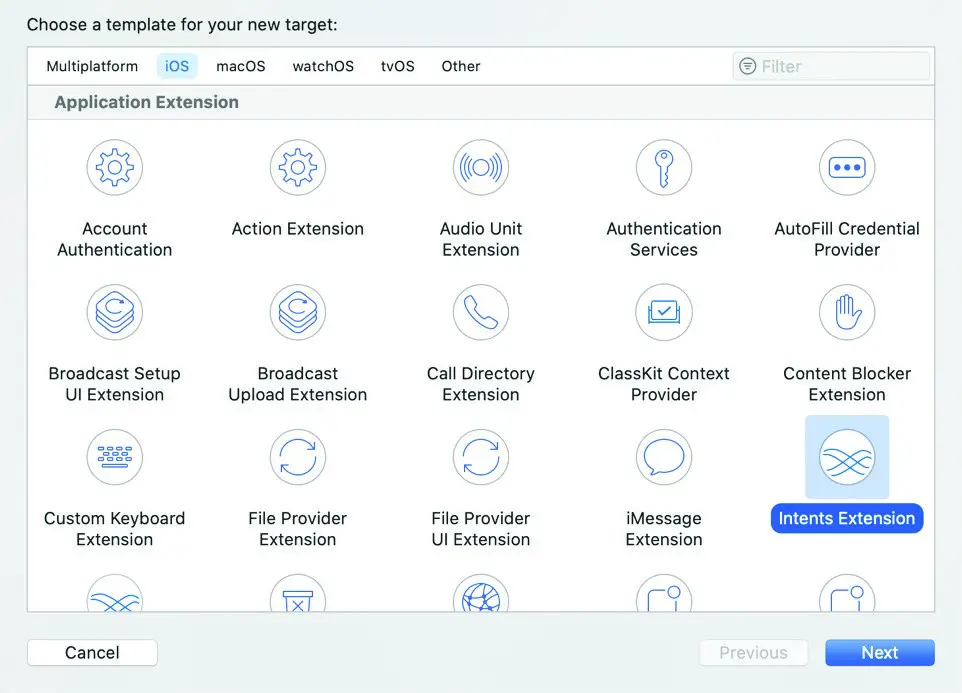
Figure 44-6
With the Intents Extension template selected, click on the Next button and enter SiriPhotoIntent into the Product Name field. Before clicking on the Finish button, turn off the Include UI Extension option and make sure that the Starting Point is set to None since this extension will not be based on the Messaging domain. When prompted to do so, enable the build scheme for the Intents Extension by clicking on the Activate button in the resulting panel.
Reviewing the Default Intents Extension
The files for the Intents Extension are located in the SiriPhotoIntent folder which will now be accessible from within the Project Navigator panel. Within this folder are an Info.plist file and a file named IntentHandler.swift.
The IntentHandler.swift file contains the IntentHandler class declaration which currently only contains a stub handler() method.
Modifying the Supported Intents
Currently we have an app which is intended to search for photos but for which no supported intents have been declared. Clearly some changes need to be made to implement the required functionality.
The first step is to configure the Info.plist file for the SiriPhotoIntent extension. Select this file and unfold the NSExtension settings until the IntentsSupported array is visible:

Figure 44-7
Currently the array does not contain any supported intents. Add a photo search intent to the array by clicking on the + button indicated by the arrow in the above figure and entering INSearchForPhotosIntent into the newly created Item 0 value field. On completion of these steps the array should match that shown in Figure 44-8:

Figure 44-8
Modifying the IntentHandler Implementation
The IntentHandler class now needs to be updated to add support for Siri photo search intents. Edit the IntentHandler.swift file and change the class declaration so it reads as follows:
import Intents
import Photos

class IntentHandler: INExtension, INSearchForPhotosIntentHandling {

    override func handler(for intent: INIntent) -> Any {

        return self
    }
}Code language: Swift (swift)
The only method currently implemented within the IntentHandler.swift file is the handler method. This method is the entry point into the extension and is called by SiriKit when the user indicates that the SiriPhoto app is to be used to perform a task. When calling this method, SiriKit expects in return a reference to the object responsible for handling the intent. Since this will be the responsibility of the IntentHandler class, the handler method simply returns a reference to itself.
Implementing the Resolve Methods
SiriKit is aware of a range of parameters which can be used to specify photo search criteria. These parameters consist of the photo creation date, the geographical location where the photo was taken, the people in the photo and album in which it resides. For each of these parameters, SiriKit will call a specific resolve method on the IntentHandler instance. Each method is passed the current intent object and is required to notify Siri whether or not the parameter is required and, if so, whether the intent contains a valid property value. The methods are also passed a completion handler reference which must be called to notify Siri of the response.
The first method called by Siri is the resolveDateCreated method which should now be implemented in the IntentHandler.swift file as follows:
func resolveDateCreated(for
    intent: INSearchForPhotosIntent,
    with completion: @escaping
        (INDateComponentsRangeResolutionResult) -> Void) {

    if let dateCreated = intent.dateCreated {
        completion(INDateComponentsRangeResolutionResult.success(
            with: dateCreated))
    } else {
        completion(INDateComponentsRangeResolutionResult.needsValue())
    }
}Code language: Swift (swift)
The method verifies that the dateCreated property of the intent object contains a value. In the event that it does, the completion handler is called indicating to Siri that the date requirement has been successfully met within the intent. In this situation, Siri will call the next resolve method in the sequence.
If no date has been provided the completion handler is called indicating the property is still needed. On receiving this response, Siri will ask the user to provide a date for the photo search. This process will repeat until either a date is provided or the user abandons the Siri session.
The SiriPhoto app is only able to search for photos by date. The remaining resolver methods can, therefore, be implemented simply to return notRequired results to Siri. This will let Siri know that values for these parameters do not need to be obtained from the user. Remaining within the IntentHandler.swift file, implement these methods as follows:
func resolveAlbumName(for intent: INSearchForPhotosIntent,
    with completion: @escaping (INStringResolutionResult) -> Void) {
    completion(INStringResolutionResult.notRequired())
}

func resolvePeopleInPhoto(for intent:
     INSearchForPhotosIntent, with completion: @escaping ([INPersonResolutionResult]) -> Void) {
    completion([INPersonResolutionResult.notRequired()])
}

func resolveLocationCreated(for intent:
    INSearchForPhotosIntent, with completion: @escaping (INPlacemarkResolutionResult) -> Void) {
        completion(INPlacemarkResolutionResult.notRequired())
}Code language: Swift (swift)
With these methods implemented, the resolution phase of the intent handling process is now complete.
Implementing the Confirmation Method
When Siri has gathered the necessary information for the user, a call is made to the confirm method of the intent handler instance. The purpose of this call is to provide the handler with an opportunity to check that everything is ready to handle the intent. In the case of the SiriPhoto app, there are no special requirements so the method can be implemented to reply with a ready status:
func confirm(intent: INSearchForPhotosIntent,
    completion: @escaping (INSearchForPhotosIntentResponse) -> Void)
{
    let response = INSearchForPhotosIntentResponse(code: .ready,
        userActivity: nil)
    completion(response)
}Code language: Swift (swift)
Handling the Intent
The last step in implementing the extension is to handle the intent. After the confirm method indicates that the extension is ready, Siri calls the handle method. This method is, once again, passed the intent object and a completion handler to be called when the intent has been handled by the extension. Implement this method now so that it reads as follows:
func handle(intent: INSearchForPhotosIntent, completion: @escaping
    (INSearchForPhotosIntentResponse) -> Void) {

    let activityType = "com.ebookfrenzy.siriphotointent"
    let activity = NSUserActivity(activityType: activityType)

    let response = INSearchForPhotosIntentResponse(code:
        INSearchForPhotosIntentResponseCode.continueInApp,
                                             userActivity: activity)

    if intent.dateCreated != nil {
        let calendar = Calendar(identifier: .gregorian)

        if let startComponents = intent.dateCreated?.startDateComponents,
            let endComponents = intent.dateCreated?.endDateComponents {

            if let startDate = calendar.date(from:
                startComponents),
                let endDate = calendar.date(from:
                    endComponents) {

                response.searchResultsCount =
                   photoSearchFrom(startDate, to: endDate)
            }
        }
    }
    completion(response)
}Code language: Swift (swift)
The above code requires some explanation. The method is responsible for constructing the intent response object containing the NSUserActivity object which will be handed off to the SiriPhoto app. The method begins by creating a new NSUserActivity instance configured with a type as follows:
let activityType = "com.ebookfrenzy.siriphotointent"
let activity = NSUserActivity(activityType: activityType)Code language: Swift (swift)
The activity type can be any string value but generally takes the form of the app or extension name and company reverse domain name. Later in the chapter, this type name will need to be added as a supported activity type to the Info.plist file for the SiriPhoto app and referenced in the App declaration so that SiriPhoto knows which intent triggered the app launch.
Next, the method creates a new intent response instance and configures it with a code to let Siri know that the intent handling will be continued within the main SiriPhoto app. The intent response is also initialized with the NSUserActivity instance created previously:
let response = INSearchForPhotosIntentResponse(code:
                    INSearchForPhotosIntentResponseCode.continueInApp,
                               userActivity: activity)Code language: Swift (swift)
The code then converts the start and end dates from DateComponents objects to Date objects and calls a method named photoSearchFrom(to:) to confirm that photo matches are available for the specified date range. The photoSearchFrom(to:) method (which will be implemented next) returns a count of the matching photos. This count is then assigned to the searchResultsCount property of the response object, which is then returned to Siri via the completion handler:
    if let startComponents = intent.dateCreated?.startDateComponents,
        let endComponents = intent.dateCreated?.endDateComponents {

        if let startDate = calendar.date(from:
            startComponents),
          let endDate = calendar.date(from:
              endComponents) {

        response.searchResultsCount = photoSearchFrom(startDate,
                            to: endDate)
        }
    }
}
completion(response)Code language: Swift (swift)
If the extension returns a zero count via the searchResultsCount property of the response object, Siri will notify the user that no photos matched the search criteria. If one or more photo matches were found, Siri will launch the main SiriPhoto app and pass it the NSUserActivity object.
The final step in implementing the extension is to add the photoSearchFrom(to:) method to the IntentHandler. swift file:
func photoSearchFrom(_ startDate: Date, to endDate: Date) -> Int {

    let fetchOptions = PHFetchOptions()

    fetchOptions.predicate = NSPredicate(format: "creationDate > %@ AND creationDate < %@", startDate as CVarArg, endDate as CVarArg)
    let fetchResult = PHAsset.fetchAssets(with: PHAssetMediaType.image,
                           options: fetchOptions)
    return fetchResult.count
}Code language: Swift (swift)
The method makes use of the standard iOS Photos Framework to perform a search of the Photo library. It begins by creating a PHFetchOptions object. A predicate is then initialized and assigned to the fetchOptions instance specifying that the search is looking for photos taken between the start and end dates. Finally, the search for matching images is initiated, and the resulting count of matches returned.
Testing the App
Though there is still some work to be completed for the main SiriPhoto app, the Siri extension functionality is now ready to be tested. Within Xcode, make sure that SiriPhotoIntent is selected as the current target and click on the run button. When prompted for a host app, select Siri and click the run button. When Siri has started listening, say the following:
“Find a photo with SiriPhoto”
Siri will respond by seeking the day for which you would like to find a photo. After you specify a date, Siri will either launch the SiriPhoto app if photos exist for that day, or state that no photos could be found. Note that the first time a photo is requested the privacy dialog will appear seeking permission to access the photo library.
Provide permission when prompted and then repeat the photo search request.
Adding a Data Class to SiriPhoto
When SiriKit launches the SiriPhoto app in response to a successful photo search, it will pass the app an NSUserActivity instance. The app will need to handle this activity and use the intent response it contains to extract the matching photo from the library. The photo image will, in turn, need to be stored as a published observable property so that the content view is always displaying the latest photo. These tasks will be performed in a new Swift class declaration named PhotoHandler.
Add this new class to the project by right-clicking on the Shared folder in the project navigator panel and selecting the New File… menu option. In the template selection panel, choose the Swift File option before clicking on the Next button. Name the new class PhotoHandler and click on the Create button. With the PhotoHandler.swift file loaded into the code editor, modify it as follows:
import SwiftUI
import Combine
import Intents
import Photos

class PhotoHandler: ObservableObject {

    @Published var image: UIImage?
    var userActivity: NSUserActivity

    init (userActivity: NSUserActivity) {

        self.userActivity = userActivity
        self.image = UIImage(named: "image-missing")

    }
}
The above changes declare an observable class containing UIImage and NSUserActivity properties. The image property is declared as being published and will be observed by the content view later in the tutorial.
The class initializer stores the NSUserActivity instance passed through when the class is instantiated and assigns the missing image icon to the image property so that it will be displayed if there is no matching image from SiriKit.
Next, the class needs a method which can be called by the app to extract the photo from the library. Remaining in the PhotoHandler.swift file, add this method to the class as follows:
func handleActivity() {

    let intent = userActivity.interaction?.intent
        as! INSearchForPhotosIntent

    if (intent.dateCreated?.startDateComponents) != nil {
        let calendar = Calendar(identifier: .gregorian)
        let startDate = calendar.date(from:
            (intent.dateCreated?.startDateComponents)!)
        let endDate = calendar.date(from:
            (intent.dateCreated?.endDateComponents)!)
        getPhoto(startDate!, endDate!)
    }
}Code language: Swift (swift)
The handleActivity() method extracts the intent from the user activity object and then converts the start and end dates to Date objects. These dates are then passed to the getPhoto() method which now also needs to be added to the class:
func getPhoto(_ startDate: Date, _ endDate: Date){

    let fetchOptions = PHFetchOptions()

    fetchOptions.predicate = NSPredicate(
         format: "creationDate > %@ AND creationDate < %@",
                  startDate as CVarArg, endDate as CVarArg)
    let fetchResult = PHAsset.fetchAssets(with:
        PHAssetMediaType.image, options: fetchOptions)

    let imgManager = PHImageManager.default()

    if let firstObject = fetchResult.firstObject {
        imgManager.requestImage(for: firstObject as PHAsset,
                                targetSize: CGSize(width: 500,
                                                    height: 500),
                                contentMode:
                                     PHImageContentMode.aspectFill,
                                options: nil,
                                resultHandler: { (image, _) in
                                    self.image = image
        })
    }
}Code language: Swift (swift)
The getPhoto() method performs the same steps used by the intent handler to search the Photo library based on the search date parameters. Once the search results have returned, however, the PHImageManager instance is used to retrieve the image from the library and assign it to the published image variable.
Designing the Content View
The user interface for the app is going to consist of a single Image view on which will be displayed the first photo taken on the day chosen by the user via Siri voice commands. Edit the ContentView.swift file and modify it so that it reads as follows:
import SwiftUI

struct ContentView: View {

    @StateObject var photoHandler: PhotoHandler

    var body: some View {
        Image(uiImage: photoHandler.image!)
            .resizable()
            .aspectRatio(contentMode: .fit)
            .padding()
    }
}

struct ContentView_Previews: PreviewProvider {
    static var previews: some View {
        ContentView(photoHandler: PhotoHandler(userActivity:
              NSUserActivity(activityType: "Placeholder")))
    }
}Code language: Swift (swift)
The changes simply add a PhotoHandler state object variable declaration, the image property of which is used to display an image on an Image view. The preview declaration is then adapted to pass a PhotoHandler instance to the content view initialized with a placeholder NSUserObject. Steps also need to be taken to pass a placeholder PhotoHandler instance to the content view within the SiriPhotoApp.swift file as follows:
import SwiftUI
import Intents

@main
struct SiriPhotoApp: App {

    @Environment(\.scenePhase) private var scenePhase
    var photoHandler: PhotoHandler =
        PhotoHandler(userActivity: NSUserActivity(activityType: "Placeholder"))

    var body: some Scene {
        WindowGroup {
            ContentView(photoHandler: photoHandler)
        }
        .onChange(of: scenePhase) { phase in
            INPreferences.requestSiriAuthorization({status in
                // Handle errors here
            })
        }
    }
}Code language: Swift (swift)
When previewed, the ContentView layout should be rendered as shown in the figure below:

Figure 44-9
Adding Supported Activity Types to SiriPhoto
When the intent handler was implemented earlier in the chapter, the NSUserActivity object containing the photo search information was configured with an activity type string. In order for the SiriPhoto app to receive the activity, the type must be declared using the NSUserActivityTypes property in the app’s iOS Info.plist file. Within the project navigator panel, select the Info.plist file located in the iOS folder. Hover the mouse pointer over the last entry in the property list and click on the ‘+’ button to add a new property. In the Key field, enter NSUserActivityTypes and change the Type setting to Array as shown in Figure 44-10:

Figure 44-10
Click on the ‘+’ button indicated by the arrow above to add a new item to the array. Set the value for Item 0 to com.ebookfrenzy.siriphotointent so that it matches the type assigned to the user activity instance:

Figure 44-11
Handling the NSUserActivity Object
The intent handler in the extension has instructed Siri to continue the intent handling process by launching the main SiriPhoto app. When the app is launched by Siri it will be provided the NSUserActivity object for the session containing the intent object. When an app is launched and passed an NSUserActivity object it can be accessed from within the App declaration by adding the onContinueUserActivity() modifier to the ContentView, passing through the activity type and defining the actions to be performed. Within the SiriPhotoApp.swift file, implement these changes as follows:
import SwiftUI

@main
struct SiriPhotoApp: App {

    var photoHandler: PhotoHandler = PhotoHandler(userActivity:
        NSUserActivity(activityType: "Placeholder"))

    var body: some Scene {
        WindowGroup {
            ContentView(photoHandler: photoHandler)
                .onContinueUserActivity(
                       "com.ebookfrenzy.siriphotointent",
                perform: { userActivity in
                    photoHandler.userActivity = userActivity
                    photoHandler.handleActivity()
                })
        }
.
.Code language: Swift (swift)
The declaration begins by creating a placeholder PhotoHandler instance which can be passed to the ContentView in the event that the app is not launched by a supported activity type, or by the user tapping on the app in on the device home screen.
Next, the onContinueUserActivity() modifier is configured to only detect the activity type associated with the SiriPhotoIntent. If the type is detected, the NSUserActivity object passed to the app is assigned to the placeholder PhotoHandler instance and the handleActivity() method called to fetch the photo from the library. Because the content view is observing the image property, the Image view will update to display the extracted photo image.
Testing the Completed App
Run the SiriPhotoIntent extension, perform a photo search and, assuming photos are available for the selected day, wait for the main SiriPhoto app to load. When the app has loaded, the first photo taken on the specified date should appear within the Image view:
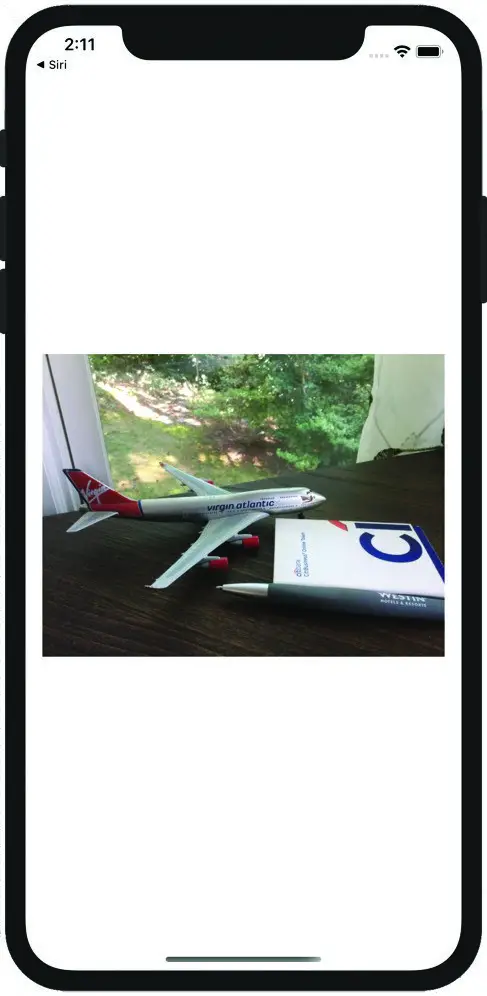
Figure 44-12
Summary
This chapter has worked through creating a simple app designed to use SiriKit to locate a photo taken on a particular date. The example has demonstrated the creation of an Intents Extension and the implementation of the intent handler methods necessary to interact with the Siri environment, including resolving missing parameters in the Siri intent. The project also explored the use of the NSUserActivity class to transfer the intent from the extension to the main iOS app.