
The previous chapter introduced Kotlin flows and explored how these can be used to return multiple sequential values from within coroutine-based asynchronous code. In this tutorial, we will look at a more detailed flow implementation, this time using SharedFlow within a ViewModel. The tutorial will also demonstrate how to ensure that flow collection responds correctly to an app switching between background and foreground modes.
About the Project
The app created in this chapter will consist of a RecyclerView located in the user interface layout of the main fragment. A shared flow located within a ViewModel will be activated as soon as the view model is created and will emit an integer value every two seconds. Code within the main fragment will collect the values from the flow and list them in the RecyclerView. The project will then be modified to suspend the collection process while the app is placed in the background.
Creating the SharedFlowDemo Project
Begin by launching Android Studio, selecting the New Project option from the welcome screen and, within the resulting new project dialog, choosing the Fragment + ViewModel template before clicking on the Next button.
Enter SharedFlowDemo into the Name field and specify com.ebookfrenzy.sharedflowdemo as the package name. Before clicking on the Finish button, change the Minimum API level setting to API 26: Android 8.0 (Oreo) and the Language menu to Kotlin. Edit the build.gradle (Module: SharedFlowDemo.app) file to enable view binding:
android {

    buildFeatures {
        viewBinding true
    }
.
.Code language: Kotlin (kotlin)
Remaining in the build.gradle file, add the Kotlin lifecycle library to the dependencies section as follows before clicking on the Sync Now link at the top of the editor panel:
dependencies {
.
.
    implementation "androidx.lifecycle:lifecycle-runtime-ktx:2.4.1"
.
.
}Code language: Kotlin (kotlin)
Designing the User Interface Layout
Locate the res -> layout -> fragment_main.xml file, load it into the layout editor, and delete the default TextView component. From the Containers section of the widget palette drag and drop a RecyclerView onto the center of the layout canvas. Add constraints so that the view fills the entire canvas and each side is attached to the corresponding side of the parent container. With the RecyclerView selected, refer to the Attributes tool window and change the id to recyclerView if it does not already have this id.
Adding the List Row Layout
We now need to add a layout resource file containing a TextView to be used for each row in the list. Add this file now by right-clicking on the app -> res -> layout entry in the Project tool window and selecting the New -> Layout resource file menu option. Name the file list_row and change the root element to LinearLayout before clicking on OK to create the file and load it into the layout editor. With the layout editor in Design mode, drag a TextView object from the palette onto the layout where it will appear by default at the top of the layout:

Figure 70-1
With the TextView selected in the layout, use the Attributes tool window to set the id of the view to itemText, the layout_height to 50dp, and the textSize attribute to 20sp. With the text view still selected, unfold the gravity settings and set center to true and all other values to false:
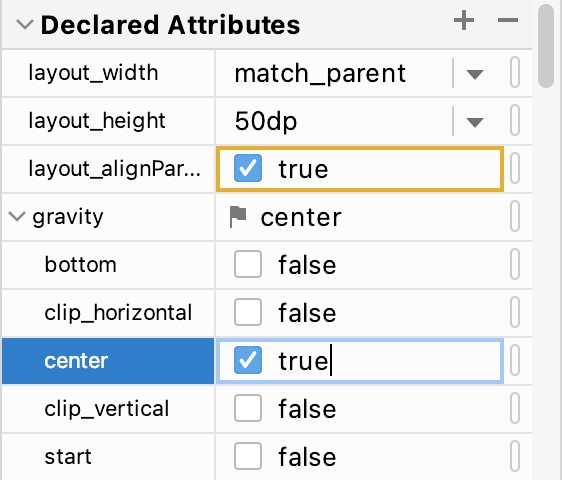
Figure 70-2
Select the LinearLayout entry in the Component Tree window and set the layout_height attribute to wrap_ content.
Adding the RecyclerView Adapter
Add the RecyclerView adapter class to the project by right-clicking on the app -> java -> com -> ebookfrenzy -> sharedflowdemo -> ui.main entry in the Project tool window and selecting the New -> Kotlin File/Class… menu. In the dialog, name the class ListAdapter and choose Class from the list before pressing the keyboard Return key. With the resulting ListAdapter.kt class file loaded into the editor, implement the class as follows:
package com.ebookfrenzy.sharedflowdemo.ui.main

import android.view.LayoutInflater
import android.view.View
import android.view.ViewGroup
import android.widget.TextView
import androidx.annotation.NonNull
import androidx.recyclerview.widget.RecyclerView
import com.ebookfrenzy.sharedflowdemo.R

class ListAdapter(private var itemsList: List) :
    RecyclerView.Adapter() {

    class MyViewHolder(view: View) : RecyclerView.ViewHolder(view) {
        var itemText: TextView = view.findViewById(R.id.itemText)
    }

    @NonNull
    override fun onCreateViewHolder(parent: ViewGroup,
                                  viewType: Int): MyViewHolder {
        val itemView = LayoutInflater.from(parent.context)
            .inflate(R.layout.list_row, parent, false)
        return MyViewHolder(itemView)
    }

    override fun onBindViewHolder(holder: MyViewHolder, position: Int) {
        val item = itemsList[position]
        holder.itemText.text = item
    }

    override fun getItemCount(): Int {
        return itemsList.size
    }
}Code language: Kotlin (kotlin)
Completing the ViewModel
The next step is to add some code to the view model to create and start the SharedFlow instance. Begin by editing the MainViewModel.kt file so that it reads as follows:
package com.ebookfrenzy.sharedflowdemo.ui.main

import androidx.lifecycle.ViewModel
import androidx.lifecycle.viewModelScope
import kotlinx.coroutines.delay
import kotlinx.coroutines.flow.MutableSharedFlow
import kotlinx.coroutines.flow.asSharedFlow
import kotlinx.coroutines.launch

class MainViewModel : ViewModel() {

    init {
        sharedFlowInit()
    }

    fun sharedFlowInit() {
    }
}Code language: Kotlin (kotlin)
When the ViewModel instance is created, the initializer will call the sharedFlowInit() function. The purpose of this function is to launch a new coroutine containing a loop in which new values are emitted using a shared flow. Before adding this code, we first need to declare the flow as follows:
.
.
class MainViewModel : ViewModel() {

    private val _sharedFlow = MutableSharedFlow()
    val sharedFlow = _sharedFlow.asSharedFlow()
.
.Code language: Kotlin (kotlin)
With the flow declared, code can now be added to the sharedFlowInit() function to launch the flow using the view model’s own scope. This will ensure that the flow ends when the view model is destroyed:
fun sharedFlowInit() {
    viewModelScope.launch {
        for (i in 1..1000) {
            delay(2000)
            _sharedFlow.emit(i)
        }
    }
}Code language: Kotlin (kotlin)
Modifying the Main Fragment for View Binding
Before we start to work on collecting values from the flow, we first need to make some changes to the MainFragment.kt file to add support for view binding. Open the file and modify it so that it reads as follows:
.
.
import com.ebookfrenzy.sharedflowdemo.databinding.FragmentMainBinding

class MainFragment : Fragment() {

    companion object {
        fun newInstance() = MainFragment()
    }

    private lateinit var viewModel: MainViewModel
    private var _binding: FragmentMainBinding? = null
    private val binding get() = _binding!!

    override fun onCreateView(
        inflater: LayoutInflater, container: ViewGroup?,
        savedInstanceState: Bundle?
    ): View {
        return inflater.inflate(R.layout.fragment_main, container, false)
        _binding = FragmentMainBinding.inflate(inflater, container, false)
        return binding.root
    }

    override fun onDestroyView() {
        super.onDestroyView()
        _binding = null
    }
.
.Code language: Kotlin (kotlin)
Collecting the Flow Values
Before testing the app for the first time we need to add some code to perform the flow collection and display those values in the RecyclerView list. The intention is for collection to start automatically when the app launches so this code will be placed in the onActvityCreated() method of the MainFragment.kt file.
Start by adding some variables to store a reference to our list adapter and the array of items to be displayed in the RecyclerView. Now is also a good time to add the imports we will need to complete the app:
.
.
import androidx.lifecycle.Lifecycle
import kotlinx.coroutines.flow.*
import kotlinx.coroutines.launch
import androidx.lifecycle.repeatOnLifecycle
import androidx.lifecycle.lifecycleScope
import androidx.recyclerview.widget.LinearLayoutManager
.
.
class MainFragment : Fragment() {

    companion object {
        fun newInstance() = MainFragment()
    }

    private lateinit var viewModel: MainViewModel
    private var _binding: FragmentMainBinding? = null
    private val binding get() = _binding!!
    private val itemList = ArrayList()
    private lateinit var listAdapter: ListAdapter
.
.Code language: Kotlin (kotlin)
Within the onActvityCreated() method, add some code to create a list adapter instance and assign it to the RecyclerView. We also need to configure the RecyclerView to use a LinearLayout manager:
override fun onActivityCreated(savedInstanceState: Bundle?) {
    super.onActivityCreated(savedInstanceState)
    viewModel = ViewModelProvider(this).get(MainViewModel::class.java)

    listAdapter = ListAdapter(itemList)
    val layoutManager = LinearLayoutManager(context)
    binding.recyclerView.layoutManager = layoutManager
    binding.recyclerView.adapter = listAdapter
}Code language: Kotlin (kotlin)
With these changes made we are ready to collect the values emitted by the shared flow and add them to the RecyclerView. Add code to the onActivityCreated() method so that it now reads as follows:
override fun onActivityCreated(savedInstanceState: Bundle?) {
.
.
    lifecycleScope.launch {
        viewModel.sharedFlow.collect() { value ->
            itemList.add(value.toString())
            listAdapter.notifyItemInserted(itemList.lastIndex)
            binding.recyclerView.smoothScrollToPosition(listAdapter.itemCount)
         }
    }
}Code language: Kotlin (kotlin)
This code accesses the shared flow instance within the view model and begins collecting values from the stream. Each collected value is added to the itemList array that was previously used when the ListAdapter was initialized. We then notify the adapter that a new item has been added to the end of the list. This will cause the RecyclerView to update so that the new value appears in the list. We have also added code to instruct the RecyclerView to scroll smoothly to the last position in the list so that the most recent values are automatically visible.
Testing the SharedFlowDemo App
Compile and run the app on a device or emulator and verify that values appear within the RecyclerView list as they are emitted by the shared flow. Rotate the device into landscape orientation to trigger a configuration change and confirm that the sequence of values continues without restarting from zero:
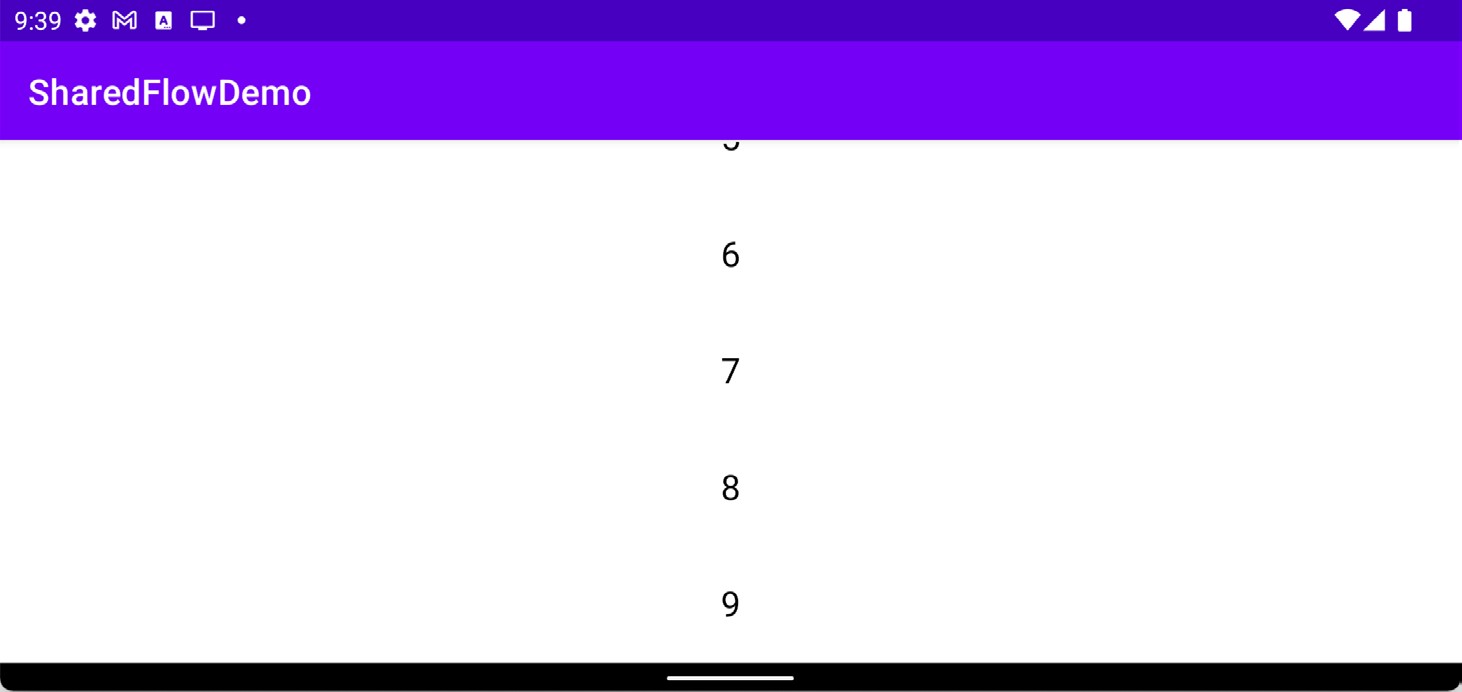
Figure 70-3
With the app now working, it is time to look at what happens when it is placed in the background.
Handling Flows in the Background
In our app, we have a shared flow that feeds values to the user interface in the form of a RecyclerView. By performing the collection in a coroutine scope, the user interface remains responsive while the flow is being collected (you can verify this by scrolling up and down within the list of values while the list is updating). This raises the question of what happens when the app is placed in the background. To find out, we can add some diagnostic output to both the emitter and collector code. First, edit the MainViewModel.kt file and add a println() call within the body of the emission for loop:
fun sharedFlowInit() {
    viewModelScope.launch {
        for (i in 1..1000) {
            delay(1100)
            println("Emitting $i")
            _sharedFlow.emit(i)
        }

    }
}Code language: Kotlin (kotlin)
Make a similar change to the collection code block in the MainFragment.kt file as follows:
.
.
    lifecycleScope.launch {
        viewModel.sharedFlow.collect() { value ->
            println("Collecting $value")
            itemList.add(value.toString())
            listAdapter.notifyDataSetChanged()
            binding.recyclerView.smoothScrollToPosition(listAdapter.itemCount)
         }
    }
.
.Code language: Kotlin (kotlin)
Once these changes have been made, display the Logcat tool window, enter System.out into the search bar, and run the app. As the list of values updates, output similar to the following should appear in the Logcat panel:
Emitting1
Collecting 1
Emitting 2
Collecting 2
Emitting 3
Collecting 3
.
.Code language: plaintext (plaintext)
Now place the app in the background and note that both the emission and collection operations continue to run, even though the app is no longer visible to the user. The continued emission is to be expected and is the correct behavior for a shared flow residing within a view model. It is wasteful of resources, however, to be collecting data and updating a user interface that is not currently visible to the user. We can resolve this problem by executing the collection using the repeatOnLifecycle function.
The repeatOnLifecycle function is a suspend function that runs a specified block of code each time the current lifecycle reaches or exceeds one of the following states (a topic covered previously in the “Working with Android Lifecycle-Aware Components” chapter):
- Lifecycle.State.INITIALIZED
- Lifecycle.State.CREATED
- Lifecycle.State.STARTED
- Lifecycle.State.RESUMED
- Lifecycle.State.DESTROYED
Conversely, when the lifecycle drops below the target state, the coroutine is canceled.
In this case, we want the collection to start each time Lifecycle.State.START is reached and to stop when the lifecycle is suspended. To implement this, modify the collection code as follows:
lifecycleScope.launch {
   repeatOnLifecycle(Lifecycle.State.STARTED) {
        viewModel.sharedFlow.collect() { value ->
            println("Collecting $value")
            itemList.add(value.toString())
            listAdapter.notifyDataSetChanged()
            binding.recyclerView.smoothScrollToPosition(listAdapter.itemCount)
        }
   }
}Code language: Kotlin (kotlin)
Run the app once again, place it in the background and note that only the emission diagnostic messages appear in the Logcat output confirming that the main fragment is no longer collecting values and adding them to the RecyclerView list. When the app is brought to the foreground, the collection will resume at the latest emitted value since replay was not configured on the shared flow.
Summary
In this chapter we created a SharedFlow instance within a view model. We then collected the streamed values within the main fragment and used that data to update the user interface. We also outlined the importance of avoiding unnecessary flow-driven user interface updates when an app is placed in the background, a problem that can easily be resolved using the repeatOnLifecycle function. This function can be used to cancel and restart asynchronous tasks such as flow collection when a target lifecycle state is reached by the containing lifecycle.