
The previous chapter provided an overview of navigation using the Jetpack Navigation Architecture Component when developing with Compose. This chapter will build on this knowledge to create a project that uses navigation, including an example of passing an argument from one destination to another.
Creating the NavigationDemo project
Launch Android Studio and create a new Empty Compose Activity project named NavigationDemo, specifying com.example.navigationdemo as the package name, and selecting a minimum API level of API 26: Android 8.0 (Oreo). Within the MainActivity.kt file, delete the Greeting function and add a new empty composable named MainScreen:
@Composable
fun MainScreen() {

}Code language: Kotlin (kotlin)
Next, edit the onCreateActivity() method and DefaultPreview function to call MainScreen instead of Greeting.
Before proceeding, we will also need to add the Compose navigation library to the project build settings. Within the Project tool window, locate and open the module level Gradle build file (app -> Gradle Scripts -> build.gradle (Module: NavigationDemo.app) file and add the following line to the dependencies section (keeping in mind that a more recent version of the library may now be available):
.
.
implementation  'androidx.navigation:navigation-compose:2.4.0'
.
.Code language: Gradle (gradle)
About the NavigationDemo project
The completed project will comprise three destination screens named “home”, “welcome” and “profile”. The home screen will contain a text field into which the user will enter their name and a button which, when clicked, will navigate to the welcome screen, passing the user’s name as an argument for inclusion in a welcome message. The welcome screen will also contain a button to navigate to the profile screen, the sole purpose of which is for experimenting with the popUpTo() navigation option method.
 |
You are reading a sample chapter from an old edition of the Jetpack Compose Essentials book. Purchase the fully updated Jetpack Compose 1.7 Essentials edition of this book in eBook or Print format. The full book contains 67 chapters and over 700 pages of in-depth information. Buy the full book now in Print or eBook format. Learn more. |
Declaring the navigation routes
The first step in implementing the navigation in the project is to add the routes for the three destinations which will be declared using a sealed class. Begin by right-clicking on the app -> java -> com.example.navigationdemo entry in the Project tool window and selecting the New -> Kotlin File/Class menu option. In the new class dialog, name the class NavRoutes, select the Sealed Class entry in the list and press the keyboard return key to generate the file. Edit the new file to add the destination routes as follows:
package com.example.navigationdemo

sealed class NavRoutes(val route: String) {
    object Home : NavRoutes("home")
    object Welcome : NavRoutes("welcome")
    object Profile : NavRoutes("profile")
}Code language: Kotlin (kotlin)
Adding the home screen
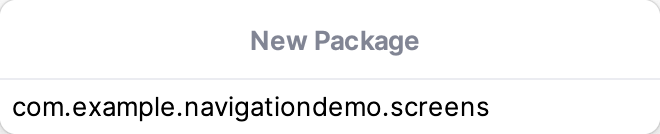
The three destinations now need a composable, each of which we will declare in a separate file placed in a new package named com.example.navigationdemo.screens. Create this package now by right-clicking on the com. example.navigationdemo entry in the Project tool window and selecting the New -> Package menu option. In the resulting dialog, name the package com.example.navigationdemo.screens as shown in Figure 45-1 before tapping the keyboard enter key:
Right-click on the new package entry in the Project tool window, select the option to create a new Kotlin class file, name it Home, and modify it so that it reads as follows:
.
.
import androidx.compose.foundation.layout.*
import androidx.compose.material.*
import androidx.compose.runtime.*
import androidx.compose.ui.Alignment
import androidx.compose.ui.Modifier
import androidx.compose.ui.text.TextStyle
import androidx.compose.ui.text.font.FontWeight
import androidx.compose.ui.unit.dp
import androidx.compose.ui.unit.sp
import androidx.navigation.NavHostController

import com.example.navigationdemo.NavRoutes

@Composable
fun Home(navController: NavHostController) {

    var userName by remember { mutableStateOf("") }
    val onUserNameChange = { text : String ->
        userName = text
    }

    Box(
        modifier = Modifier
            .fillMaxSize(),
        contentAlignment = Alignment.Center
    ) {
        Column(horizontalAlignment = Alignment.CenterHorizontally) {
            CustomTextField(
                title = "Enter your name",
                textState = userName,
                onTextChange = onUserNameChange
            )

            Spacer(modifier = Modifier.size(30.dp))

            Button(onClick = { }) {
                Text(text = "Register")
            }
        }
    }
}

@Composable
fun CustomTextField(
    title: String,
    textState: String,
    onTextChange: (String) -> Unit,
) {
    OutlinedTextField(
        value = textState,
        onValueChange = { onTextChange(it) },
        singleLine = true,
        label = { Text(title)},
        modifier = Modifier.padding(10.dp),
        textStyle = TextStyle(fontWeight = FontWeight.Bold,
            fontSize = 30.sp)
    )
}Code language: Kotlin (kotlin)
Adding the welcome screen
Add a new class file to the screens package named Welcome.kt. Once the file has been created, edit it so that it reads as follows:
.
.
import androidx.compose.foundation.layout.*
import androidx.compose.material.*
import androidx.compose.runtime.*
import androidx.compose.ui.Alignment
import androidx.compose.ui.Modifier
import androidx.compose.ui.unit.dp
import androidx.navigation.NavHostController

import com.example.navigationdemo.NavRoutes

@Composable
fun Welcome(navController: NavHostController) {

    Box(
        modifier = Modifier
            .fillMaxSize(),
        contentAlignment = Alignment.Center
    ) {
        Column(horizontalAlignment = Alignment.CenterHorizontally) {
            Text("Welcome", style = MaterialTheme.typography.h5)

            Spacer(modifier = Modifier.size(30.dp))

            Button(onClick = { }) {
                Text(text = "Set up your Profile")
            }
        }
    }
}Code language: Kotlin (kotlin)
Adding the profile screen
The profile screen is the simplest of the composables and consists of a single Text component. Once again, add a new class file to the screens package, this time named Profile.kt, and edit it to make the following changes:
|
You are reading a sample chapter from an old edition of the Jetpack Compose Essentials book. Purchase the fully updated Jetpack Compose 1.7 Essentials edition of this book in eBook or Print format. The full book contains 67 chapters and over 700 pages of in-depth information. Buy the full book now in Print or eBook format. Learn more. |
.
.
import androidx.compose.foundation.layout.*
import androidx.compose.material.*
import androidx.compose.runtime.*
import androidx.compose.ui.Alignment
import androidx.compose.ui.Modifier

@Composable
fun Profile() {

    Box(
        modifier = Modifier
            .fillMaxSize(),
        contentAlignment = Alignment.Center
    ) {
            Text("Profile Screen", style = MaterialTheme.typography.h5)
    }
}Code language: Kotlin (kotlin)
Creating the navigation controller and host
Now that the basic elements of the project have been created, the next step is to create the navigation controller (NavHostController) and navigation host (NavHost) instances. Edit the MainActivity.kt file and make the following modifications:
.
.
import androidx.navigation.compose.NavHost
import androidx.navigation.compose.composable
import androidx.navigation.compose.rememberNavController
import com.example.navigationdemo.screens.Home
import com.example.navigationdemo.screens.Profile
import com.example.navigationdemo.screens.Welcome
.
.
@Composable
fun MainScreen() {

    val navController = rememberNavController()

    NavHost(
        navController = navController,
        startDestination = NavRoutes.Home.route,
    ) {
        composable(NavRoutes.Home.route) {
            Home(navController = navController)
        }

        composable(NavRoutes.Welcome.route) {
            Welcome(navController = navController)
        }

        composable(NavRoutes.Profile.route) {
            Profile()
        }
    }
}Code language: Kotlin (kotlin)
The above code changes to the MainScreen function begin by obtaining a navigation controller instance via a call to the rememberNavController() method. The NavHost component is called, assigning the home screen as the start destination. The composable() method is then called to add a route for each of the screens.
Implementing the screen navigation
Navigation needs to be initiated when the Button components in the home and welcome screens are clicked. Both composables have already been passed the navigation controller on which we will be calling the navigate() method. Starting with the Home.kt file, locate the Button component and add the navigation code to the onClick property using the route for the welcome screen:
.
.
Button(onClick = {
    navController.navigate(NavRoutes.Welcome.route)
}) {
    Text(text = "Register")
}
.
.Code language: Kotlin (kotlin)
Next, edit the Welcome.kt file and add code to the Button onClick property to navigate to the profile screen:
.
.
Button(onClick = {
        navController.navigate(NavRoutes.Profile.route)
    }) {
        Text(text = "Set up your Profile")
    }
.
.Code language: Kotlin (kotlin)
Take this opportunity to compile and run the app on a device or emulator and test that the buttons navigate to the correct screens when clicked.
|
You are reading a sample chapter from an old edition of the Jetpack Compose Essentials book. Purchase the fully updated Jetpack Compose 1.7 Essentials edition of this book in eBook or Print format. The full book contains 67 chapters and over 700 pages of in-depth information. Buy the full book now in Print or eBook format. Learn more. |
Passing the user name argument
The welcome destination route in the NavHost declaration now needs to be extended so that the user name typed into the text field can be passed to the welcome screen during the navigation. First, edit the Welcome. kt file and modify the Welcome function to accept a user name String parameter and to display it in the Text component:
.
.
@Composable
fun Welcome(navController: NavHostController, userName: String?) {
.
.
       Column(horizontalAlignment = Alignment.CenterHorizontally) {
            Text("Welcome, $userName", style = MaterialTheme.typography.h5)
.
.Code language: Kotlin (kotlin)
With the Welcome composable ready to accept and display the user name, the NavHost declaration needs to be changed to extract the parameter from the navigation back stack entry and pass it to the Welcome function. Return to the MainActivity.kt file and modify the Welcome route composable() call so that it reads as follows:
.
.
composable(NavRoutes.Welcome.route + "/{userName}") { backStackEntry ->

    val userName = backStackEntry.arguments?.getString("userName")
    Welcome(navController = navController, userName)
}
.
.Code language: Kotlin (kotlin)
The final task before we test the app once again is to modify the onClick handler assigned to the home screen Button component to get the current user name state value and append it to the route in the navigate() method call. Edit the Home.kt file, locate the Button call and modify the onClick handler:
.
.
    Button(onClick = {
        navController.navigate(NavRoutes.Welcome.route + "/$userName")
    }) {
        Text(text = "Register")
    }
.
.Code language: Kotlin (kotlin)
Testing the project
Compile and run the project on a device or emulator and enter a name into the text field on the home screen:
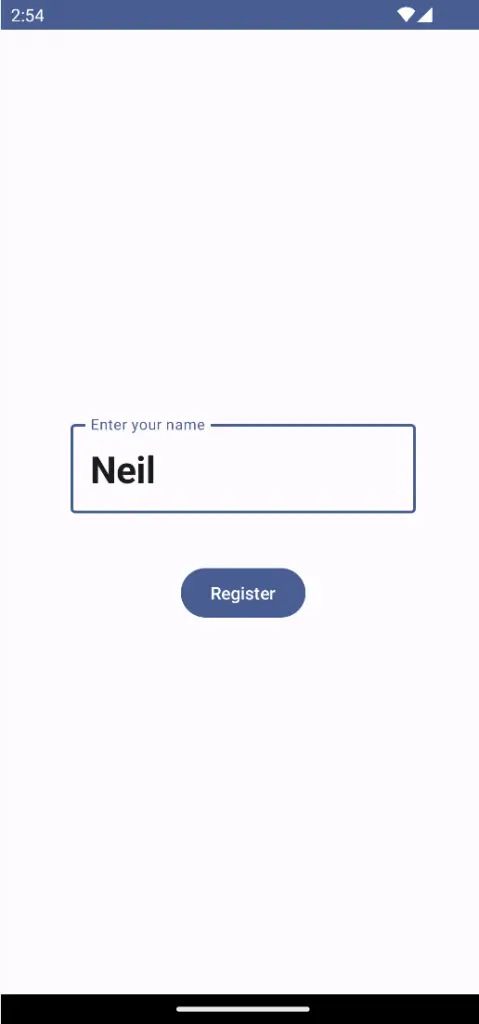
Figure 45-2
|
You are reading a sample chapter from an old edition of the Jetpack Compose Essentials book. Purchase the fully updated Jetpack Compose 1.7 Essentials edition of this book in eBook or Print format. The full book contains 67 chapters and over 700 pages of in-depth information. Buy the full book now in Print or eBook format. Learn more. |
Click the Register button and verify that the name you entered appears in the Text component of the Welcome screen:

Figure 45-3
After clicking on the “Set up your Profile” button to reach the profile screen, the back button located in the bottom toolbar should navigate through the back stack (if you are using Android 12 or later, swipe right to navigate backwards), starting with the welcome screen followed by the home screen. If we want the backward navigation to return directly to the home screen we need to make sure everything except the home destination is popped off the navigation back stack using the popUpTo() method call. This needs to be called as an option to the navigate() method in the Button onClick handler in the Welcome composable:
.
.
    Button(onClick = {
        navController.navigate(NavRoutes.Profile.route) {
            popUpTo(NavRoutes.Home.route)
        }
.
.Code language: Kotlin (kotlin)
When the app runs, tapping the back button (or swiping right on newer Android versions) from the profile screen should now skip the welcome screen and return directly to the home screen.
Summary
In this chapter, we have created a project that uses navigation to switch between screens within an activity. This included creating a navigation controller and declaring a navigation host initialized with navigation routes for each destination. The tutorial also implemented a navigation argument to pass a string value from one navigation destination to another.
|
You are reading a sample chapter from an old edition of the Jetpack Compose Essentials book. Purchase the fully updated Jetpack Compose 1.7 Essentials edition of this book in eBook or Print format. The full book contains 67 chapters and over 700 pages of in-depth information. Buy the full book now in Print or eBook format. Learn more. |