
In the early days of mobile applications for operating systems such as Android and iOS, the most common method for earning revenue was to charge an upfront fee to download and install the application. Another revenue opportunity was soon introduced in the form of embedding advertising within applications. Perhaps the most common and lucrative option is now to charge the user for purchasing items from within the application after it has been installed. This typically takes the form of access to a higher level in a game, acquiring virtual goods or currency, or subscribing to premium content in the digital edition of a magazine or newspaper.
Google provides support for the integration of in-app purchasing through the Google Play In-App Billing API and the Play Console. This chapter will provide an overview of in-app billing and outline the steps in integrating in-app billing into your Android projects. Once these topics have been explored, the next chapter will walk you through creating an example app that includes in-app purchasing features.
Preparing a Project for In-App Purchasing
Building in-app purchasing into an app will require a Google Play Developer Console account, details of which were covered previously in the “Creating, Testing and Uploading an Android App Bundle” chapter. You will also need to register a Google merchant account and configure your payment settings. These settings can be found by navigating to Setup -> Payments profile in the Play Console. Note that merchant registration is not available in all countries. For details, refer to the following page:
https://support.google.com/googleplay/android-developer/answer/9306917
The app will then need to be uploaded to the console and enabled for in-app purchasing. The console will not activate in-app purchasing support for an app, however, unless the Google Play Billing Library has been added to the module-level build.gradle file as follows:
dependencies {
.
.
    implementation 'com.android.billingclient:billing:<latest version>'
.
.
}Code language: Gradle (gradle)
Once the library has been added and the app bundle uploaded to the console, the next step is to add in-app products or subscriptions for the user to purchase.
Creating In-App Products and Subscriptions
Products and subscriptions are created and managed using the options listed beneath the Monetize section of the Play Console navigation panel as highlighted in Figure 83-1 below:
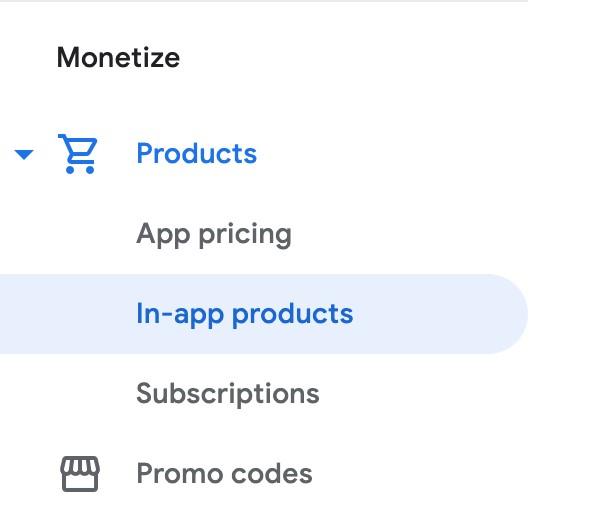
Figure 83-1
Each product or subscription needs an ID, title, description, and pricing information. Purchases fall into the categories of consumable (the item must be purchased each time it is required by the user such as virtual currency in a game), non-consumable (only needs to be purchased once by the user such as content access), and subscription-based. Consumable and non-consumable products are collectively referred to as managed products.
Subscriptions are useful for selling an item that needs to be renewed on a regular schedule such as access to news content or the premium features of an app. When creating a subscription, a base plan is defined specifying the price, renewal period (monthly, annually, etc.), and whether the subscription auto-renews. Users can also be provided with discount offers and given the option of pre-purchasing a subscription.
Billing Client Initialization
Communication between your app and the Google Play Billing Library is handled by a BillingClient instance. In addition, BillingClient includes a set of methods that can be called to perform both synchronous and asynchronous billing-related activities. When the billing client is initialized, it will need to be provided with a reference to a PurchasesUpdatedListener callback handler. The client will call this handler to notify your app of the results of any purchasing activity. To avoid duplicate notifications, it is recommended to have only one BillingClient instance per app.
A BillingClient instance can be created using the newBuilder() method, passing through the current activity or fragment context. The purchase update handler is then assigned to the client via the setListener() method:
private final PurchasesUpdatedListener purchasesUpdatedListener =
                                     new PurchasesUpdatedListener() {
    @Override
    public void onPurchasesUpdated(BillingResult billingResult,
                                   List<Purchase> purchases) {

        if (billingResult.getResponseCode() ==
                BillingClient.BillingResponseCode.OK
                && purchases != null) {

            // Purchase(s) successful

            for (Purchase purchase : purchases) {
                // Process purchases
            }
        } else if (billingResult.getResponseCode() ==
                BillingClient.BillingResponseCode.USER_CANCELED) {
            // User cancelled purchase
        } else {
            // handle erros here
        }
    }
};

private BillingClient billingClient = BillingClient.newBuilder(context)
    .setListener(purchasesUpdatedListener)
    .enablePendingPurchases()
    .build();Code language: Java (java)
Connecting to the Google Play Billing Library
After the successful creation of the Billing Client, the next step is to initialize a connection to the Google Play Billing Library. To establish this connection, a call needs to be made to the startConnection() method of the billing client instance. Since the connection is performed asynchronously, a BillingClientStateListener handler needs to be implemented to receive a callback indicating whether the connection was successful. Code should also be added to override the onBillingServiceDisconnected() method. This is called if the connection to the Billing Library is lost and can be used to report the problem to the user and to retry the connection.
Once the setup and connection tasks are complete, the BillingClient instance will make a call to the onBillingSetupFinished() method which can be used to check that the client is ready:
billingClient.startConnection(new BillingClientStateListener() {

    @Override
    public void onBillingSetupFinished(
            @NonNull BillingResult billingResult) {

        if (billingResult.getResponseCode() ==
                BillingClient.BillingResponseCode.OK) {
            // Connection successful
        } else {
            // Connection failed
        }
    }

    @Override
    public void onBillingServiceDisconnected() {
        // Existing connection lost
    }
});Code language: Java (java)
Displaying Available Products
Once the billing environment is initialized and ready to go, the next step is to request the details of the products or subscriptions that are available for purchase. This is achieved by making a call to the queryProductDetailsAsync() method of the BillingClient and passing through an appropriately configured QueryProductDetailsParams instance containing the product ID and type (ProductType.SUBS for a subscription or ProductType.INAPP for a managed product):
billingClient.queryProductDetailsAsync(queryProductDetailsParams,
    new ProductDetailsResponseListener() {
        public void onProductDetailsResponse(
                @NonNull BillingResult billingResult,
                @NonNull List<ProductDetails> productDetailsList) {

            if (!productDetailsList.isEmpty()) {
                // Process list of matching products
            } else {
                // No product matches found
            }
        }
    }
);Code language: Java (java)
The queryProductDetailsAsync() method is passed a ProductDetailsResponseListener handler which, in turn, is called and passed a list of ProductDetail objects containing information about the matching products. For example, we can call methods on these objects to get information such as the product name, title, description, price, and offer details.
Starting the Purchase Process
Once a product or subscription has been queried and selected for purchase by the user, the purchase process is ready to be launched. We do this by calling the launchBillingFlow() method of the BillingClient, passing through as arguments the current activity and a BillingFlowParams instance configured with the ProductDetail object for the item being purchased.
BillingFlowParams billingFlowParams =
    BillingFlowParams.newBuilder()
        .setProductDetailsParamsList(
            ImmutableList.of(
                BillingFlowParams.ProductDetailsParams.newBuilder()
                        .setProductDetails(productDetails)
                        .build()
            )
        )
        .build();

billingClient.launchBillingFlow(this, billingFlowParams);Code language: Java (java)
The success or otherwise of the purchase operation will be reported via a call to the PurchasesUpdatedListener callback handler outlined earlier in the chapter.
Completing the Purchase
When purchases are successful, the PurchasesUpdatedListener handler will be passed a list containing a Purchase object for each item. You can verify that the item has been purchased by calling the getPurchaseState() method of the Purchase instance as follows:
if (purchase.getPurchaseState() == Purchase.PurchaseState.PURCHASED) {
    // Purchase completed.
} else if (purchase.getPurchaseState() == Purchase.PurchaseState.PENDING) {
    // Paymemt is still pending
}Code language: Java (java)
Note that your app will only support pending purchases if call a call to enablePendingPurchases() method during initialization. A pending purchase will remain so until the user completes the payment process.
When the purchase of a non-consumable item is complete, it will need to be acknowledged to prevent a refund from being issued to the user. This requires the purchase token for the item which is obtained via a call to the getPurchaseToken() method of the Purchase object. This token is used to create an AcknowledgePurchaseParams instance together with an AcknowledgePurchaseResponseListener handler. Managed product purchases and subscriptions are acknowledged by calling the BillingClient’s acknowledgePurchase() method as follows:
AcknowledgePurchaseParams acknowledgePurchaseParams =
        AcknowledgePurchaseParams.newBuilder()
                .setPurchaseToken(purchase.getPurchaseToken())
                .build();

AcknowledgePurchaseResponseListener acknowledgePurchaseResponseListener =
                   new AcknowledgePurchaseResponseListener() {

    @Override
    public void onAcknowledgePurchaseResponse(
                      @NonNull BillingResult billingResult) {
        // Check acknowledgement result
    }
};

billingClient.acknowledgePurchase(acknowledgePurchaseParams,
                             acknowledgePurchaseResponseListener);Code language: Java (java)
For consumable purchases, you will need to notify Google Play when the item has been consumed so that it is available to be repurchased by the user. This requires a configured ConsumeParams instance containing a purchase token, a ConsumeResponseListener, and a call to the billing client’s consumeAsync() method:
ConsumeParams consumeParams =
    ConsumeParams.newBuilder()
            .setPurchaseToken(purchase.getPurchaseToken())
            .build();

ConsumeResponseListener listener = new ConsumeResponseListener() {
    @Override
    public void onConsumeResponse(BillingResult billingResult,
                                  @NonNull String purchaseToken) {
        if (billingResult.getResponseCode() ==
                BillingClient.BillingResponseCode.OK) {
            // Purchase consumed successfully
        }
    }
};

billingClient.consumeAsync(consumeParams, listener);Code language: Java (java)
Querying Previous Purchases
When working with in-app billing it is a common requirement to need to check whether a user has already purchased a product or subscription. A list of all the user’s previous purchases of a specific type (non-consumable or active subscriptions) can be generated by calling the queryPurchasesAsync() method of the BillingClient instance and implementing a PurchaseResponseListener. The following code, for example, obtains a list of all previously purchased non-consumable items:
QueryPurchasesParams queryPurchasesParams =
        QueryPurchasesParams.newBuilder()
                .setProductType(BillingClient.ProductType.INAPP)
                .build();

billingClient.queryPurchasesAsync(queryPurchasesParams,
                       new PurchasesResponseListener() {
    @Override
    public void onQueryPurchasesResponse(@NonNull BillingResult billingResult,
              @NonNull List<Purchase> list) {
        // Process list of purchases
    }
});Code language: Java (java)
To obtain a list of active subscriptions, change the ProductType value from INAPP to SUBS.
Alternatively, to obtain a list of past purchases, including active, expired, canceled, and consumed items, make a call to the BillingClient queryPurchaseHistoryAsync() method:
QueryPurchaseHistoryParams queryPurchaseHistoryParams =
        QueryPurchaseHistoryParams.newBuilder()
                .setProductType(BillingClient.ProductType.INAPP)
                .build();

billingClient.queryPurchaseHistoryAsync(queryPurchaseHistoryParams,
               new PurchaseHistoryResponseListener() {

    @Override
    public void onPurchaseHistoryResponse(@NonNull BillingResult billingResult,
               @NonNull List<PurchaseHistoryRecord> list) {
        // Process purchase history
    }
});Code language: Java (java)
Summary
In-app purchases provide a way to generate revenue from within Android apps by selling virtual products and subscriptions to users. In this chapter, we have explored managed products and subscriptions and explained the difference between consumable and non-consumable products. In-app purchasing support is added to an app using the Google Play In-app Billing Library and involves creating and initializing a billing client on which methods are called to perform tasks such as making purchases, listing available products, and consuming existing purchases. The next chapter contains a tutorial demonstrating the addition of in-app purchases to an Android Studio project.