Just about every activity related to developing and testing iOS apps involves the use of the Xcode environment. This chapter is intended to serve two purposes. Primarily it is intended to provide an overview of many key areas that comprise the Xcode development environment. In the course of providing this overview, the chapter will also work through creating a straightforward iOS app project to display a label that reads “Hello World” on a colored background. By the end of this chapter, you will have a basic familiarity with Xcode and your first running iOS app.
Starting Xcode 15
As with all iOS examples in this book, the development of our example will take place within the Xcode 15 development environment. Therefore, if you have not already installed this tool with the latest iOS SDK, refer first to the “Installing Xcode 15 and the iOS 17 SDK” chapter of this book. Then, assuming that the installation is complete, launch Xcode either by clicking on the icon on the dock (assuming you created one) or using the macOS Finder to locate Xcode in the Apps folder of your system.
When launched for the first time, and until you turn off the Show this window when Xcode launches toggle, the screen illustrated in Figure 4-1 will appear by default:
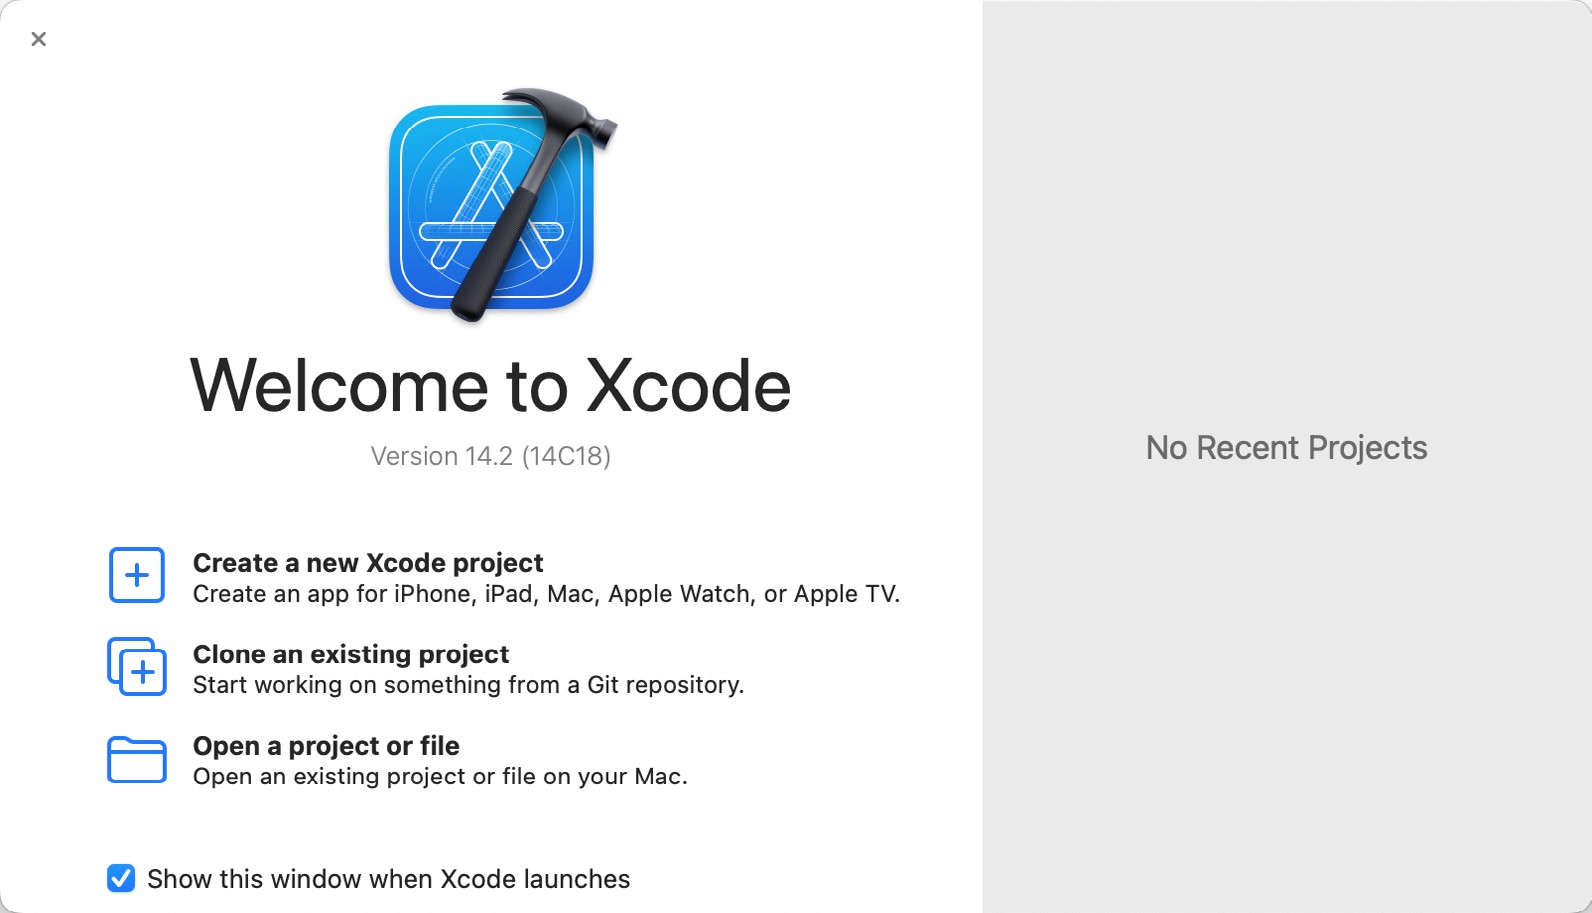
If you do not see this window, select the Window -> Welcome to Xcode menu option to display it. Within this window, click on the option to Create a new Xcode project. This selection will display the main Xcode project window together with the project template panel, where we can select a template matching the type of project we want to develop. Within this window, select the iOS tab so that the template panel appears as follows:
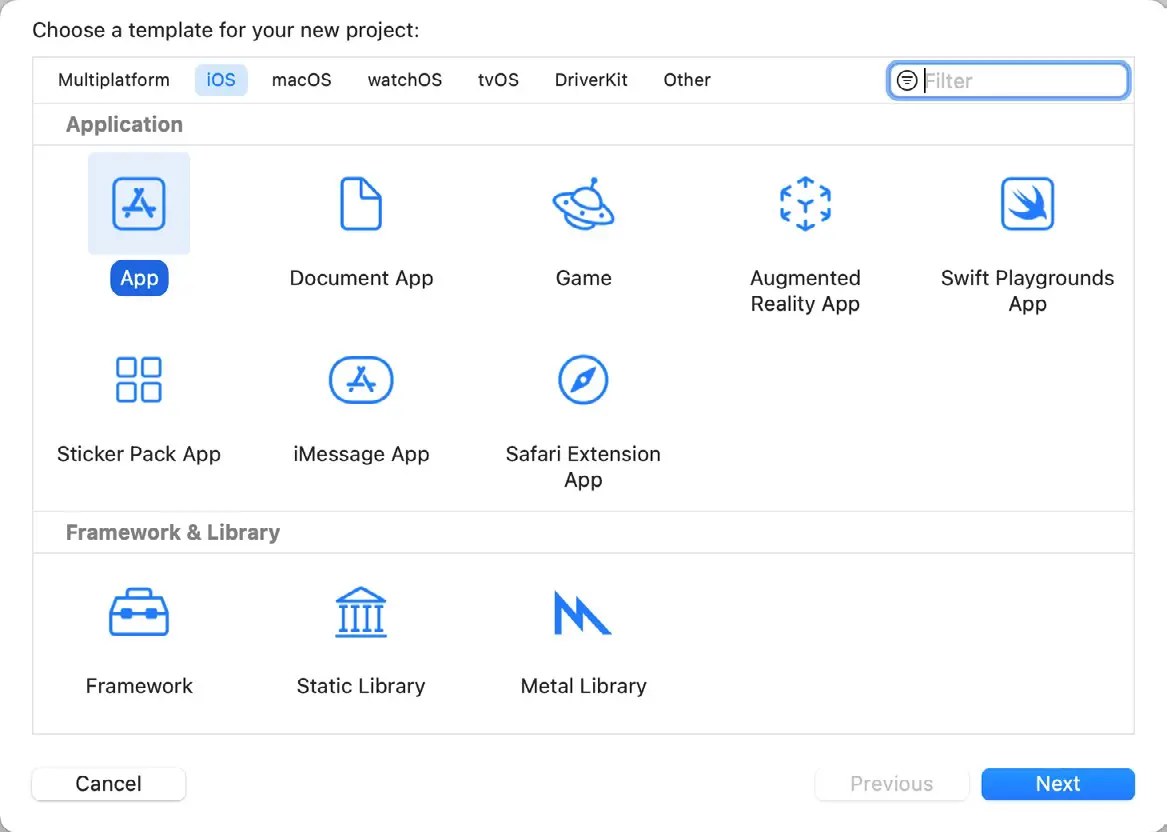
The toolbar on the window’s top edge allows for selecting the target platform, providing options to develop an app for iOS, watchOS, tvOS, or macOS. An option is also available for creating multiplatform apps using SwiftUI.
Begin by making sure that the App option located beneath iOS is selected. The main panel contains a list of templates available to use as the basis for an app. The options available are as follows:
- App – This creates a basic template for an app containing a single view and corresponding view controller.
- Document App – Creates a project intended to use the iOS document browser. The document browser provides a visual environment where the user can navigate and manage local and cloud-based files from within an iOS app.
- Game – Creates a project configured to take advantage of Sprite Kit, Scene Kit, OpenGL ES, and Metal for developing 2D and 3D games.
- Augmented Reality App – Creates a template project pre-configured to use ARKit to integrate augmented reality support into an iOS app.
- Sticker Pack App – Allows a sticker pack app to be created and sold within the Message App Store. Sticker pack apps allow additional images to be made available for inclusion in messages sent via the iOS Messages app.
- iMessage App – iMessage apps are extensions to the built-in iOS Messages app that allow users to send interactive messages, such as games, to other users. Once created, iMessage apps are available through the Message App Store.
- Safari Extension App – This option creates a project to be used as the basis for developing an extension for the Safari web browser.
For our simple example, we are going to use the App template, so select this option from the new project window and click Next to configure some more project options:
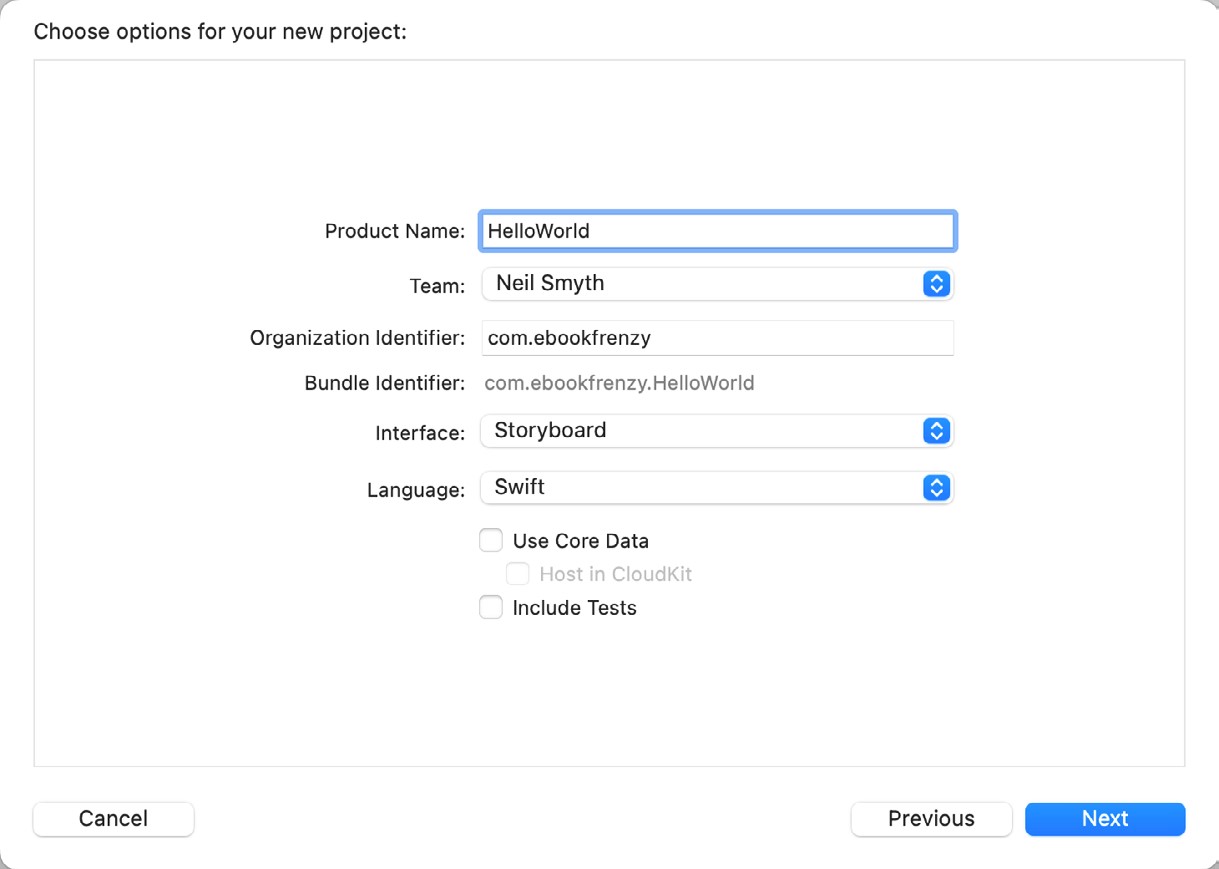
On this screen, enter a Product name for the app that will be created, in this case, “HelloWorld”. Next, choose your account from the Team menu if you have already signed up for the Apple developer program. Otherwise, leave the option set to None.
The text entered into the Organization Name field will be placed within the copyright comments of all the source files that make up the project.
The company identifier is typically the reverse URL of your website, for example, “com.mycompany”. This identifier will be used when creating provisioning profiles and certificates to enable the testing of advanced features of iOS on physical devices. It also uniquely identifies the app within the Apple App Store when it is published.
When developing an app in Xcode, the user interface can be designed using either Storyboards or SwiftUI. For this book, we will use Storyboards, so make sure that the Interface menu is set to Storyboard. SwiftUI development is covered in my iOS 17 App Development Essentials book.
Apple supports two programming languages for the development of iOS apps in the form of Objective-C and Swift. While it is still possible to program using the older Objective-C language, Apple considers Swift to be the future of iOS development. Therefore, all the code examples in this book are written in Swift, so make sure that the Language menu is set accordingly before clicking on the Next button.
On the final screen, choose a location on the file system for the new project to be created. This panel also allows placing the project under Git source code control. Source code control systems such as Git allow different project revisions to be managed and restored and for changes made over the project’s development lifecycle to be tracked. Since this is typically used for larger projects or those involving more than one developer, this option can be turned off for this and the other projects created in the book.
Once the new project has been created, the main Xcode window will appear as illustrated in Figure 4-4:
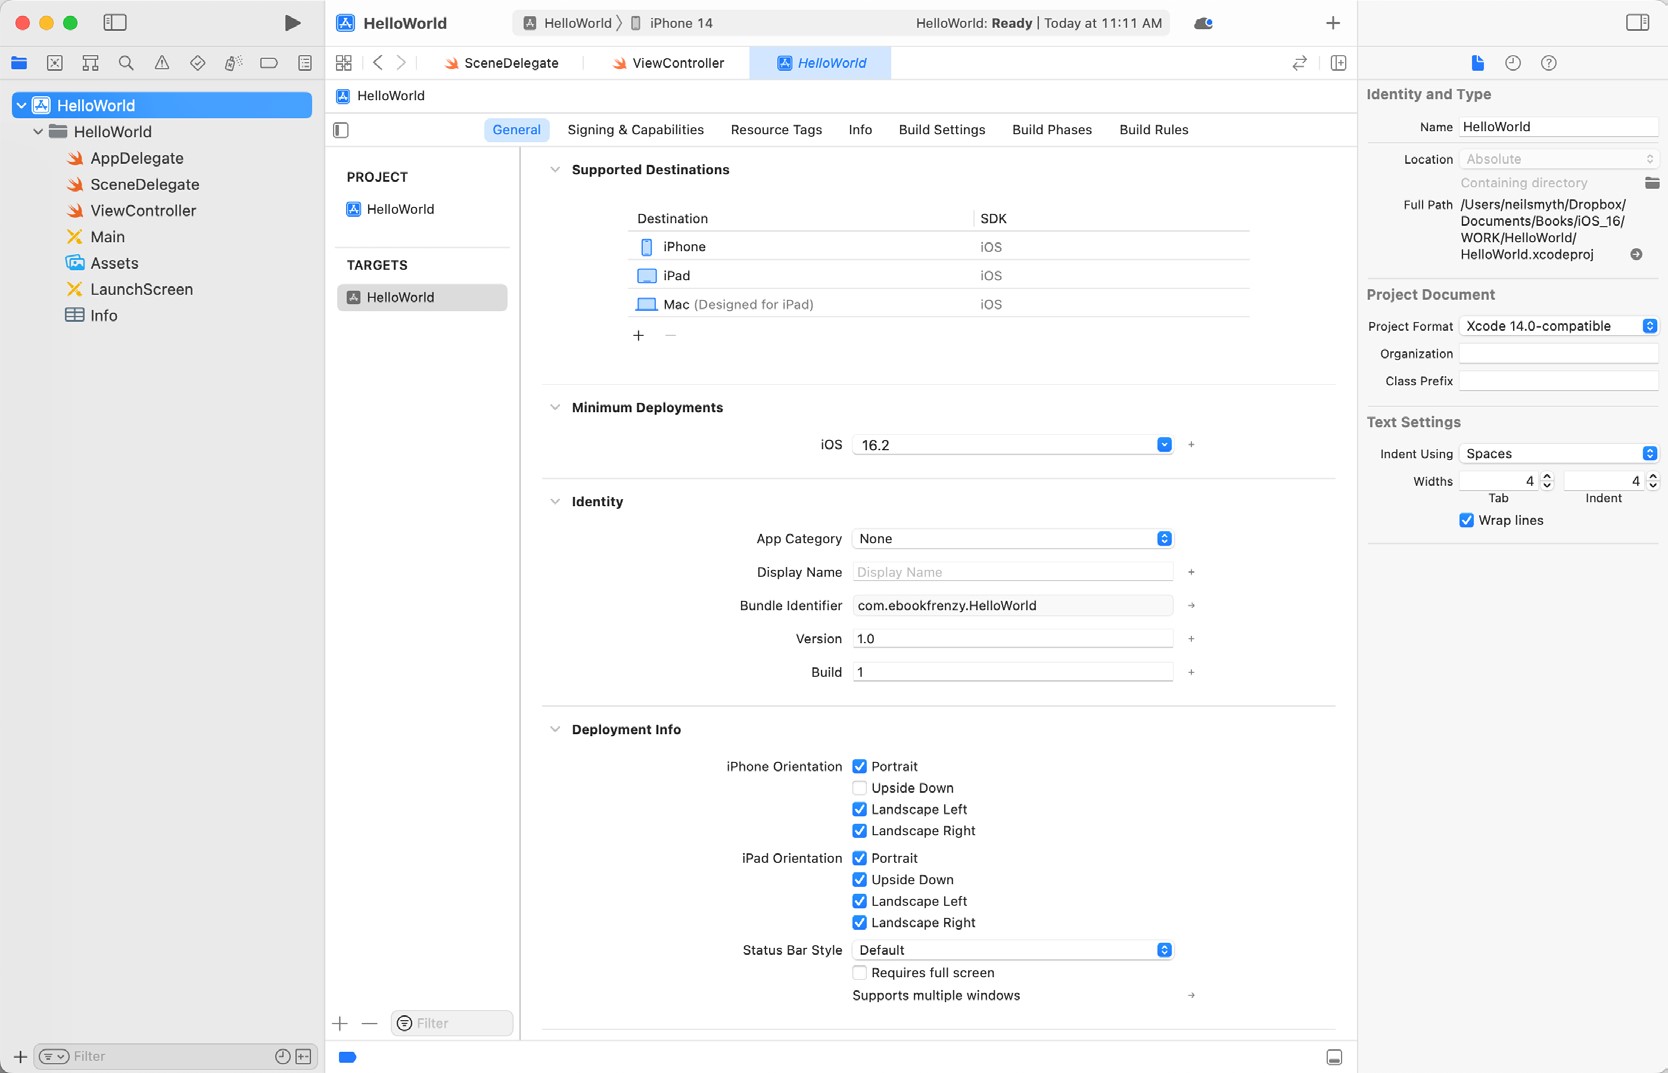
Before proceeding, we should take some time to look at what Xcode has done for us. First, it has created a group of files we will need to complete our app. Some of these are Swift source code files, where we will enter the code to make our app work.
In addition, the Main storyboard file is the save file used by the Interface Builder tool to hold the user interface design we will create. A second Interface Builder file named LaunchScreen will also have been added to the project. This file contains the user interface design for the screen that appears on the device while the app is loading.
Also present will be one or more Property List files that contain key/value pair information. For example, the Info. plist file contains resource settings relating to items such as the language, executable name, and app identifier and, as will be shown in later chapters, is the location where several properties are stored to configure the capabilities of the project (for example, to configure access to the user’s current geographical location). The list of files is displayed in the Project Navigator located in the left-hand panel of the main Xcode project window. In addition, a toolbar at the top of this panel contains options to display other information, such as build and run history, breakpoints, and compilation errors.
By default, the center panel of the window shows a general summary of the settings for the app project. This summary includes the identifier specified during the project creation process and the target devices. In addition, options are also provided to configure the orientations of the device that are to be supported by the app, together with opportunities to upload icons (the small images the user selects on the device screen to launch the app) and launch screen images (displayed to the user while the app loads) for the app.
The Signing section allows selecting an Apple identity when building the app. This identity ensures that the app is signed with a certificate when it is compiled. If you have registered your Apple ID with Xcode using the Preferences screen outlined in the previous chapter, select that identity now using the Team menu. Testing apps on physical devices will not be possible if no team is selected, though the simulator environment may still be used.
The Supported Destinations and Minimum Deployment sections of the screen also include settings to specify the device types and iOS versions on which the completed app is intended to run, as shown in Figure 4-5:
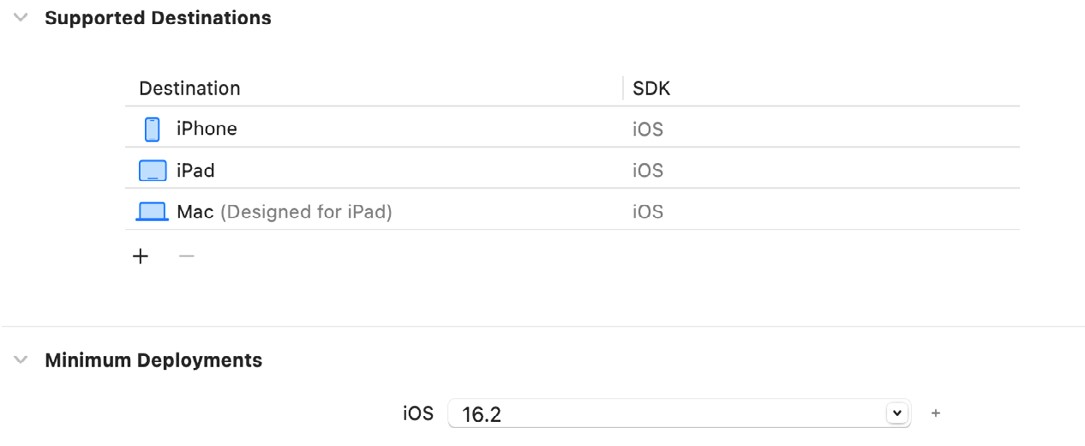
The iOS ecosystem now includes a variety of devices and screen sizes. When developing a project, it is possible to indicate that it is intended to target either the iPhone or iPad family of devices. With the gap between iPad and iPhone screen sizes now reduced by the introduction of the Pro range of devices, it no longer makes sense to create a project that targets just one device family. A much more sensible approach is to create a single project that addresses all device types and screen sizes. As will be shown in later chapters, Xcode 15 and iOS 17 include several features designed specifically to make the goal of universal app projects easy to achieve. With this in mind, ensure that the destination list at least includes the iPhone and iPad.
In addition to the General screen, tabs are provided to view and modify additional settings consisting of Signing & Capabilities, Resource Tags, Info, Build Settings, Build Phases, and Build Rules.
As we progress through subsequent chapters of this book, we will explore some of these other configuration options in greater detail. To return to the project settings panel at any future time, ensure the Project Navigator is selected in the left-hand panel and select the top item (the app name) in the navigator list.
When a source file is selected from the list in the navigator panel, the contents of that file will appear in the center panel, where it may then be edited.
Creating the iOS App User Interface
Simply by the very nature of the environment in which they run, iOS apps are typically visually oriented. Therefore, a vital component of any app involves a user interface through which the user will interact with the app and, in turn, receive feedback. While it is possible to develop user interfaces by writing code to create and position items on the screen, this is a complex and error-prone process. In recognition of this, Apple provides a tool called Interface Builder, which allows a user interface to be visually constructed by dragging and dropping components onto a canvas and setting properties to configure the appearance and behavior of those components.
As mentioned in the preceding section, Xcode pre-created several files for our project, one of which has a .storyboard filename extension. This is an Interface Builder storyboard save file, and the file we are interested in for our HelloWorld project is named Main.storyboard. To load this file into Interface Builder, select the Main item in the list in the left-hand panel. Interface Builder will subsequently appear in the center panel, as shown in Figure 4-6:
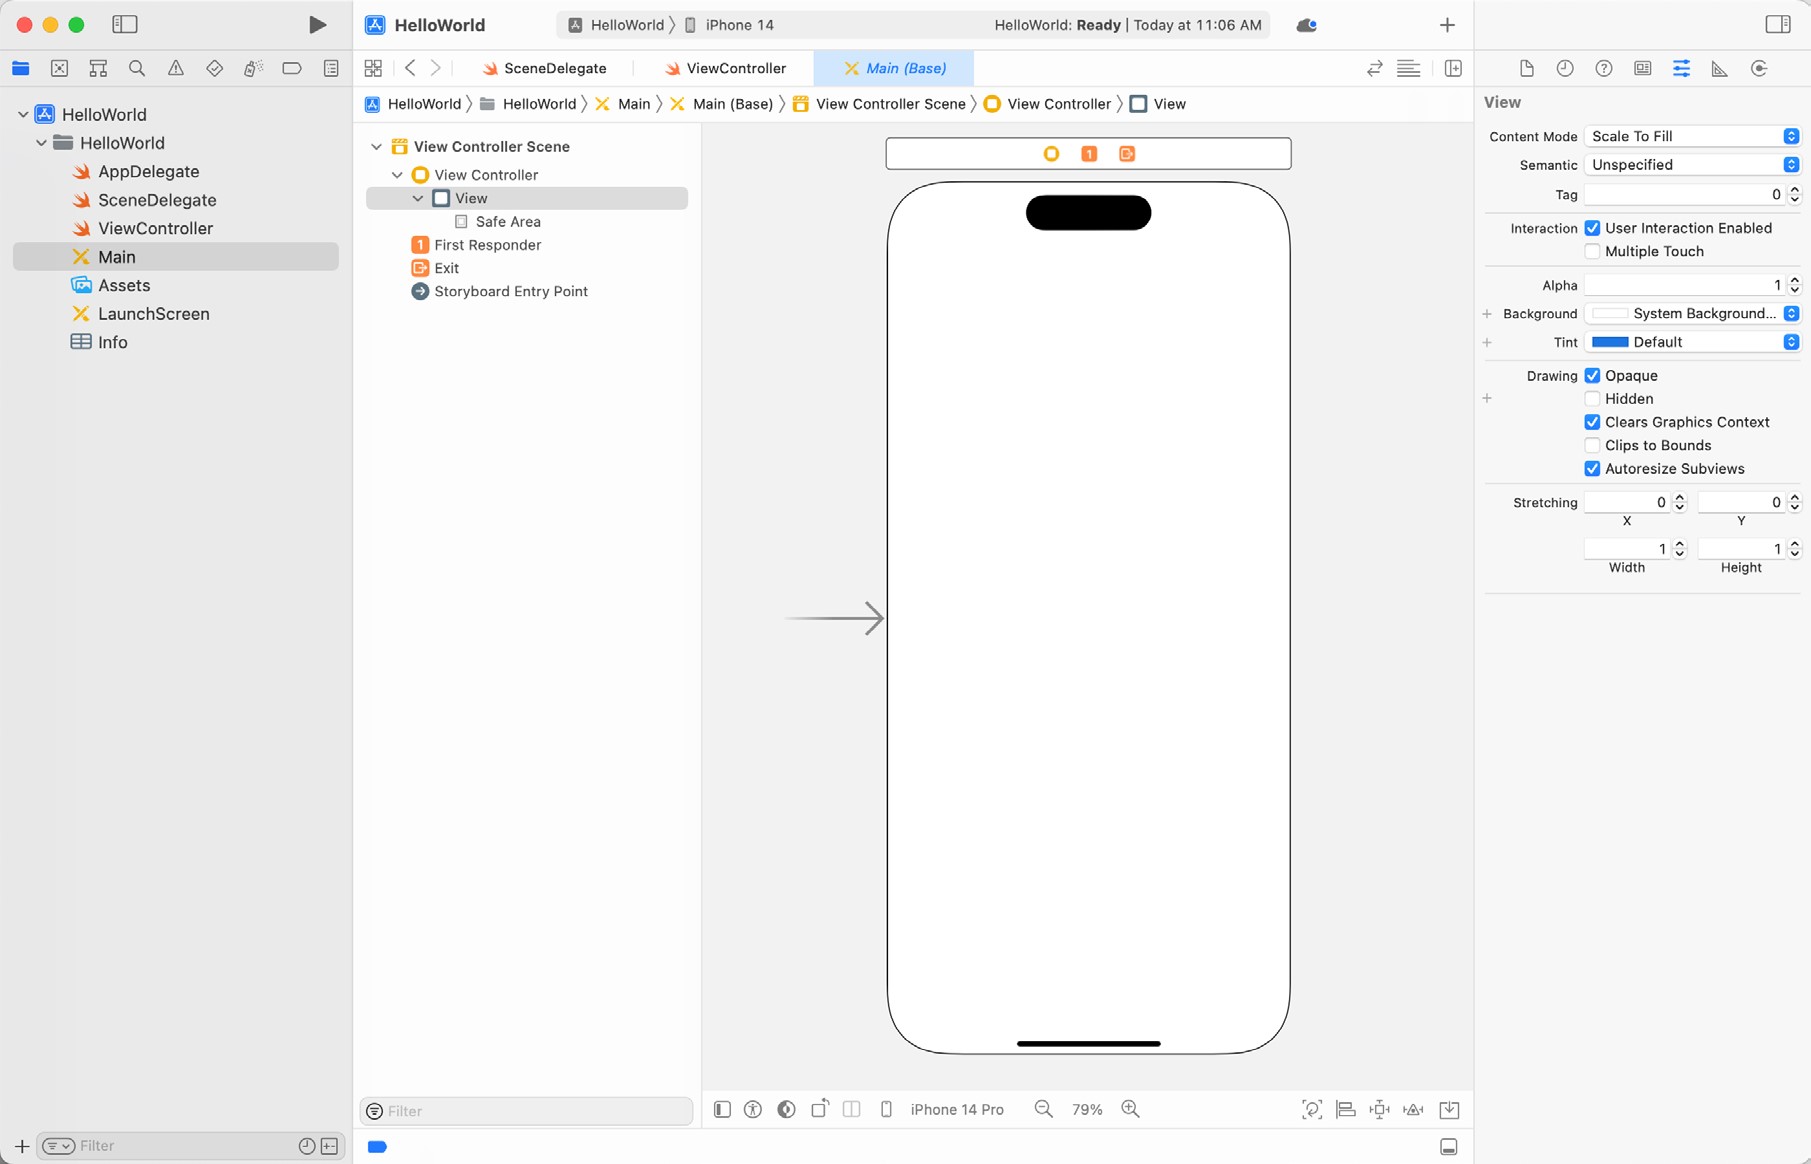
In the center panel, a visual representation of the app’s user interface is displayed. Initially, this consists solely of a View Controller (UIViewController) containing a single View (UIView) object. This layout was added to our design by Xcode when we selected the App template option during the project creation phase. We will construct the user interface for our HelloWorld app by dragging and dropping user interface objects onto this UIView object. Designing a user interface consists primarily of dragging and dropping visual components onto the canvas and setting a range of properties. The user interface components are accessed from the Library panel, which is displayed by clicking on the Library button in the Xcode toolbar, as indicated in Figure 4-7:

This button will display the UI components used to construct our user interface. The layout of the items in the library may also be switched from a single column of objects with descriptions to multiple columns without descriptions by clicking on the button located in the top right-hand corner of the panel and to the right of the search box.
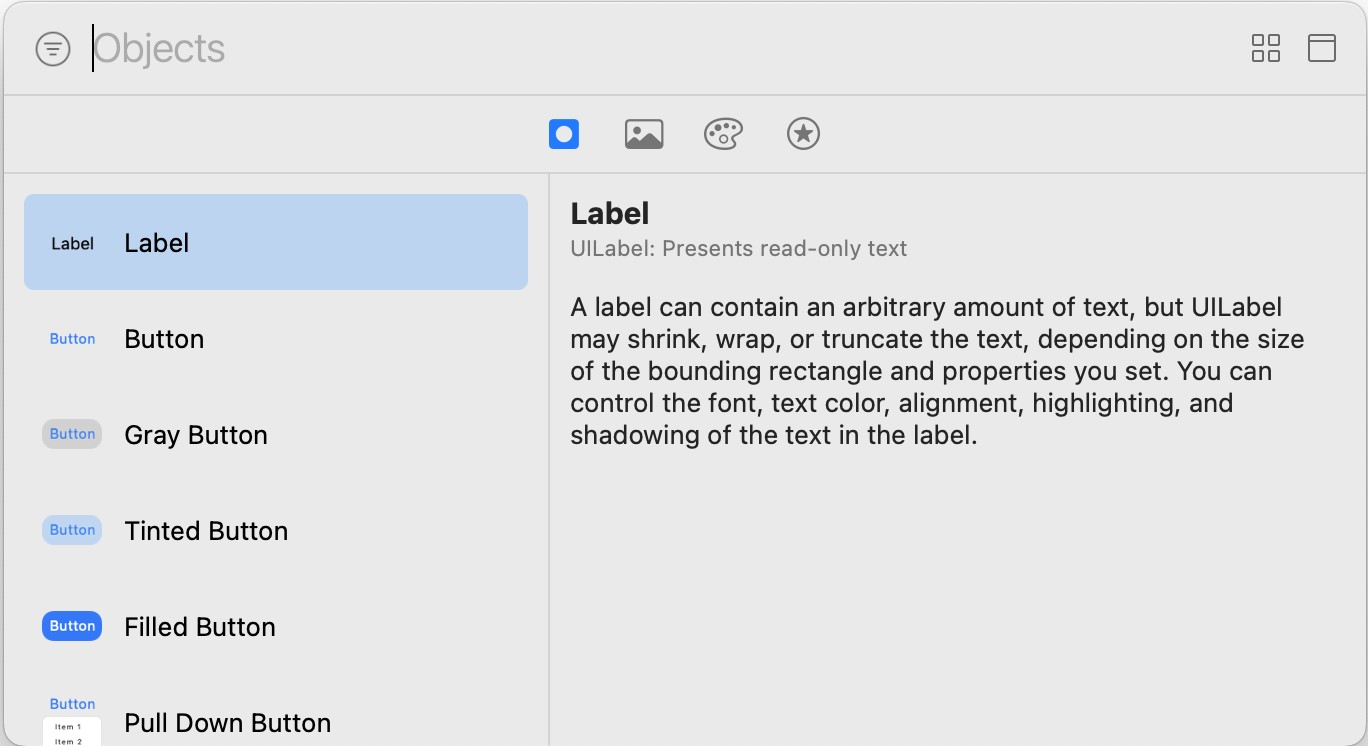
By default, the library panel will disappear either after an item has been dragged onto the layout or a click is performed outside of the panel. Hold the Option key while clicking on the required Library item to keep the panel visible in this mode. Alternatively, displaying the Library panel by clicking on the toolbar button highlighted in Figure 4-7 while holding down the Option key will cause the panel to stay visible until it is manually closed.
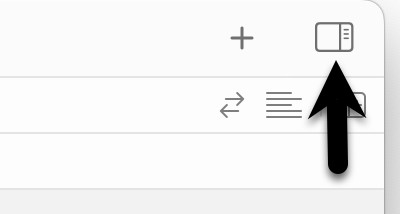
To edit property settings, we need to display the Xcode right-hand panel (if it is not already shown). This panel is referred to as the Utilities panel and can be displayed and hidden by clicking the right-hand button in the Xcode toolbar:
The Utilities panel, once displayed, will appear as illustrated in Figure 4-10:
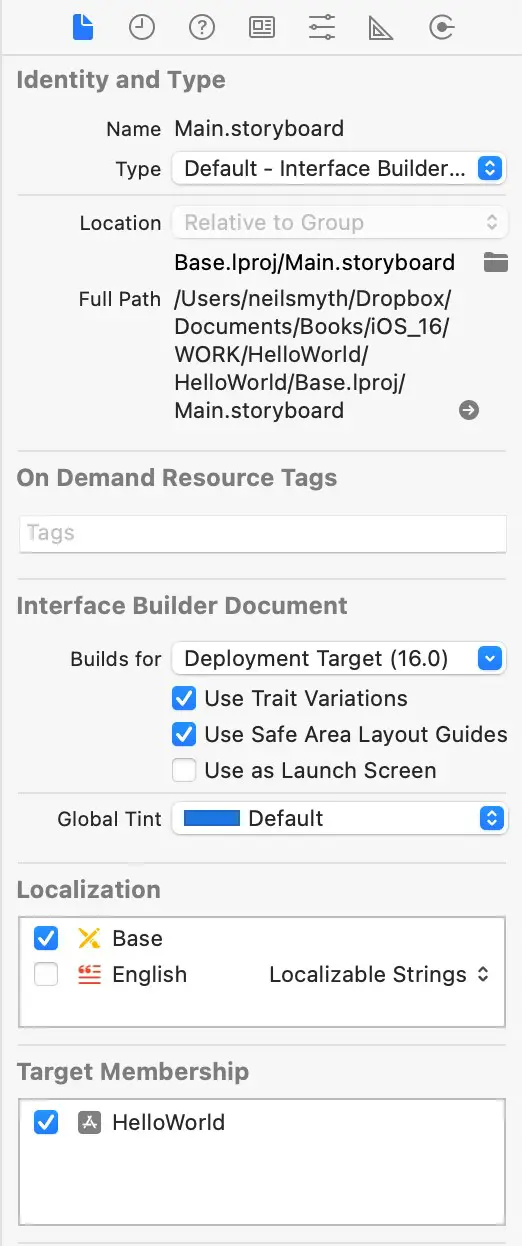
Along the top edge of the panel is a row of buttons that change the settings displayed in the upper half of the panel. By default, the File Inspector is typically shown. Options are also provided to display quick help, the Identity Inspector, History Inspector, Attributes Inspector, Size Inspector, and Connections Inspector. Take some time to review each of these selections to familiarize yourself with the configuration options each provides. Throughout the remainder of this book, extensive use of these inspectors will be made.
Changing Component Properties
With the property panel for the View selected in the main panel, we will begin our design work by changing the background color of this view. Start by ensuring the View is selected and that the Attributes Inspector (View -> Inspectors -> Attributes) is displayed in the Utilities panel. Next, click on the current property setting next to the Background setting and select the Custom option from the popup menu to display the Colors dialog. Finally, choose a visually pleasing color using the color selection tool and close the dialog. You will now notice that the view window has changed from white to the new color selection.
Adding Objects to the User Interface
The next step is to add a Label object to our view. To achieve this, display the Library panel as shown in Figure 4-7 above and either scroll down the list of objects in the Library panel to locate the Label object or, as illustrated in Figure 4-11, enter Label into the search box beneath the panel:
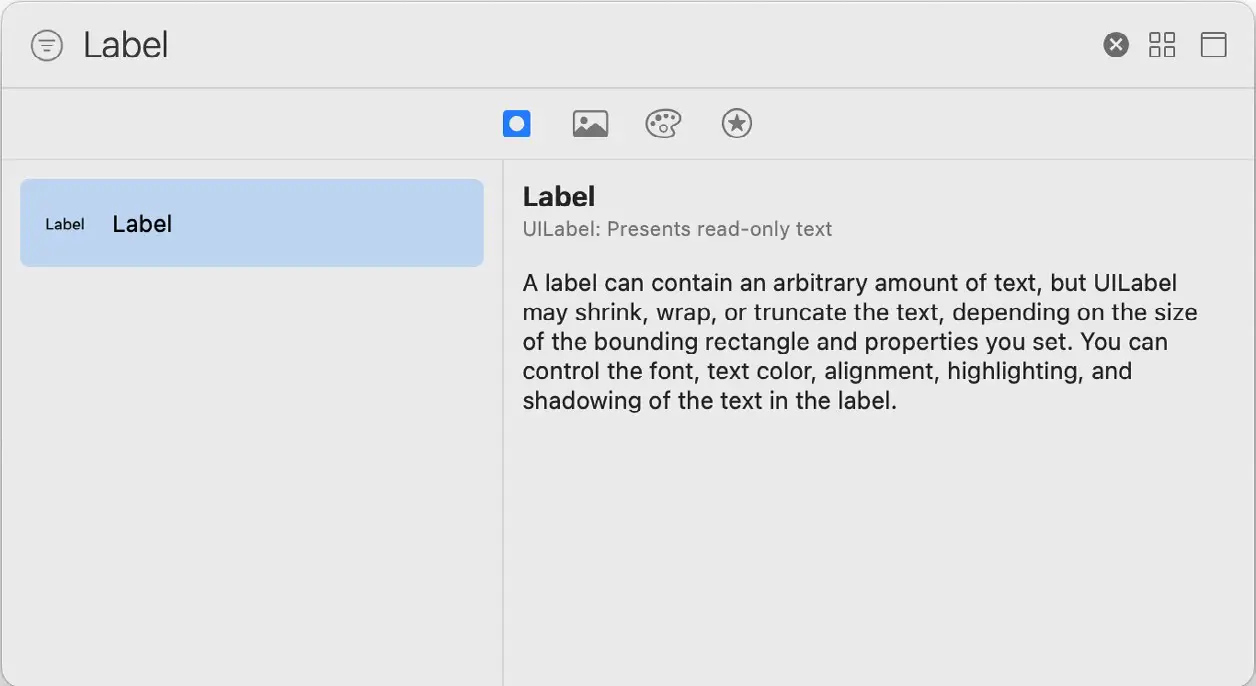
After locating the Label object, click on it and drag it to the center of the view so that the vertical and horizontal center guidelines appear. Once it is in position, release the mouse button to drop it at that location. We have now added an instance of the UILabel class to the scene. Cancel the Library search by clicking on the “x” button on the right-hand edge of the search field. Next, select the newly added label and stretch it horizontally so that it is approximately three times the current width. With the Label still selected, click on the centered alignment button in the Attributes Inspector (View -> Inspectors -> Attributes) to center the text in the middle of the label view:
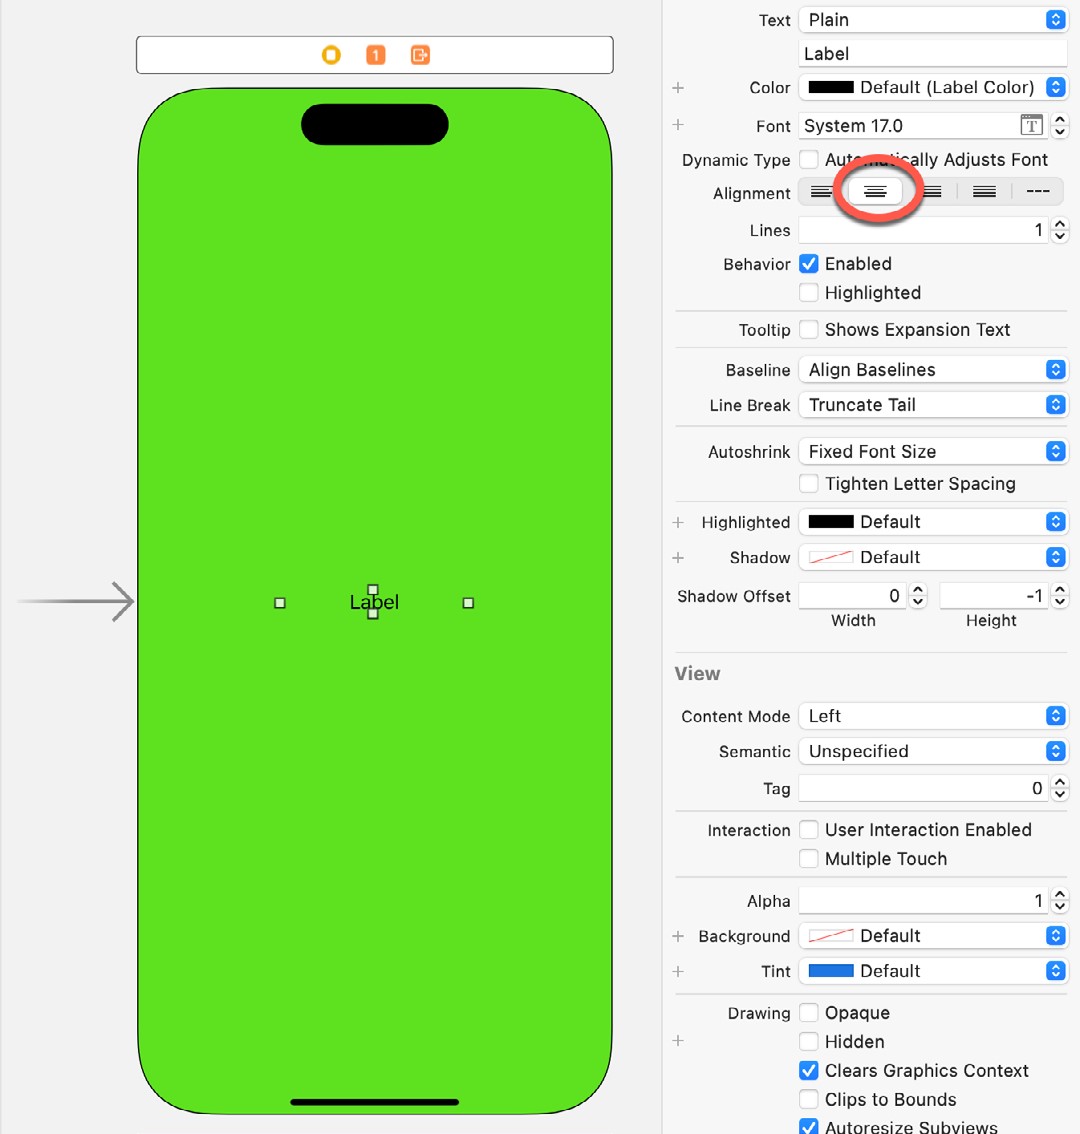
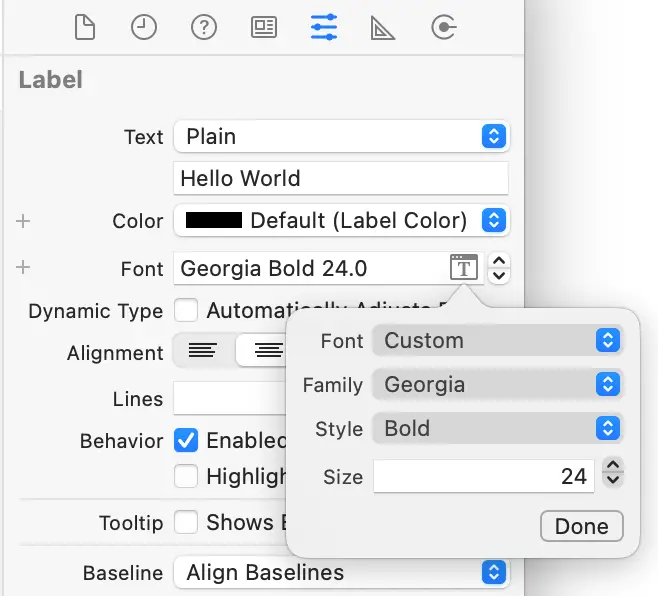
Double-click on the text in the label that currently reads “Label” and type in “Hello World”. Locate the font setting property in the Attributes Inspector panel and click the “T” button to display the font selection menu next to the font name. Change the Font setting from System – System to Custom and choose a larger font setting, for example, a Georgia bold typeface with a size of 24, as shown in Figure 4-13:
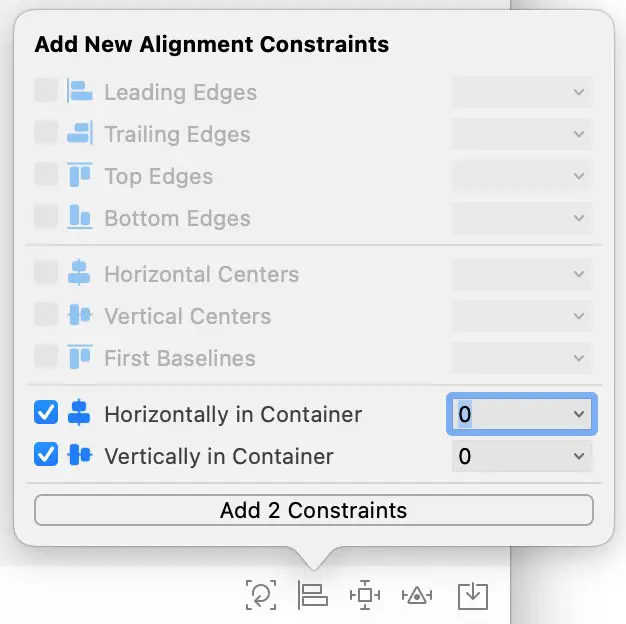
The final step is to add some layout constraints to ensure that the label remains centered within the containing view regardless of the size of the screen on which the app ultimately runs. This involves using the Auto Layout capabilities of iOS, a topic that will be covered extensively in later chapters. For this example, select the Label object, display the Align menu as shown in Figure 4-14, and enable both the Horizontally in Container and Vertically in Container options with offsets of 0 before clicking on the Add 2 Constraints button.
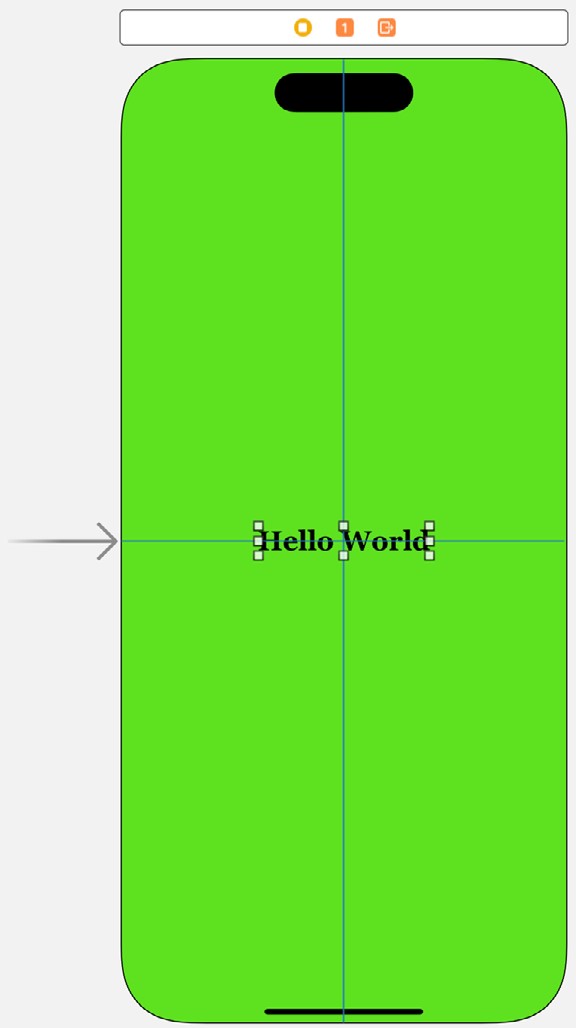
At this point, your View window will hopefully appear as outlined in Figure 4-15 (allowing, of course, for differences in your color and font choices).
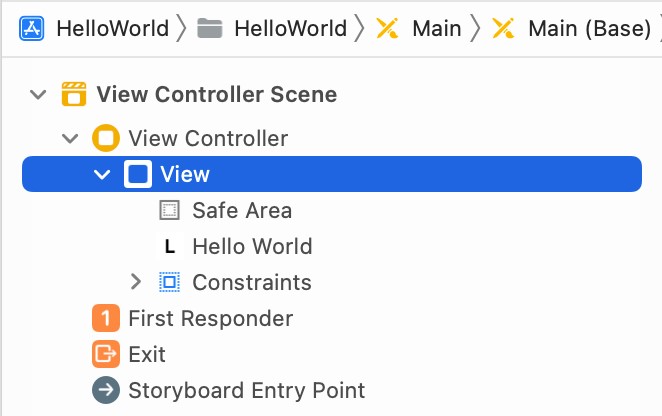
Before building and running the project, it is worth taking a short detour to look at the Xcode Document Outline panel. This panel appears by default to the left of the Interface Builder panel. It is controlled by the small button in the bottom left-hand corner (indicated by the arrow in Figure 4-16) of the Interface Builder panel.

When displayed, the document outline shows a hierarchical overview of the elements that make up a user interface layout, together with any constraints applied to views in the layout.
Building and Running an iOS App in Xcode
Before an app can be run, it must first be compiled. Once successfully compiled, it may be run either within a simulator or on a physical iPhone or iPad device. For this chapter, however, it is sufficient to run the app in the simulator.
Within the main Xcode project window, make sure that the menu located in the top left-hand corner of the window (marked C in Figure 4-18) has the iPhone 14 simulator option selected:

Click on the Run toolbar button (A) to compile the code and run the app in the simulator. The small panel in the center of the Xcode toolbar (D) will report the progress of the build process together with any problems or errors that cause the build process to fail. Once the app is built, the simulator will start, and the HelloWorld app will run:
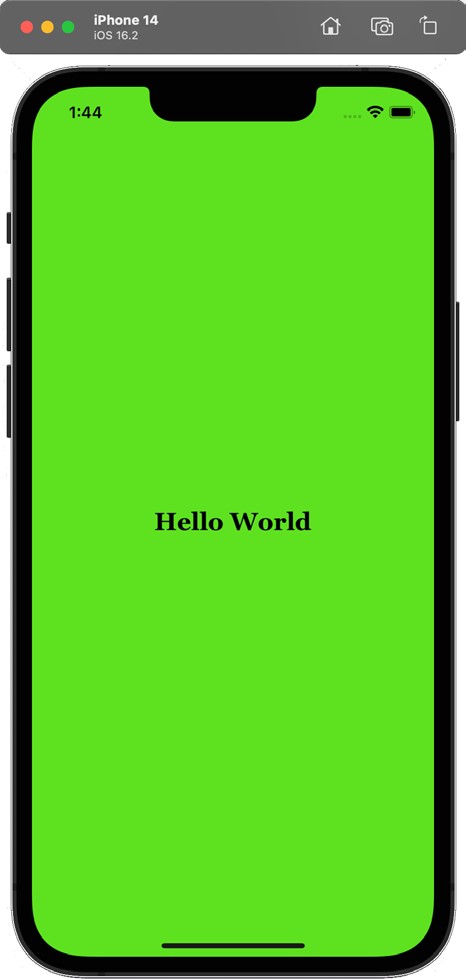
Note that the user interface appears as designed in the Interface Builder tool. Click on the stop button (B), change the target menu from iPhone 14 to iPad Air 2, and rerun the app. Once again, the label will appear centered on the screen even with the larger screen size. Finally, verify that the layout is correct in landscape orientation by using the Device -> Rotate Left menu option. This indicates that the Auto Layout constraints are working and that we have designed a universal user interface for the project.
Running the App on a Physical iOS Device
Although the Simulator environment provides a valuable way to test an app on various iOS device models, it is important to also test on a physical iOS device.
If you have entered your Apple ID in the Xcode preferences screen as outlined in the previous chapter and selected a development team for the project, it is possible to run the app on a physical device simply by connecting it to the development Mac system with a USB cable and selecting it as the run target within Xcode.
With a device connected to the development system and an app ready for testing, refer to the device menu in the Xcode toolbar. There is a reasonable chance that this will have defaulted to one of the iOS Simulator configurations. Switch to the physical device by selecting this menu and changing it to the device name, as shown in Figure 4-20:
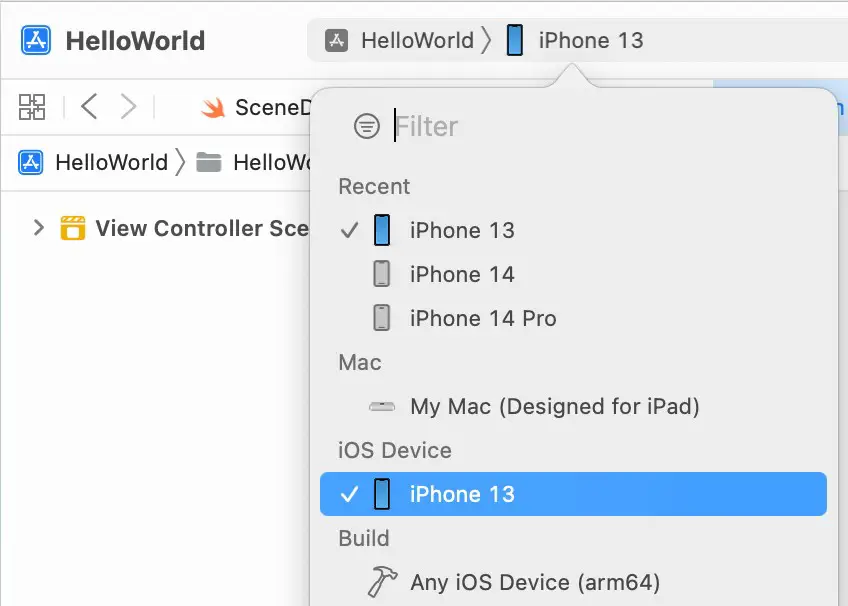
If the menu indicates that developer mode is disabled on the device, navigate to the Privacy & Security screen in the device’s Settings app, locate the Developer Mode setting, and enable it. You will then need to restart the device. After the device restarts, a dialog will appear in which you will need to turn on developer mode. After entering your security code, the device will be ready for use with Xcode.
With the target device selected, ensure the device is unlocked and click on the run button, at which point Xcode will install and launch the app. As will be discussed later in this chapter, a physical device may also be configured for network testing, whereby apps are installed and tested via a network connection without needing to have the device connected by a USB cable.
Managing Devices and Simulators
Currently connected iOS devices and the simulators configured for use with Xcode can be viewed and managed using the Xcode Devices window, accessed via the Window -> Devices and Simulators menu option. Figure 4-21, for example, shows a typical Device screen on a system where an iPhone has been detected:
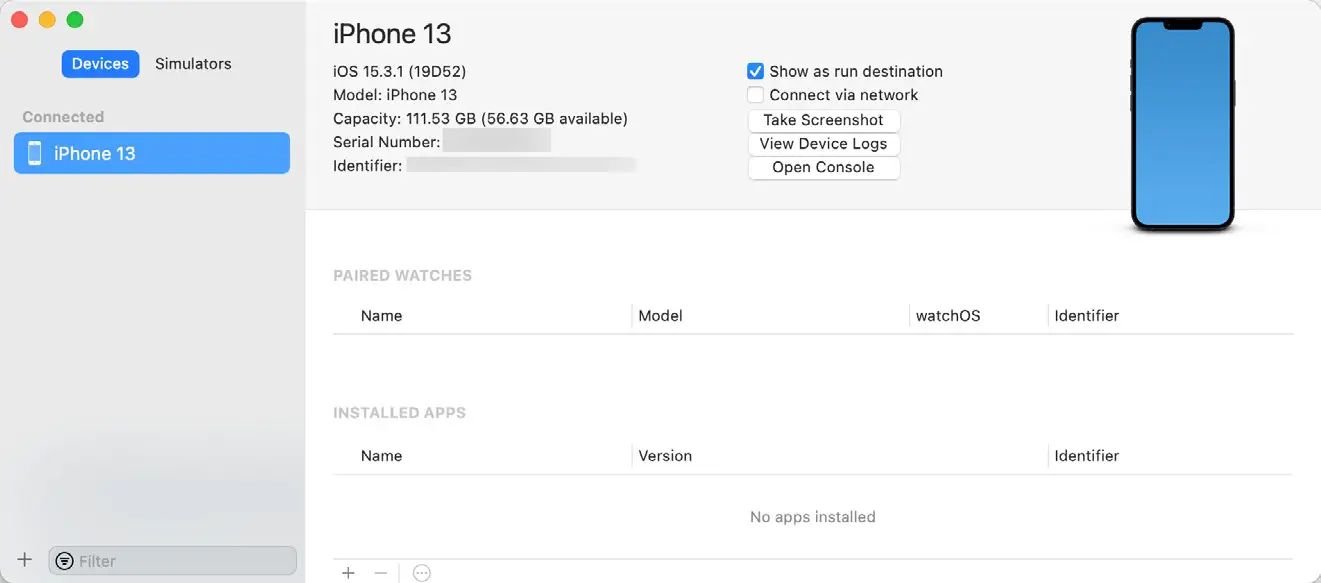
A wide range of simulator configurations are set up within Xcode by default and can be viewed by selecting the Simulators button at the top of the left-hand panel. Other simulator configurations can be added by clicking on the + button in the window’s bottom left-hand corner. Once selected, a dialog will appear allowing the simulator to be configured in terms of the device model, iOS version, and name.
Enabling Network Testing
In addition to testing an app on a physical device connected to the development system via a USB cable, Xcode also supports testing via a network connection. This option is enabled on a per device basis within the Devices and Simulators dialog introduced in the previous section. With the device connected via the USB cable, display this dialog, select the device from the list, and enable the Connect via network option as highlighted in Figure 4-22:
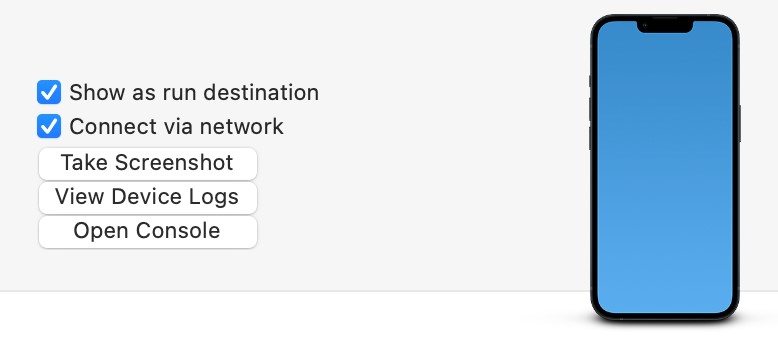
Once the setting has been enabled, the device may continue to be used as the run target for the app even when the USB cable is disconnected. The only requirement is that the device and development computer be connected to the same WiFi network. Assuming this requirement has been met, clicking the run button with the device selected in the run menu will install and launch the app over the network connection.
Dealing with Build Errors
If for any reason, a build fails, the status window in the Xcode toolbar will report that an error has been detected by displaying “Build” together with the number of errors detected and any warnings. In addition, the left-hand panel of the Xcode window will update with a list of the errors. Selecting an error from this list will take you to the location in the code where corrective action needs to be taken.
Monitoring Application Performance
Another useful feature of Xcode is the ability to monitor the performance of an application while it is running, either on a device or simulator or within the Live Preview canvas. This information is accessed by displaying the Debug Navigator.
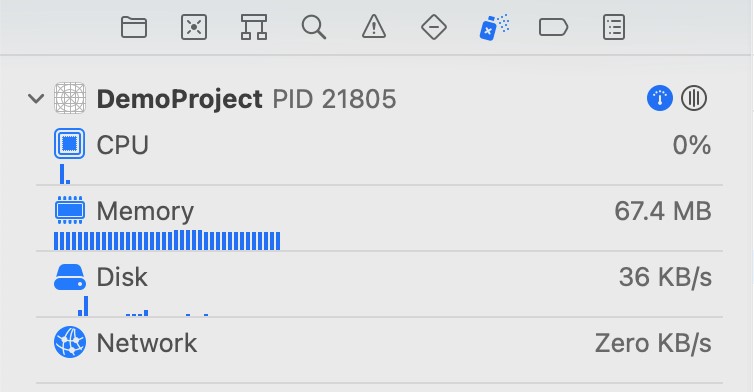
When Xcode is launched, the project navigator is displayed in the left-hand panel by default. Along the top of this panel is a bar with various other options. The seventh option from the left displays the debug navigator when selected, as illustrated in Figure 4-23. When displayed, this panel shows real-time statistics relating to the performance of the currently running application, such as memory, CPU usage, disk access, energy efficiency, network activity, and iCloud storage access.
When one of these categories is selected, the main panel (Figure 4-24) updates to provide additional information about that particular aspect of the application’s performance:
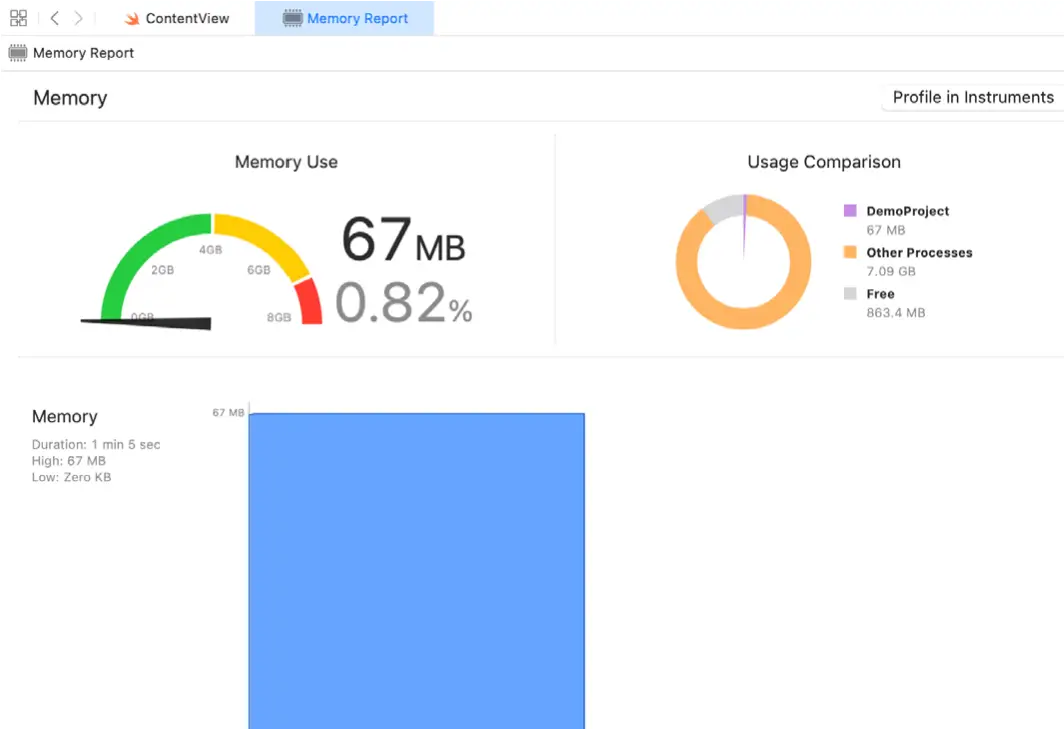
Yet more information can be obtained by clicking on the Profile in Instruments button in the top right-hand corner of the panel.
Exploring the User Interface Layout Hierarchy
Xcode also provides an option to break the user interface layout out into a rotatable 3D view that shows how the view hierarchy for a user interface is constructed. This can be particularly useful for identifying situations where one view instance is obscured by another appearing on top of it, or a layout is not appearing as intended. This is also useful for learning how SwiftUI works behind the scenes to construct a SwiftUI layout if only to appreciate how much work SwiftUI is saving us from having to do.
To access the view hierarchy in this mode, the app needs to be running on a device or simulator. Once the app is running, click on the Debug View Hierarchy button indicated in Figure 4-25:

Once activated, a 3D “exploded” view of the layout will appear. Clicking and dragging within the view will rotate the hierarchy allowing the layers of views that make up the user interface to be inspected:
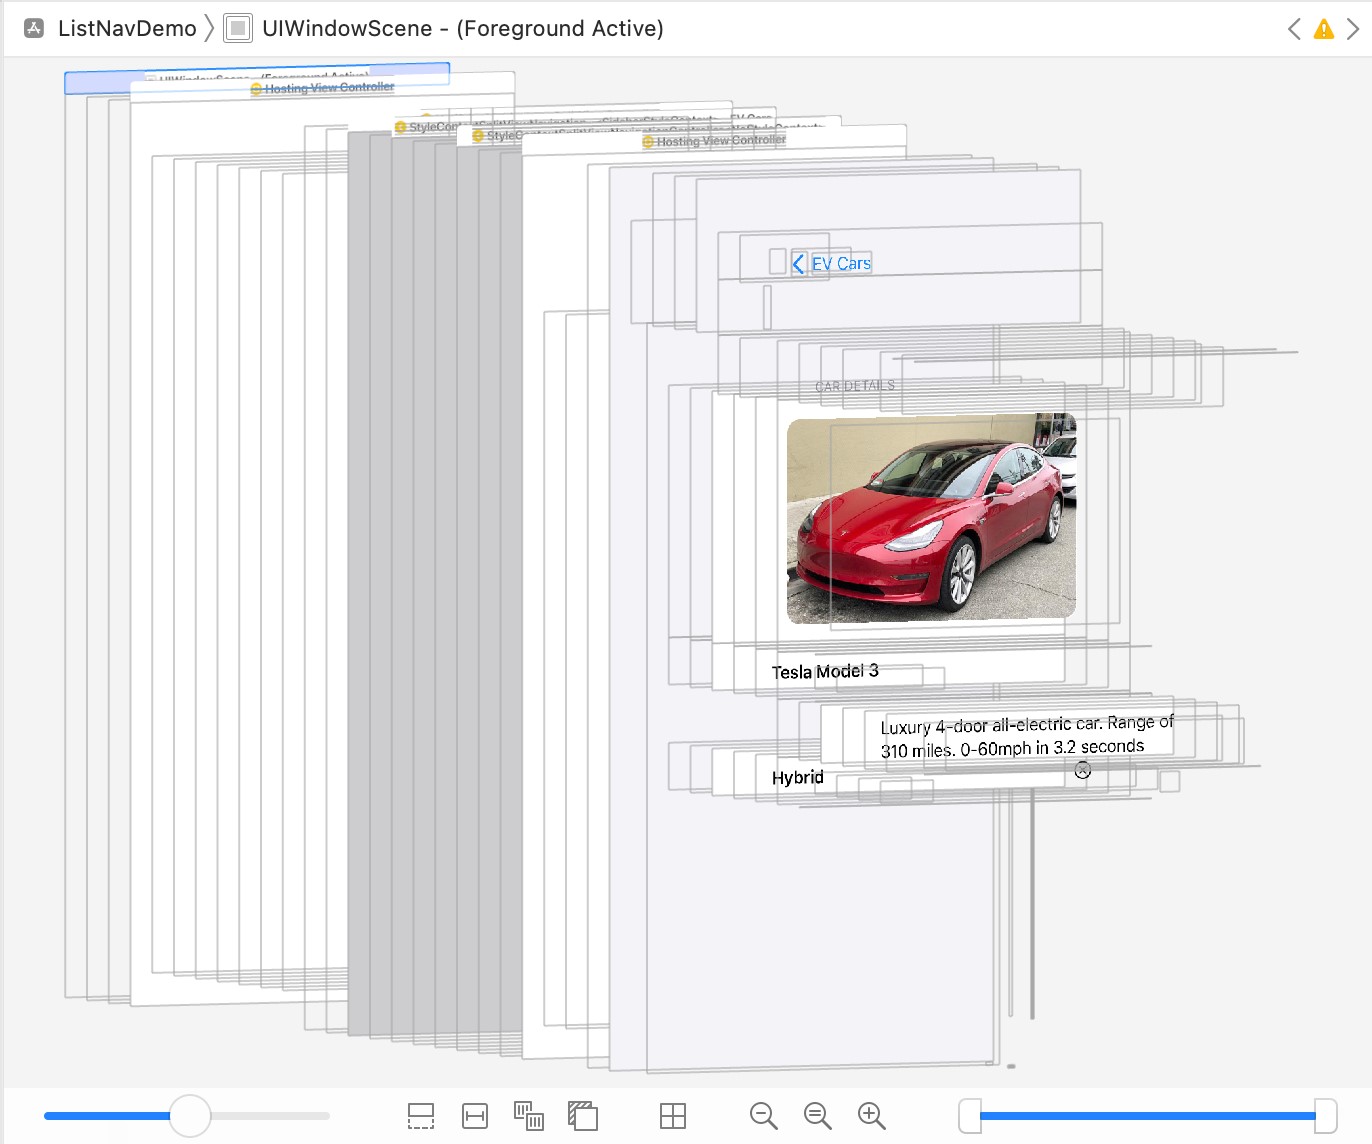
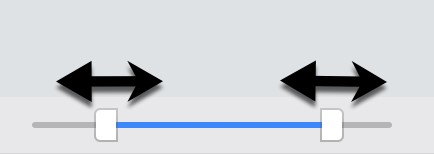
Moving the slider in the bottom left-hand corner of the panel will adjust the spacing between the different views in the hierarchy. The two markers in the right-hand slider (Figure 4-27) may also be used to narrow the range of views visible in the rendering. This can be useful, for example, to focus on a subset of views located in the middle of the hierarchy tree:
While the hierarchy is being debugged, the left-hand panel will display the entire view hierarchy tree for the layout as shown in Figure 4-28 below:
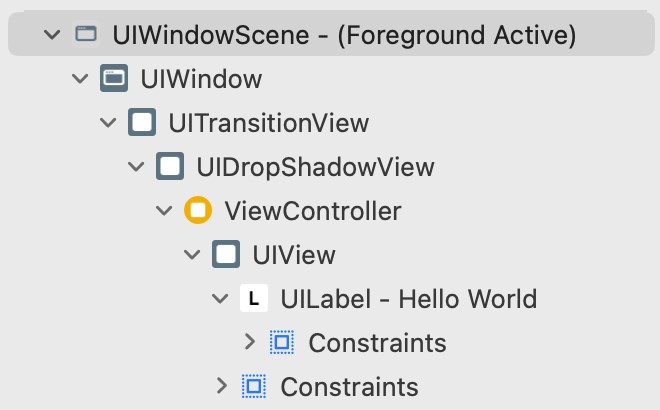
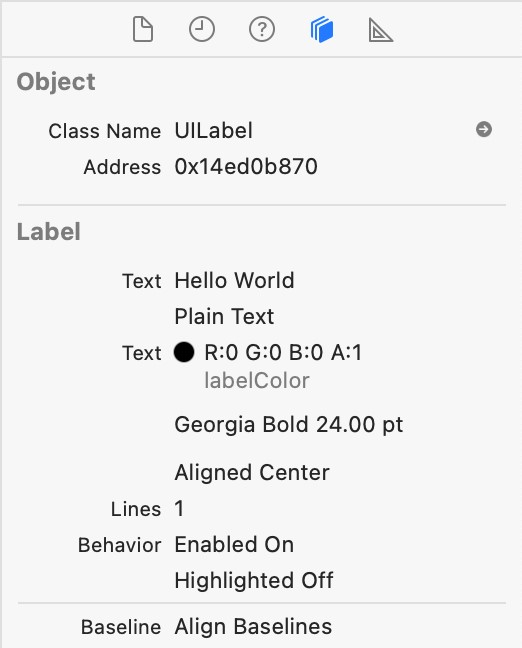
Selecting an object in the hierarchy tree will highlight the corresponding item in the 3D rendering and vice versa. The far right-hand panel will also display the Object Inspector populated with information about the currently selected object. Figure 4-29, for example, shows part of the Object Inspector panel while a Label view is selected within the view hierarchy.
Summary
Apps are primarily created within the Xcode development environment. This chapter has provided a basic overview of the Xcode environment and worked through creating a straightforward example app. Finally, a brief overview was provided of some of the performance monitoring features in Xcode 15. In subsequent chapters of the book, many more features and capabilities of Xcode and Interface Builder will be covered.

