
iOS apps are developed using the iOS SDK and Apple’s Xcode development environment. Xcode is an integrated development environment (IDE) within which you will code, compile, test and debug your iOS applications.
All of the examples in this book are based on Xcode version 15 and use features unavailable in earlier Xcode versions. This chapter will cover the steps involved in installing Xcode 15 and the iOS 17 SDK on macOS.
Identifying Your macOS Version
When developing with SwiftUI, the Xcode 15 environment requires a system running macOS Ventura 13.5 or later. If you are unsure of the version of macOS on your Mac, you can find this information by clicking on the Apple menu in the top left-hand corner of the screen and selecting the About This Mac option from the menu. In the resulting dialog, check the macOS line:
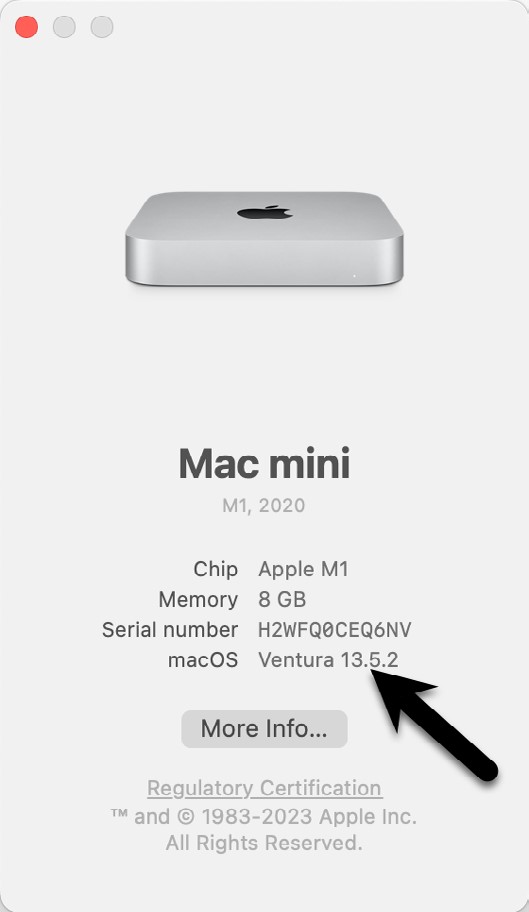
If the “About This Mac” dialog does not indicate that macOS 13.5 or later is running, click on the Software Update… button to download and install the appropriate operating system upgrades.
Installing Xcode 15 and the iOS 17 SDK
The best way to obtain the latest Xcode and iOS SDK versions is to download them from the Apple Mac App Store. Launch the App Store on your macOS system, enter Xcode into the search box and click on the Get button to initiate the installation. This will install both Xcode and the iOS SDK.
 |
You are reading a sample chapter from an old edition of iOS App Development Essentials. Purchase the fully updated iOS 18 App Development Essentials book. The full book contains 71 chapters, over 612 pages of in-depth information, downloadable source code, and access to over 50 SwiftUI knowledge test quizzes. |
Starting Xcode
Having successfully installed the SDK and Xcode, the next step is to launch it so we are ready to start development work. To start up Xcode, open the macOS Finder and search for Xcode. Since you will be frequently using this tool, take this opportunity to drag and drop it onto your dock for easier access in the future. Click on the Xcode icon in the dock to launch the tool. The first time Xcode runs you may be prompted to install additional components. Follow these steps, entering your username and password when prompted.
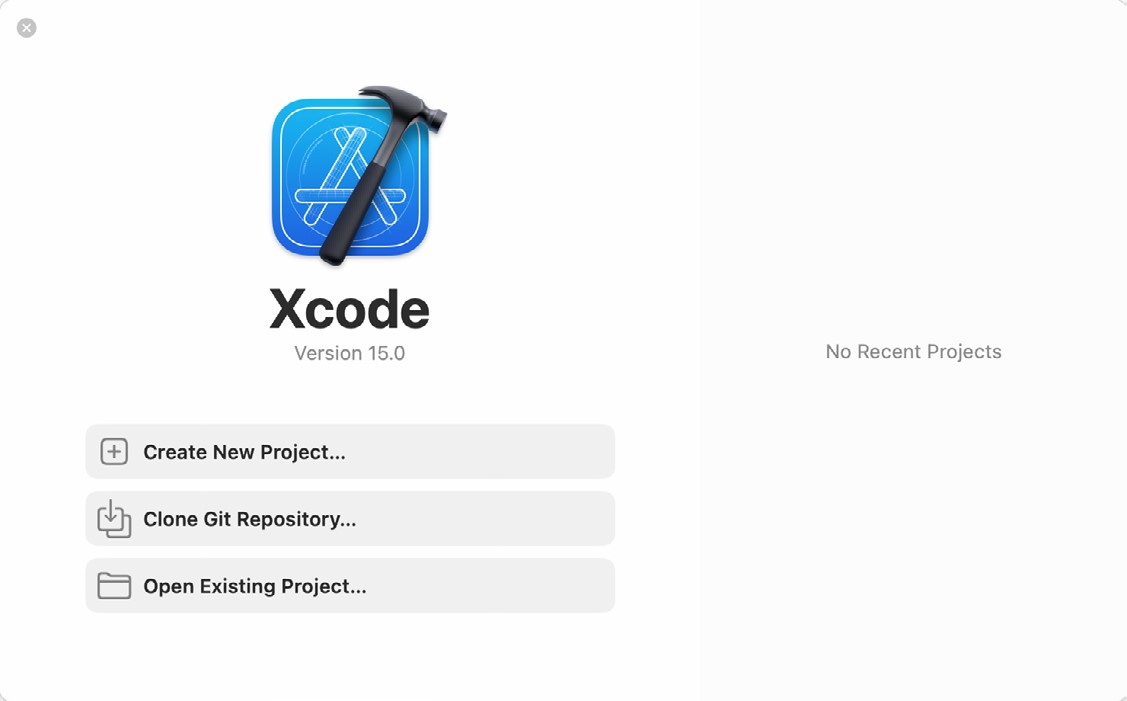
Once Xcode has loaded, and assuming this is the first time you have used Xcode on this system, you will be presented with the Welcome screen from which you are ready to proceed:
Adding Your Apple ID to the Xcode Preferences
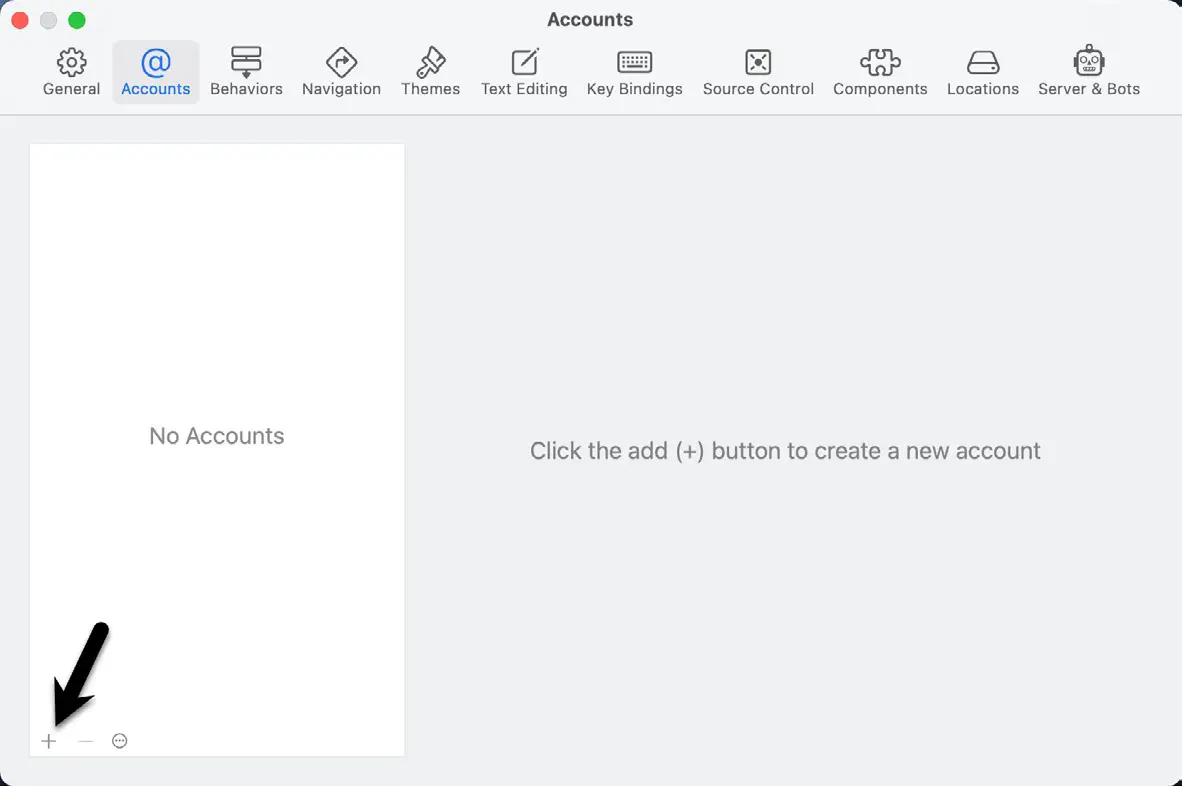
Whether or not you enroll in the Apple Developer Program, it is worth adding your Apple ID to Xcode now that it is installed and running. Select the Xcode -> Settings… menu option followed by the Accounts tab. On the Accounts screen, click on the + button highlighted in Figure 3-3, select Apple ID from the resulting panel and click on the Continue button. When prompted, enter your Apple ID and password before clicking on the Sign In button to add the account to the preferences.
Developer and Distribution Signing Identities
Once the Apple ID has been entered the next step is to generate signing identities. To view the current signing identities, select the newly added Apple ID in the Accounts panel and click on the Manage Certificates… button to display a list of available signing identity types. To create a signing identity, simply click on the + button highlighted in Figure 3-4 and make the appropriate selection from the menu:
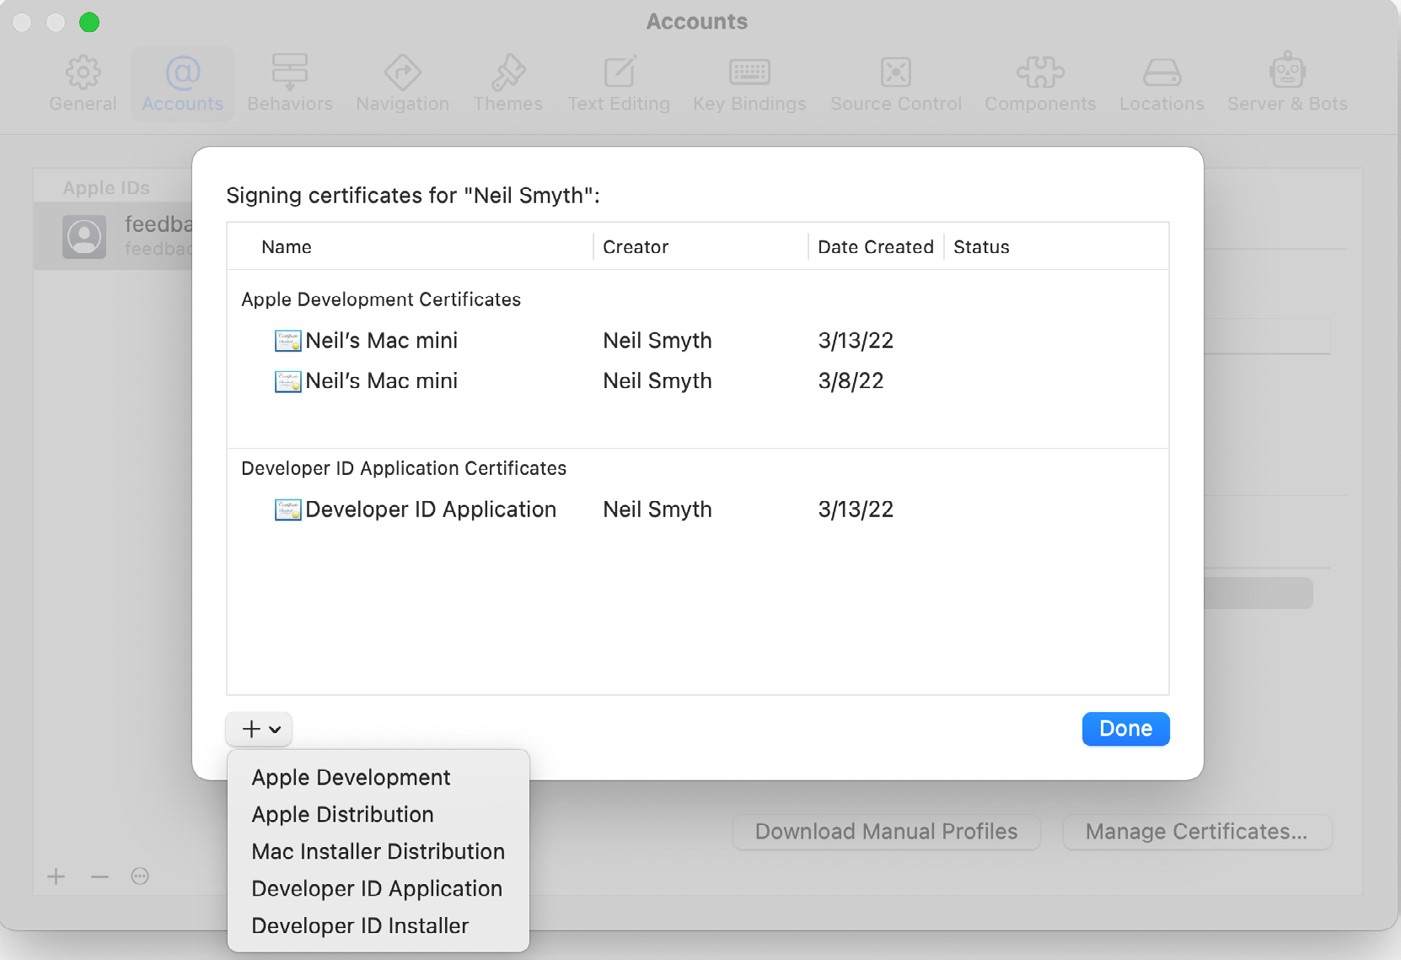
If the Apple ID has been used to enroll in the Apple Developer program, the option to create an Apple Distribution certificate will appear in the menu which will, when clicked, generate the signing identity required to submit the app to the Apple App Store. You will also need to create a Developer ID Application certificate if you plan to integrate features such as iCloud and Siri into your app projects. If you have not yet signed up for the Apple Developer program, select the Apple Development option to allow apps to be tested during development.
|
You are reading a sample chapter from an old edition of iOS App Development Essentials. Purchase the fully updated iOS 18 App Development Essentials book. The full book contains 71 chapters, over 612 pages of in-depth information, downloadable source code, and access to over 50 SwiftUI knowledge test quizzes. |
Summary
This book was written using Xcode 15 and the iOS 17 SDK running on macOS 13.5.2 (Ventura). Before beginning SwiftUI development, the first step is to install Xcode and configure it with your Apple ID via the accounts section of the Preferences screen. Once these steps have been performed, a development certificate must be generated which will be used to sign apps developed within Xcode. This will allow you to build and test your apps on physical iOS-based devices.
When you are ready to upload your finished app to the App Store, you will also need to generate a distribution certificate, a process requiring membership in the Apple Developer Program as outlined in the previous chapter.
Having installed the iOS SDK and successfully launched Xcode 15, we can now look at Xcode in more detail, starting with Playgrounds.