There are now three ways in which an Ubuntu system can be deployed. One method is to either purchase new hardware or re-purpose an existing computer system on which to install and run the operating system. Alternatively, a virtualization platform such as VirtualBox or VMware can be used to install and run Ubuntu inside a virtual machine on an existing operating system. Another option is to create a cloud-based operating system instance using services such as Amazon AWS, Google Cloud, or Microsoft Azure (to name but a few). Since cloud-based instances are typically created by selecting a pre-configured, ready-to-run operating system image that is already optimized for the cloud platform and using that as the basis for the Ubuntu system, there is no need to perform a manual operating system installation in this situation.
If, on the other hand, you plan to install Ubuntu on your own hardware or make use of a virtualization environment, the first step on the path to learning about Ubuntu involves installing the operating system.
Ubuntu can be installed either in a clean disk environment (where an entire disk is cleared of any existing partitions and dedicated entirely to Ubuntu) or in a dual boot environment where Ubuntu co-exists with another operating system on the disk (typically a member of the Microsoft Windows family of operating systems).
In this chapter, we will cover the clean disk approach to installation from local or remote installation media. Dual boot installation with a Windows 10 system will be covered in Dual Booting Ubuntu 22.04 with Windows.
Ubuntu Installation Options
Ubuntu can be downloaded free of charge from the following web page:
 |
You are reading a sample chapter from Ubuntu 22.04 Essentials. Buy the full book now in eBook ($24.99) format. Includes 36 chapters. Learn more. |
This page provides a number of download options depending on how the operating system is to be installed and used:
- Ubuntu Desktop – Downloads the installation media for the desktop edition of the operating system. This edition is intended for use on desktop and laptop systems where a graphical desktop environment is needed and is only available for 64-bit x86 systems. The desktop edition can be downloaded in the form of an ISO image which you can then write to a USB drive using the steps outlined later in this chapter. When booted, the desktop media will allow you to test out Ubuntu by running a Live Ubuntu session prior to performing the installation.
- Ubuntu Server – Downloads the Live Server ISO installation media for the server edition of the operating system. This image is intended for performing an installation on servers on which the graphical desktop environment is not required and is available for x86, ARM, IBM POWER (PowerPC), and s390x (IBM System z mainframe) systems. The installation media does not include the option to try Ubuntu before installing and uses the text-based installer instead of the graphical installer used for Ubuntu Desktop. This allows Ubuntu to be installed on systems without a graphical console.
The Ubuntu Server image may also be used to perform Preboot Execution Environment (PXE) network installations. When using PXE to install Ubuntu, the Ubuntu image is installed on a specially configured server (referred to as a PXE boot server). The client system on which Ubuntu is to be installed is then configured to boot over the network from the image on the PXE boot server (assuming the client hardware supports PXE) to initiate the installation.
Server vs. Desktop Editions
Clearly, a decision between the Desktop and the Server Edition images needs to be made before installation can begin. If you would like to try Ubuntu before installing it, then the Desktop option is the best solution since it allows you to boot Ubuntu from the installation media without first installing it on a disk drive. This option also allows the installation to be initiated from within the live session.
If the graphical desktop environment is not required, and the destination system does not have internet access or a graphical console, then the Live Server ISO image is recommended since this allows a fully functional server to be built without the need to download any additional packages.
|
You are reading a sample chapter from Ubuntu 22.04 Essentials. Buy the full book now in eBook ($24.99) format. Includes 36 chapters. Learn more. |
Regardless of the chosen installation method, packages can be added to and removed from the system after installation to configure the system to specific needs.
Obtaining the Ubuntu Installation Media
For the purposes of this chapter, the Ubuntu Desktop environment will be installed using the graphical installer. Begin, therefore, by downloading the Ubuntu Desktop 22.04 ISO image from the following URL:
https://ubuntu.com/download/desktop
The DVD ISO image is self-contained, including all of the packages necessary to install an Ubuntu system, and is named using the following convention:
ubuntu-<version>-<edition>-<architecture>.isoCode language: plaintext (plaintext)For example, the Ubuntu 20.10 Desktop ISO image for 64-bit Intel/AMD systems is named as follows:
|
You are reading a sample chapter from Ubuntu 22.04 Essentials. Buy the full book now in eBook ($24.99) format. Includes 36 chapters. Learn more. |
ubuntu-20.10-desktop-amd64.isoCode language: plaintext (plaintext)Having downloaded the image, either burn it to disk or use the steps in the next section to write the media to a USB drive and configure your virtualization environment to treat it as a DVD drive.
Writing the ISO Installation Image to a USB Drive
These days it is more likely that an operating system installation will be performed from a USB drive than from a DVD. Having downloaded the ISO installation image for Ubuntu, the steps to write that image to a USB drive will differ depending on whether the drive is attached to a Linux, macOS, or Windows system. The steps outlined in the remainder of this section assume that the USB drive is new or has been reformatted to remove any existing data or partitions:
Linux
The first step in writing an ISO image to a USB drive on Linux is identifying the device name. Before inserting the USB drive, identify the storage devices already detected on the system by listing the devices in /dev as follows:
# ls /dev/sd*
/dev/sda  /dev/sda1  /dev/sda2Code language: PHP (php)
Attach the USB drive to the Linux system and run the dmesg command to get a list of recent system messages, one of which will be a report that the USB drive was detected and will be similar to the following:
[445597.988045] sd 6:0:0:0: [sdb] Attached SCSI removable diskCode language: plaintext (plaintext)This output tells us that we should expect the device name to include “sdb” which we can confirm by listing device names in /dev again:
|
You are reading a sample chapter from Ubuntu 22.04 Essentials. Buy the full book now in eBook ($24.99) format. Includes 36 chapters. Learn more. |
# ls /dev/sd*
/dev/sda   /dev/sda1   /dev/sda2   /dev/sdbCode language: plaintext (plaintext)
From this output, we can tell that the USB drive has been assigned to /dev/sdb. The next step before writing the ISO image to the device is to run the findmnt command to make sure it has not been auto-mounted:
# findmnt /dev/sdb?
TARGET                SOURCE    FSTYPE OPTIONS
/media/demo/C24E-6727 /dev/sdb1 vfat   rw,nosuid,nodev, ...Code language: plaintext (plaintext)
If the findmnt command indicates that the USB drive has been mounted, unmount it before continuing:
# umount /media/demo/C24E-6727Code language: plaintext (plaintext)Once the filesystem has been unmounted, use the dd command as follows to write the ISO image to the drive:
# dd if=/path/to/iso/<image name>.iso of=/dev/sdb bs=512kCode language: plaintext (plaintext)The writing process can take some time (as long as 10 – 15 minutes) to complete depending on the image size and speed of the system on which it is running. Once the image has been written, output similar to the following will appear and the USB drive is ready to be used to install Ubuntu:
4056+1 records in
4056+1 records out
2126544896 bytes (2.1 GB, 2.0 GiB) copied, 625.911 s, 3.4 MB/sCode language: plaintext (plaintext)
macOS
The first step in writing an ISO image to a USB drive attached to a macOS system is to identify the device using the diskutil tool. Before attaching the USB device, open a Terminal window and run the following command:
|
You are reading a sample chapter from Ubuntu 22.04 Essentials. Buy the full book now in eBook ($24.99) format. Includes 36 chapters. Learn more. |
$ diskutil list
/dev/disk0 (internal, physical):
   #:                       TYPE NAME                    SIZE       IDENTIFIER
   0:      GUID_partition_scheme                        *1.0 TB     disk0
   1:                        EFI EFI                     209.7 MB   disk0s1
   2:                 Apple_APFS Container disk2         1000.0 GB  disk0s2

/dev/disk1 (internal):
   #:                       TYPE NAME                    SIZE       IDENTIFIER
   0:      GUID_partition_scheme                         28.0 GB    disk1
   1:                        EFI EFI                     314.6 MB   disk1s1
   2:                 Apple_APFS Container disk2         27.7 GB    disk1s2

/dev/disk2 (synthesized):
   #:                       TYPE NAME                    SIZE       IDENTIFIER
   0:      APFS Container Scheme -                      +1.0 TB     disk2
                                 Physical Stores disk1s2, disk0s2
   1:                APFS Volume Macintosh HD            473.6 GB   disk2s1
   2:                APFS Volume Preboot                 42.1 MB    disk2s2
   3:                APFS Volume Recovery                517.0 MB   disk2s3
   4:                APFS Volume VM                      1.1 GB     disk2s4Code language: plaintext (plaintext)
Having established a baseline of detected devices, insert the USB drive into a port on the macOS system and run the command again. The same results should appear with one additional entry for the USB drive resembling the following:
/dev/disk3 (external, physical):
   #:                       TYPE NAME                    SIZE       IDENTIFIER
   0:                                                   *16.0 GB    disk3Code language: plaintext (plaintext)
In the above example, the USB drive has been assigned to /dev/disk3. Before proceeding, unmount the disk as follows:
$ diskutil unmountDisk /dev/disk3
Unmount of all volumes on disk3 was successful
Code language: plaintext (plaintext)
Finally, use the dd command to write the ISO image to the device, taking care to reference the raw disk device (/dev/rdisk3) and entering your user password when prompted:
$ sudo dd if=/path/to/iso/image.iso of=/dev/rdisk3 bs=1m Code language: plaintext (plaintext)Once the image has been written, the USB drive is ready.
Windows/macOS
Several free tools are available for Windows and macOS that will write an ISO image to a USB drive, but one written specifically for writing Linux ISO images is the Fedora Media Writer tool which can be downloaded from the following URL:
|
You are reading a sample chapter from Ubuntu 22.04 Essentials. Buy the full book now in eBook ($24.99) format. Includes 36 chapters. Learn more. |
https://getfedora.org/en/workstation/download/
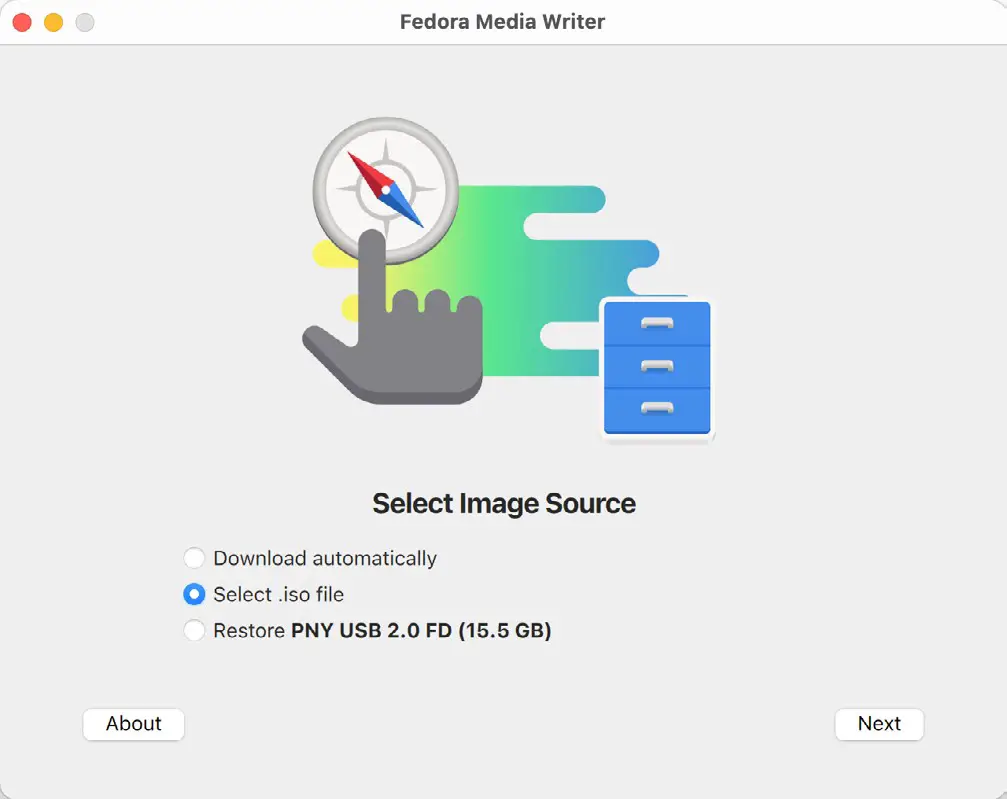
Once installed, insert the destination USB drive, launch the writer tool, and choose the Select .iso file option as highlighted in Figure 3-1:
Click Next to proceed to the Write Options screen and select the USB Drive before clicking on the Select… button:
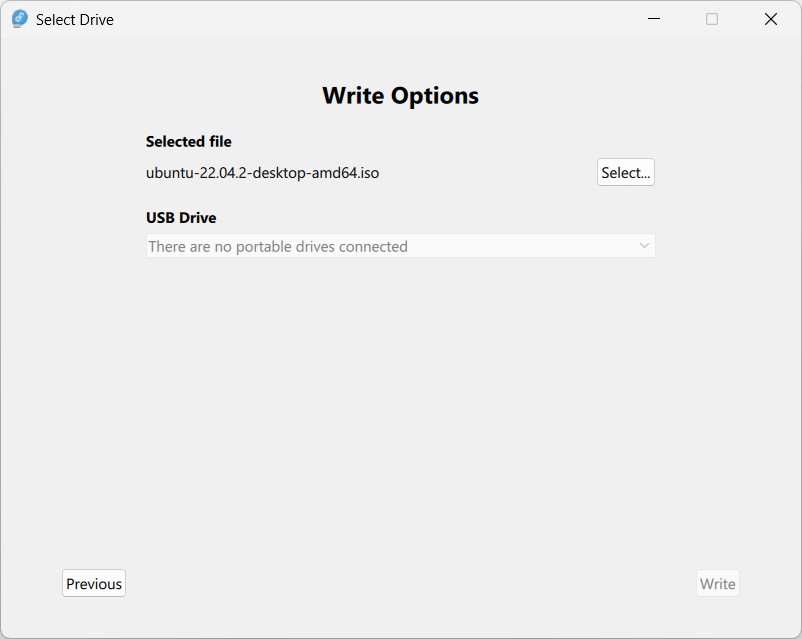
In the resulting file selection dialog, navigate to and select the Ubuntu installation ISO image and click the Open button. Finally, click the Write button to start writing the image to the USB drive:
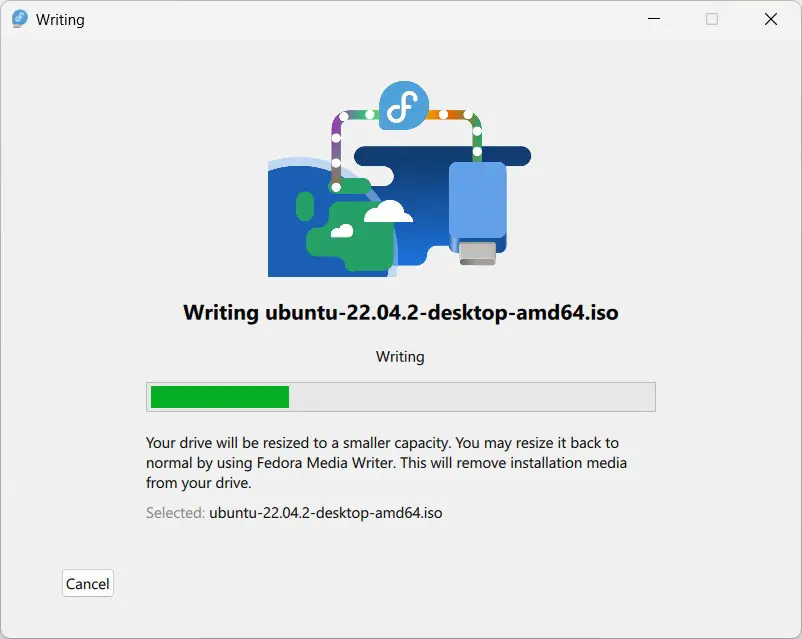
Once the image has been written, the device is ready to perform the installation.
|
You are reading a sample chapter from Ubuntu 22.04 Essentials. Buy the full book now in eBook ($24.99) format. Includes 36 chapters. Learn more. |
Booting from the Ubuntu USB Image
Insert the Ubuntu installation media into the appropriate drive and power on the system. If the system tries to boot from the hard disk drive, you will need to enter the BIOS set up for your computer and change the boot order so that it boots from the installation media drive first. After the initial boot sequence completes, the GRUB menu shown in Figure 3-4 will appear:
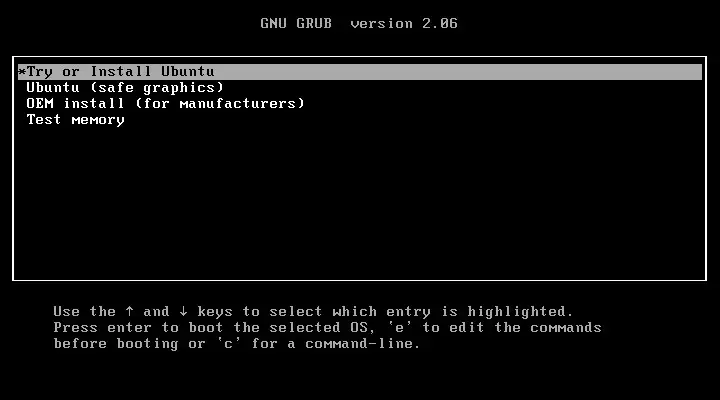
Use the arrow keys to select the Try or Install Ubuntu menu option, then press Enter to boot into an Ubuntu Live session. After Ubuntu has booted completely, the screen shown in Figure 3-5 below will appear:
Options are provided to either try the Ubuntu Live session or to begin the installation process. If you experience a black screen when attempting to start or install Ubuntu, reboot the system and try again using the safe graphics options. If you are not ready to install Ubuntu, click on the Try Ubuntu button to safely explore the operating system without making changes to any installed hard drives.
Installing Ubuntu
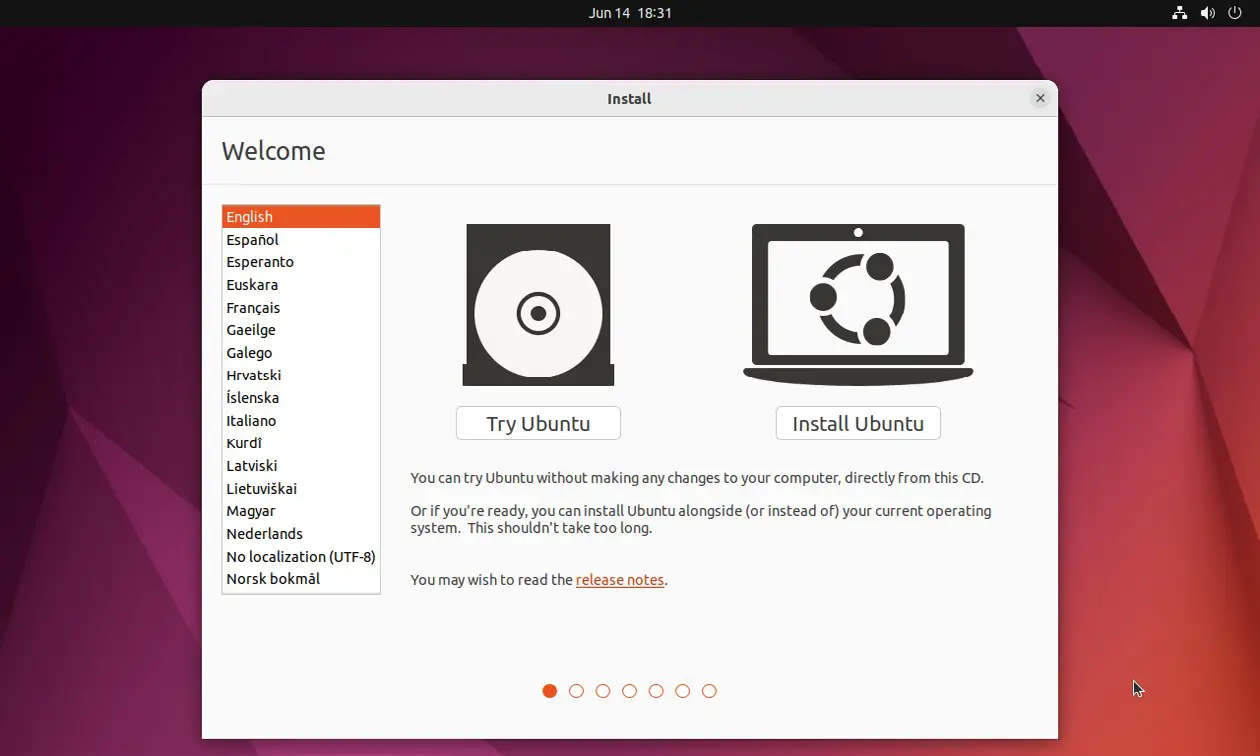
From within Install dialog, select the option to begin the Ubuntu installation and wait for the initial screen of the installer to appear. Select your preferred language before clicking on the Continue button to proceed to the next screen:
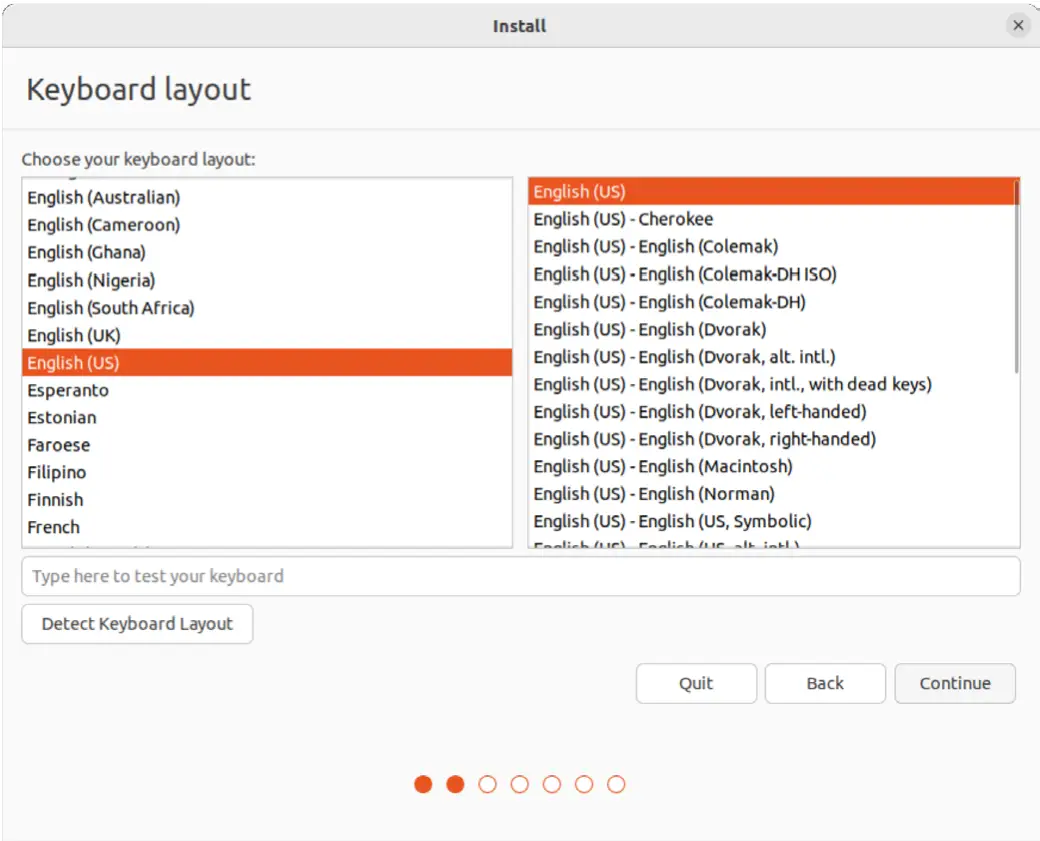
Either select your keyboard layout or, if you are unsure, click on the Detect Keyboard Layout button to work through some steps to identify your keyboard before clicking on Continue. On the next screen, choose whether to perform the Normal or Minimal installation:
|
You are reading a sample chapter from Ubuntu 22.04 Essentials. Buy the full book now in eBook ($24.99) format. Includes 36 chapters. Learn more. |
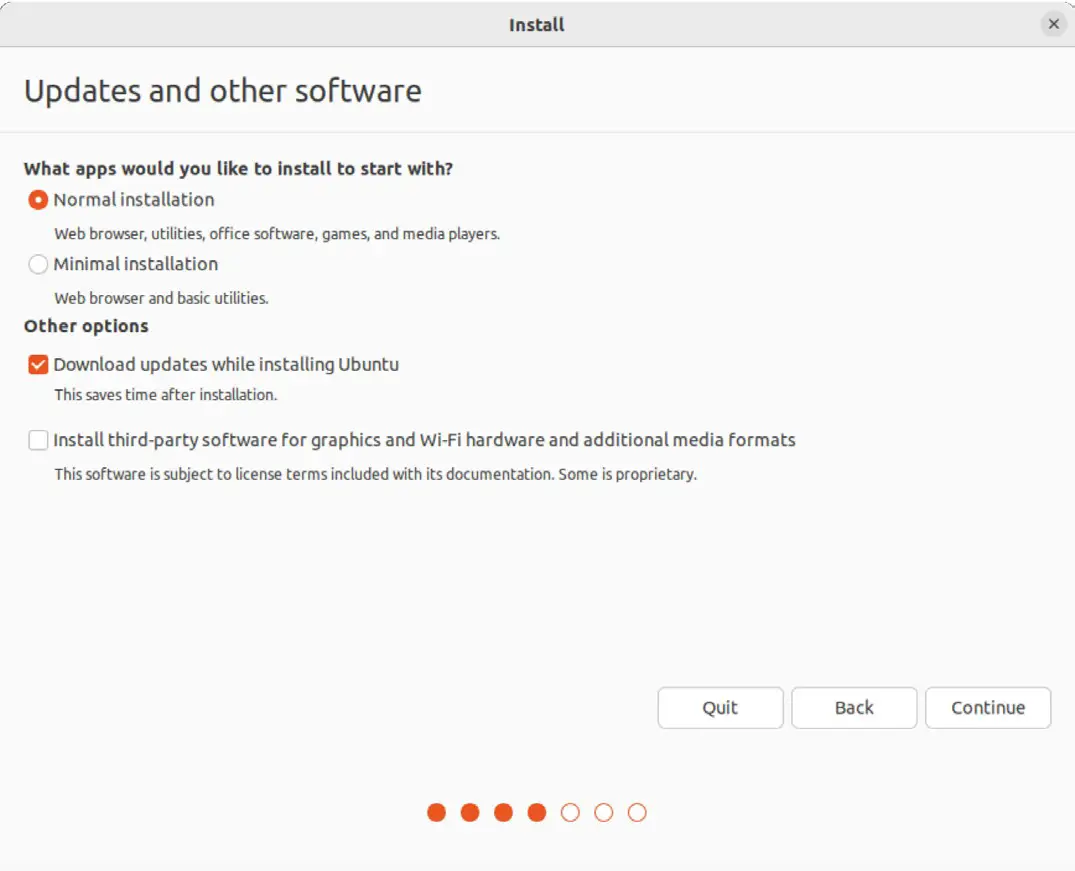
Select the Normal option if you have plenty of disk space and want to explore the main applications and utilities included with Ubuntu without having to install them later manually. Alternatively, to avoid cluttering the system with software you may never need, select the Minimal option. Regardless of the choice made here, all of the software provided with Ubuntu can be easily installed or removed at any point in the future if needed.
The option is also available to update the software packages that comprise the Ubuntu distribution during the installation. Ubuntu, as with most actively supported operating systems, continues to be updated with bug fixes and security patches long after it has been released to the public. If this option is selected and the system is connected to the internet, the installer will download any updates issued since the Ubuntu installation image was released and applies them to the system during installation. If you choose not to perform this update during the installation process, these updates may still be applied at any time after the installation completes.
A second option provides the choice of whether to install 3rd party non-open source software to support specific hardware devices and the playback of proprietary media files on the system. Some users object fervently to using any software which is not published under a public license. If you are one of those people, then do not select this option. If, on the other hand, you just want the best experience from your Ubuntu installation, then this option is recommended.
Having made appropriate selections, click the Continue button to proceed to the disk allocation screen:
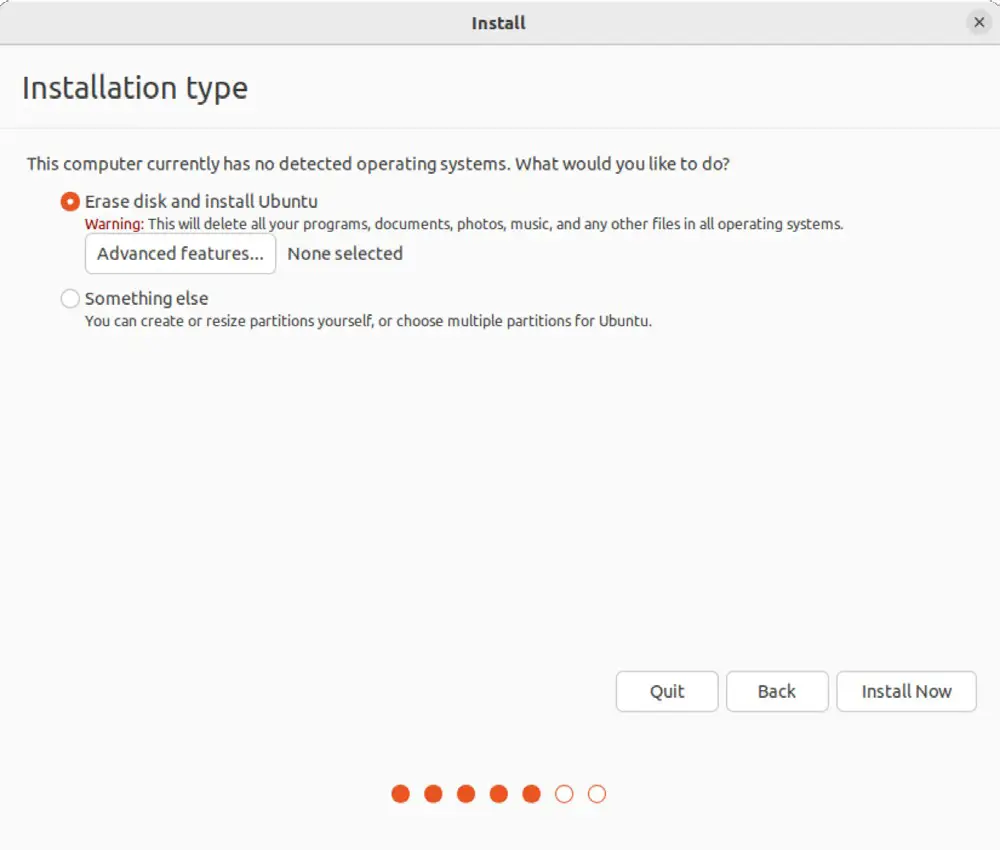
Assuming that this is a new disk on which an existing operating system is not present, the installer will provide the option to erase the entire disk and use it for Ubuntu (in which case the installer will calculate and implement a typical and recommended partition layout). Alternatively, to define your own custom disk layout, select the Something else option to manually create and size the disk partitions that will contain the operating system and your data.
|
You are reading a sample chapter from Ubuntu 22.04 Essentials. Buy the full book now in eBook ($24.99) format. Includes 36 chapters. Learn more. |
Clicking on the Advanced Features button will provide the option to use Logical Volume Management (LVM). LVM is strongly recommended to make the management of the disks and partitions on the system easier, a topic covered in detail in the chapter entitled Adding a New Disk to an Ubuntu 22.04 Volume Group and Logical Volume:
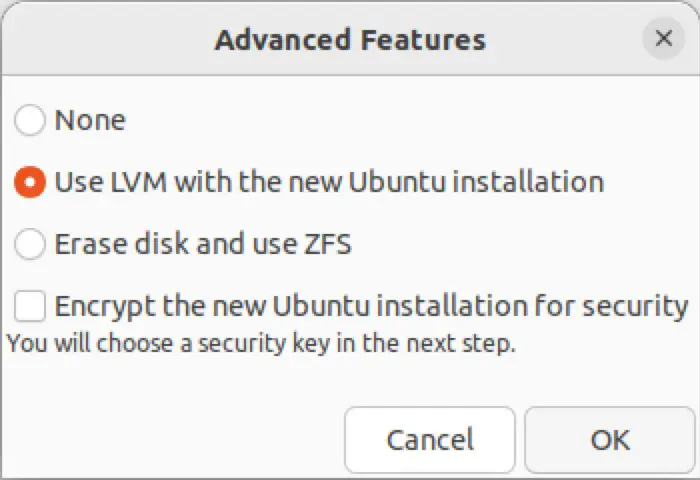
If the security of the data stored on the disk is of paramount concern, select the option to encrypt the Ubuntu installation. If this option is selected, the next screen will prompt you to choose a security key which will then need to be entered each time the system starts.
The option is also provided to use the ZFS filesystem. ZFS is an advanced filesystem with many of the features of Logical Volume Management built in together with a range of other features, such as the ability to take disk snapshots and shadowing (copy-on-write). The option is also available to encrypt the data stored by Ubuntu. For this example, select the option to use LVM and click on OK.
Once the selections have been made, click on the Install Now button to begin the installation process, at which point the system will seek confirmation that the changes are to be made to the disk drive:
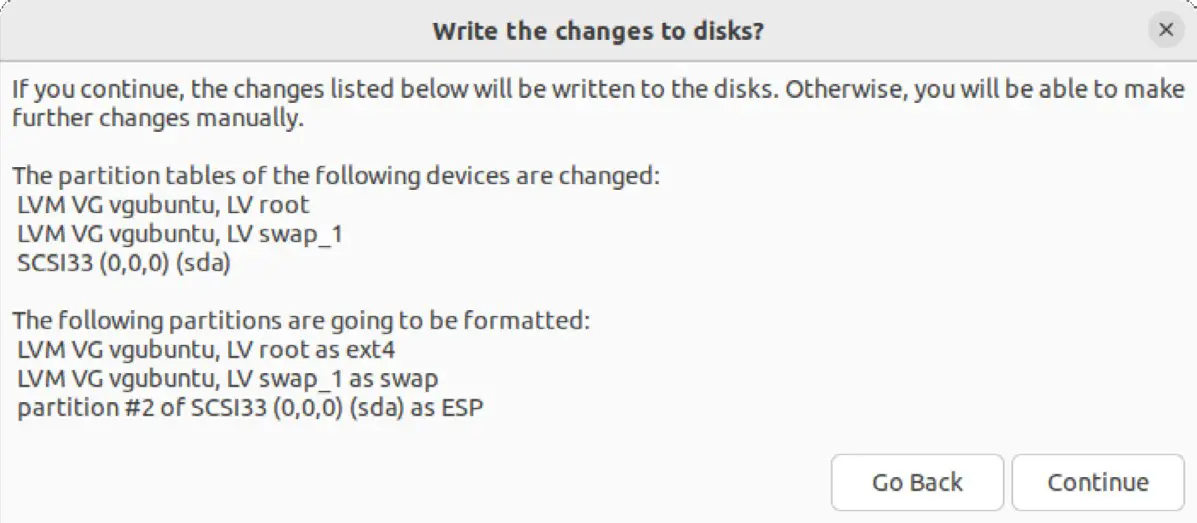
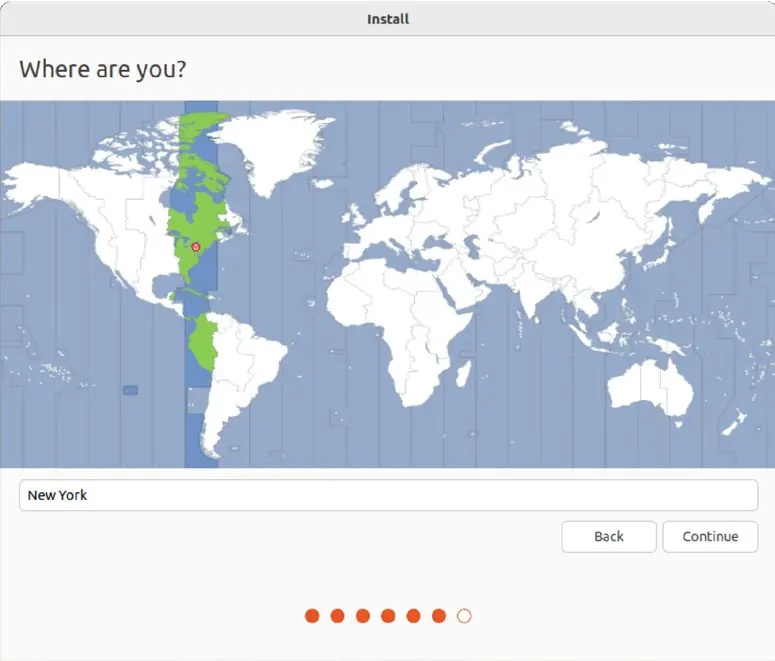
Click the Continue button to start the installation. While the installation is in progress, the installer will ask for information about your geographical location in order to configure time zone settings:
|
You are reading a sample chapter from Ubuntu 22.04 Essentials. Buy the full book now in eBook ($24.99) format. Includes 36 chapters. Learn more. |
Next, the installer will ask you to provide a username and password for the first account on the system:
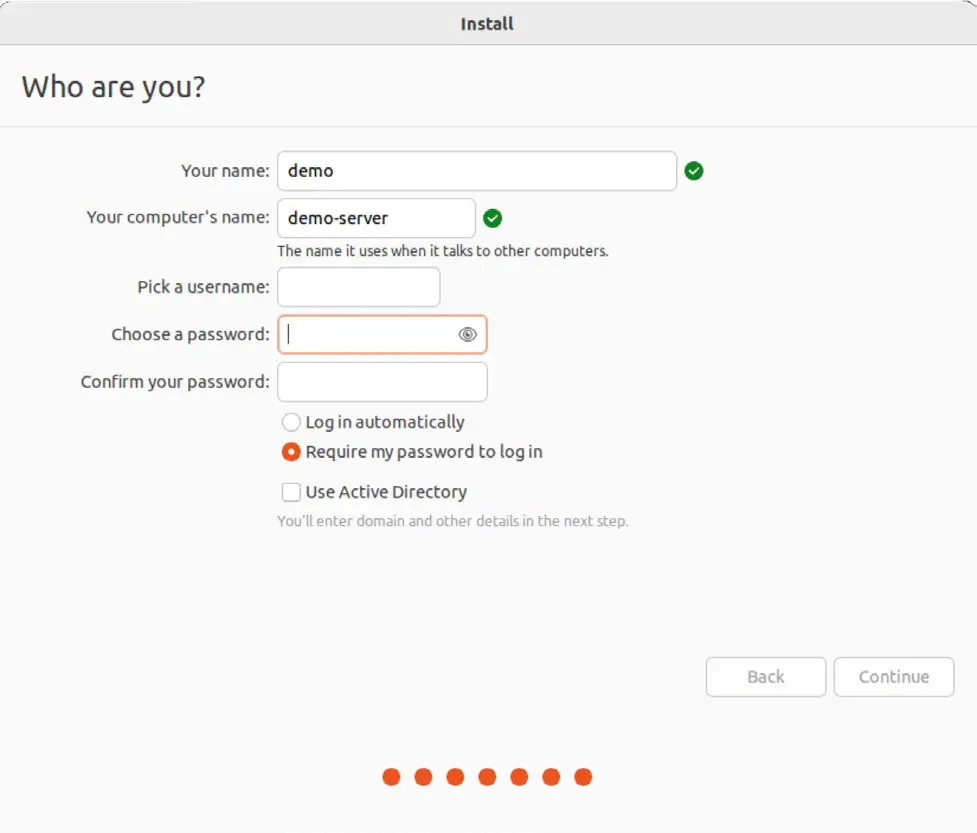
The option is also provided to dictate whether the password must be specified each time the user wishes to log into the system. By default, each time Ubuntu starts, a login screen will be presented seeking username and password credentials. If you are the sole user of the system and would like to bypass this screen and be logged in automatically each time the system boots, be sure to set the Log in automatically checkbox before proceeding.
Once all the questions have been answered, the installer will simply proceed with the installation. Depending on the speed of your system and whether or not you opted to download updates during the installation, this process can take some time. For a more detailed view of the steps being performed by the installer, click on the status title located above the progress bar:
When the installation is complete, a dialog will appear to inform you the system is ready to be restarted:

When you are ready to reboot, press the Restart Now button. The installer may prompt you to remove the installation media, and the system will take a few moments to shut down. At this point, remove the USB flash drive and press the Enter key to proceed.
|
You are reading a sample chapter from Ubuntu 22.04 Essentials. Buy the full book now in eBook ($24.99) format. Includes 36 chapters. Learn more. |
Accessing the Ubuntu Desktop
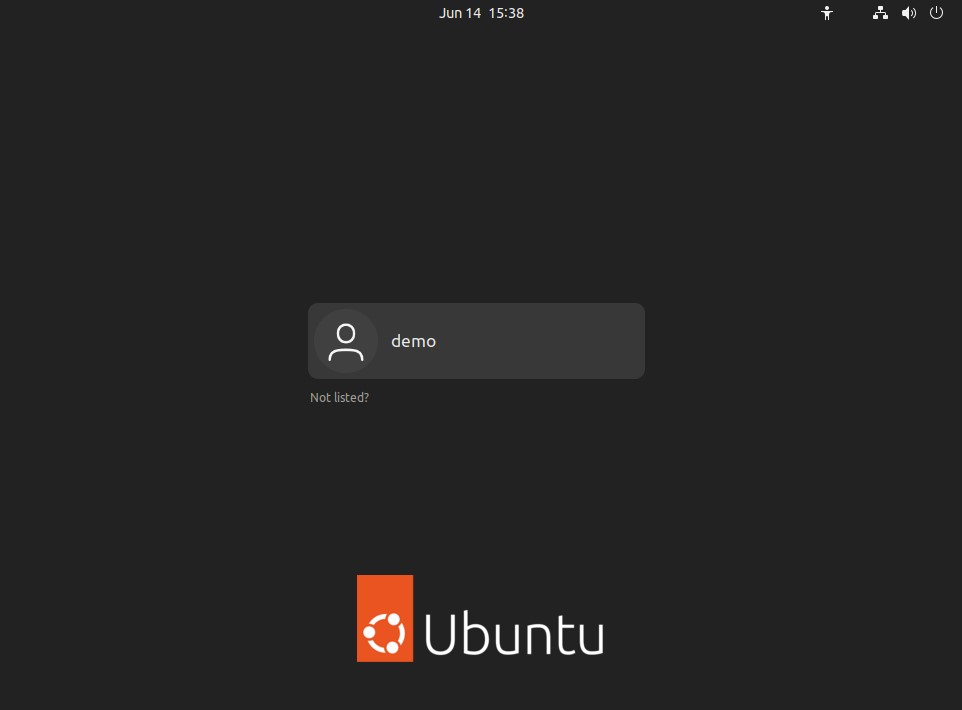
Once the system has started, if the password requirement option was enabled the GNOME Display Manager (GDM) login screen (Figure 3-15) will appear. To access the system, select the user name and enter the password specified during installation:
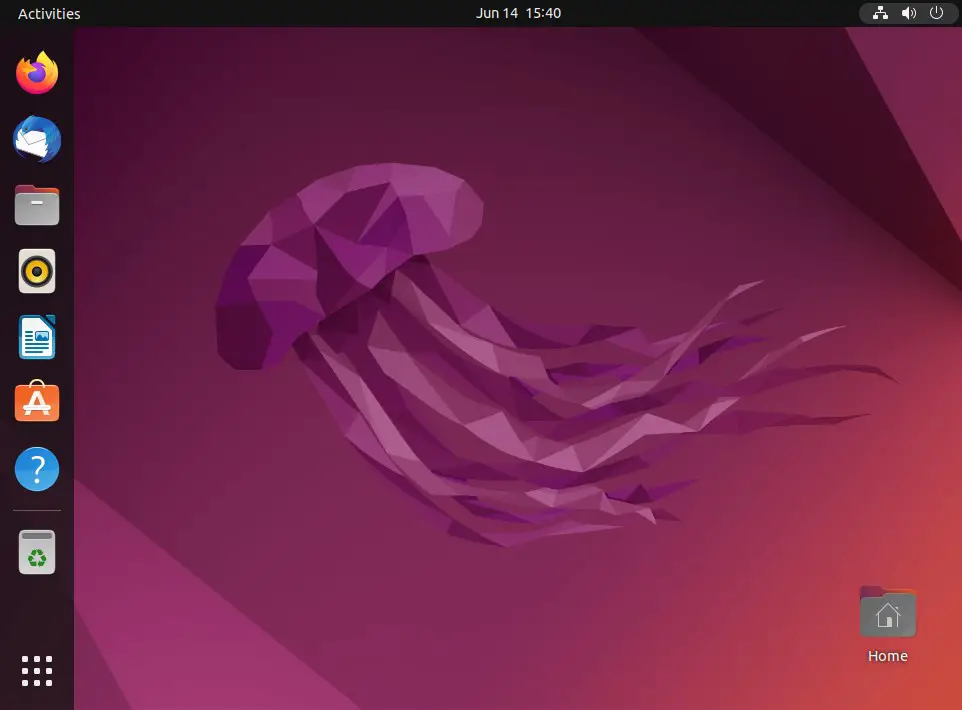
Alternatively, if the installation was configured to log directly into the desktop, the GNOME desktop (Figure 3-16) will appear after the system has restarted:
Installing Updates
As with most operating systems today, each particular release of the Ubuntu distribution continues to evolve after it has been released. This generally takes the form of bug fixes and security updates and, occasionally, new features that may be downloaded over the internet and installed on your system.
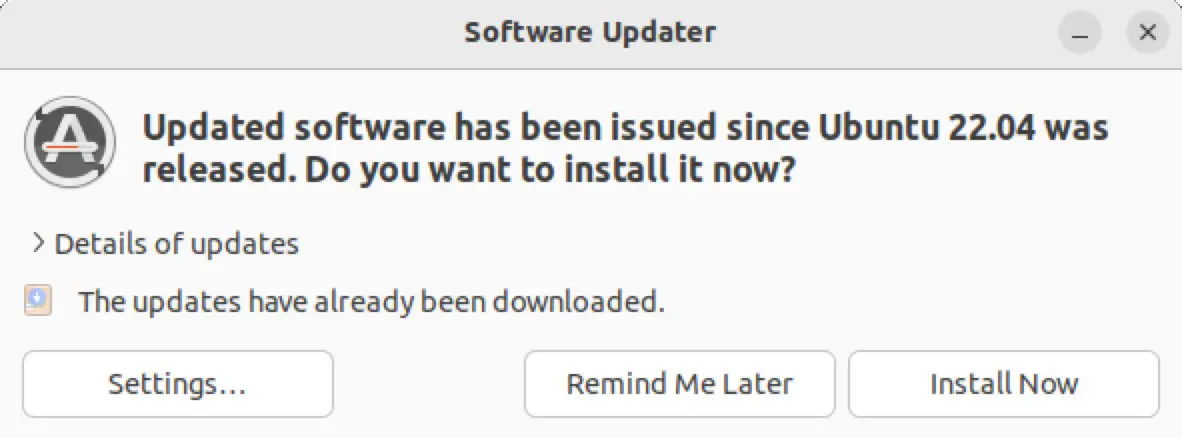
Best practices dictate that the first step after installing Ubuntu is to ensure any available updates are applied to the system. When updates are available, the Software Updater will display the following dialog from which updates may be installed:
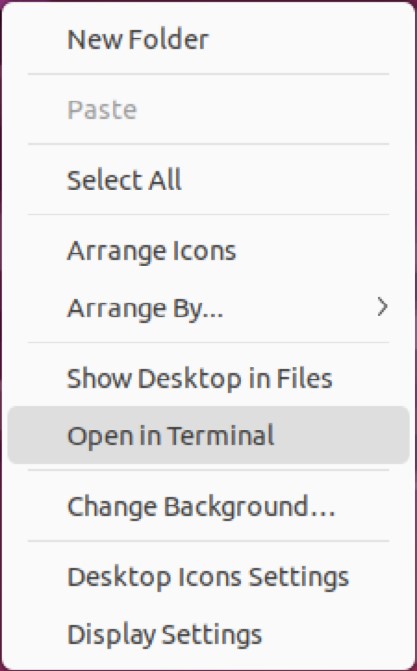
Updates can also be installed via the command-line prompt in a Terminal window using the apt package manager tool. To check for the availability of updates, right-click on the desktop background and, from the resulting menu, select the Open in Terminal option:
|
You are reading a sample chapter from Ubuntu 22.04 Essentials. Buy the full book now in eBook ($24.99) format. Includes 36 chapters. Learn more. |
Within the Terminal window, run the following commands to gain root privileges and update the package list:
$ sudo su -
# apt update
Code language: plaintext (plaintext)
If updated packages are available, the command will display output similar to the following:
.
.
.
Reading package lists... Done
Building dependency tree
Reading state information... Done
220 packages can be upgraded. Run 'apt list --upgradable' to see them.Code language: plaintext (plaintext)
Any pending updates may be applied using the apt tool:
# apt upgradeCode language: plaintext (plaintext)Upon execution, the apt tool will provide a list of packages that are available for update and prompt for permission to perform the update:
220 upgraded, 7 newly installed, 0 to remove and 0 not upgraded.
Need to get 75.2 MB/286 MB of archives.
After this operation, 34.8 MB of additional disk space will be used.
Do you want to continue? [Y/n]Code language: plaintext (plaintext)
Once the upgrade is complete, the installation is essentially finished.
|
You are reading a sample chapter from Ubuntu 22.04 Essentials. Buy the full book now in eBook ($24.99) format. Includes 36 chapters. Learn more. |
Displaying Boot Messages
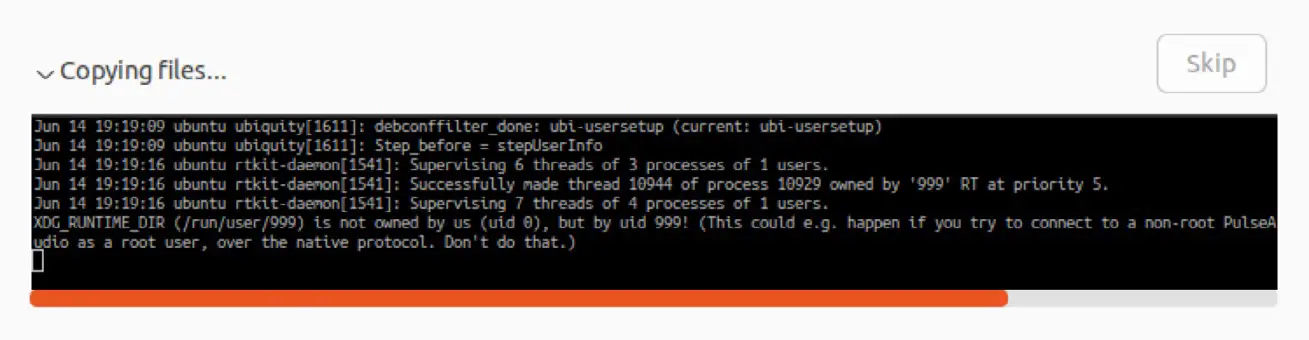
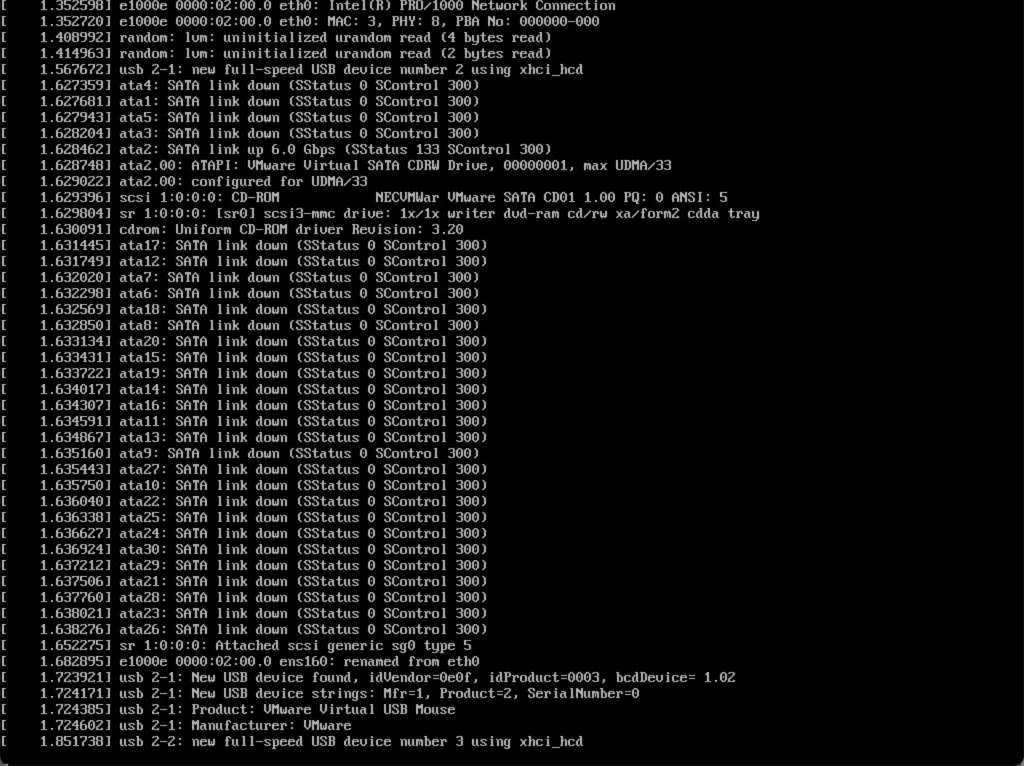
During the boot process, the system will display the Ubuntu splash screen, which hides from view all of the boot messages generated by the system as it loads. To make these messages visible during the boot process (as shown in Figure 3-19), simply press the keyboard Esc key while the system is starting:
The default behavior can be changed so that messages are always displayed by default by editing the /etc/default/grub file and changing the GRUB_CMDLINE_LINUX setting which, by default, will resemble the following:
GRUB_CMDLINE_LINUX="... rhgb quiet"Code language: plaintext (plaintext)If you are new to Linux and are not familiar with the editors available, refer to the editor recommendations outlined in the Introduction – Ubuntu 22.04 Essentials chapter. For example, to use the nano editor, enter the following command to start the editor and load the grub file:
# nano /etc/default/grubCode language: plaintext (plaintext)To remove the graphical boot screen so that messages are visible without pressing the Esc key, remove the “splash” and “quiet” options from the setting:
GRUB_CMDLINE_LINUX=""Code language: plaintext (plaintext)This change will cause the system to display all of the boot messages generated by the system.
|
You are reading a sample chapter from Ubuntu 22.04 Essentials. Buy the full book now in eBook ($24.99) format. Includes 36 chapters. Learn more. |
Once the changes have been made, run the following command to generate a new boot configuration to take effect next time the system starts:
# grub-mkconfig --output=/boot/grub/grub.cfgCode language: plaintext (plaintext)Summary
The first step in working with Ubuntu is to install the operating system. In the case of a cloud-based server, this task is typically performed automatically when an operating system image is selected for the system based on a range of options offered by the cloud service provider. Installation on your own hardware or in a virtual machine, however, involves downloading the installation media in the form of an ISO image, writing that image to suitable storage such as a DVD or USB drive, and booting from it. Once installation is complete, it is important to install any operating system updates that may have been released since the original installation image was created.