
The previous chapter introduced the DocumentGroup scene type provided with SwiftUI and explored the architecture that allows adding document browsing and management to apps.
This chapter will demonstrate how to take the standard Xcode Multiplatform Document App template and modify it to work with image files instead of plain text documents. Upon completion of the tutorial, the app will allow image files to be opened, modified using a sepia filter, and then saved back to the original file.
Creating the ImageDocDemo Project
Begin by launching Xcode and create a new project named ImageDocDemo using the Multiplatform Document App template.
Modifying the Info.plist File
Since the app will work with image files instead of plain text, some changes must be made to the type identifiers declared in the Info.plist file. To make these changes, select the ImageDocDemo entry at the top of the project navigator window (marked A in Figure 47-1), followed by the ImageDocDemo target (B), before clicking on the Info tab (C).

Scroll down to the Document Types section within the Info screen and change the Identifier field from com. example.plain-text to com.ebookfrenzy.image:
 |
You are reading a sample chapter from an old edition of iOS App Development Essentials. Purchase the fully updated iOS 18 App Development Essentials book. The full book contains 71 chapters, over 612 pages of in-depth information, downloadable source code, and access to over 50 SwiftUI knowledge test quizzes. |

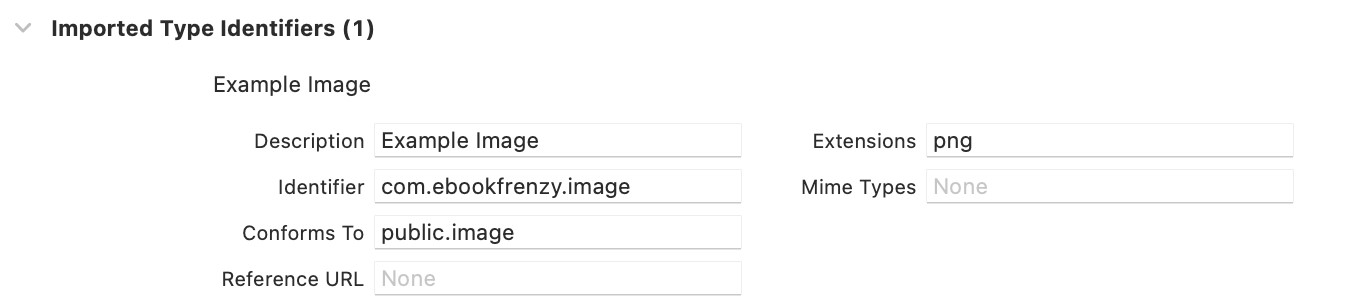
Next, locate the Imported Type Identifiers section and make the following changes:
- Description – Example Image
- Identifier – com.ebookfrenzy.image
- Conforms To – public.image
- Extensions – png
Once these changes have been made, the settings should match those shown in Figure 47-3:
Adding an Image Asset
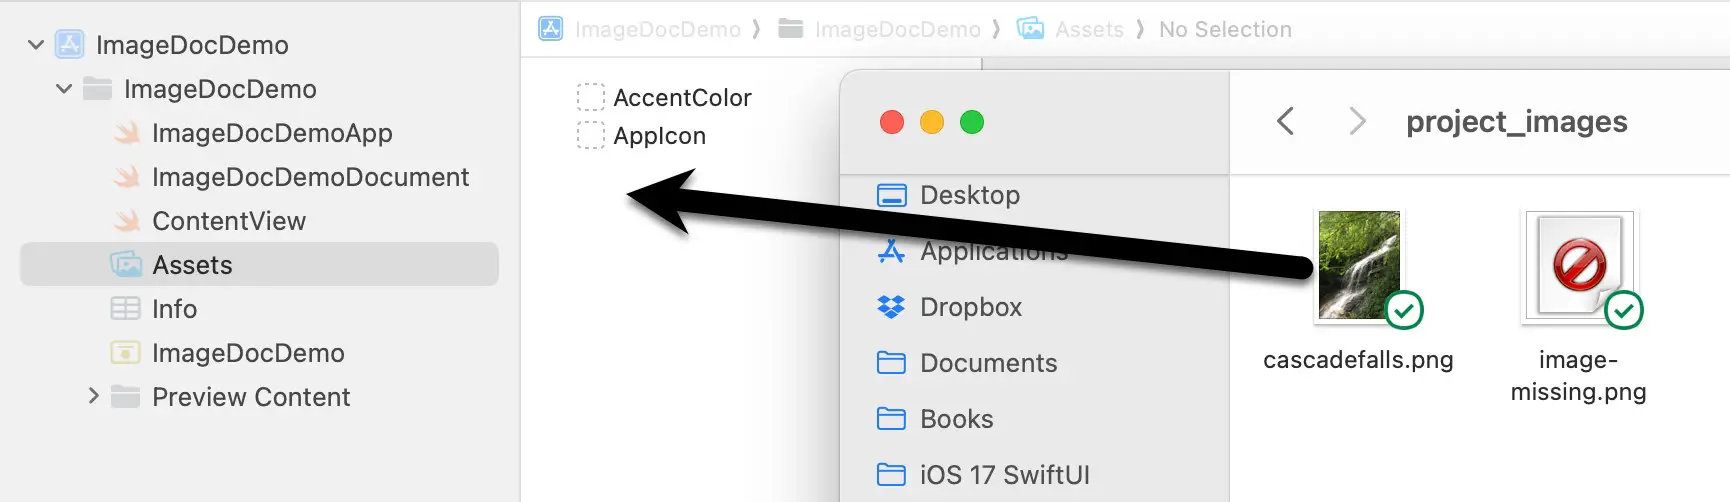
If the user decides to create a new document instead of opening an existing one, a sample image will be displayed from the project asset catalog. For this purpose, the cascadefalls.png file located in the project_images folder of the sample code archive will be added to the asset catalog. If you do not already have the source code downloaded, it can be downloaded from the following URL:
https://www.ebookfrenzy.com/retail/ios17_web/
Once the image file has been located in a Finder window, select the Assets entry in the Xcode project navigator and drag and drop the image, as shown in Figure 47-4:
|
You are reading a sample chapter from an old edition of iOS App Development Essentials. Purchase the fully updated iOS 18 App Development Essentials book. The full book contains 71 chapters, over 612 pages of in-depth information, downloadable source code, and access to over 50 SwiftUI knowledge test quizzes. |
Modifying the ImageDocDemoDocument.swift File
Although we have changed the type identifiers to support images instead of plain text, the document declaration is still implemented for handling text-based content. Select the ImageDocDemoDocument.swift file to load it into the editor and begin by modifying the UTType extension so that it reads as follows:
extension UTType {
    static var exampleImage: UTType {
        UTType(importedAs: "com.ebookfrenzy.image")
    }
}Code language: Swift (swift)
Next, locate the readableContentTypes variable and modify it to use the new UTType:
static var readableContentTypes: [UTType] { [.exampleImage] }
Code language: Swift (swift)
With the necessary type changes made, the next step is to modify the structure to work with images instead of string data. Remaining in the ImageDocDemoDocument.swift file, change the text variable from a string to an image and modify the first initializer to use the cascadefalls image:
.
.
struct ImageDocDemoDocument: FileDocument {

    // var text: String
    var image: UIImage = UIImage()

    init() {
        if let image = UIImage(named: "cascadefalls") {
            self.image = image
        }
    }
.
.Code language: Swift (swift)
Moving on to the second init() method, make the following modifications to decode image instead of string data:
init(configuration: ReadConfiguration) throws {
    guard let data = configuration.file.regularFileContents,
          // let string = String(data: data, encoding: .utf8)
          let decodedImage: UIImage = UIImage(data: data)
    else {
        throw CocoaError(.fileReadCorruptFile)
    }
    // text = string
    image = decodedImage
}Code language: Swift (swift)
Finally, modify the write() method to encode the image to Data format so that it can be saved to the document:
|
You are reading a sample chapter from an old edition of iOS App Development Essentials. Purchase the fully updated iOS 18 App Development Essentials book. The full book contains 71 chapters, over 612 pages of in-depth information, downloadable source code, and access to over 50 SwiftUI knowledge test quizzes. |
func fileWrapper(configuration: WriteConfiguration) throws -> FileWrapper {
    let data = image.pngData()!
    return .init(regularFileWithContents: data)
}Code language: Swift (swift)
Designing the Content View
Before performing some initial tests on the project so far, the content view needs to be modified to display an image instead of text content. We will also take this opportunity to add a Button view to the layout to apply the sepia filter to the image. Edit the ContentView.swift file and modify it so that it reads as follows:
import SwiftUI
struct ContentView: View {
@Binding var document: ImageDocDemoDocument
var body: some View {
VStack {
Image(uiImage: document.image)
.resizable()
.aspectRatio(contentMode: .fit)
.padding()
Button(action: {
}, label: {
Text("Filter Image")
})
.padding()
}
.navigationTitle("Image Editor")
}
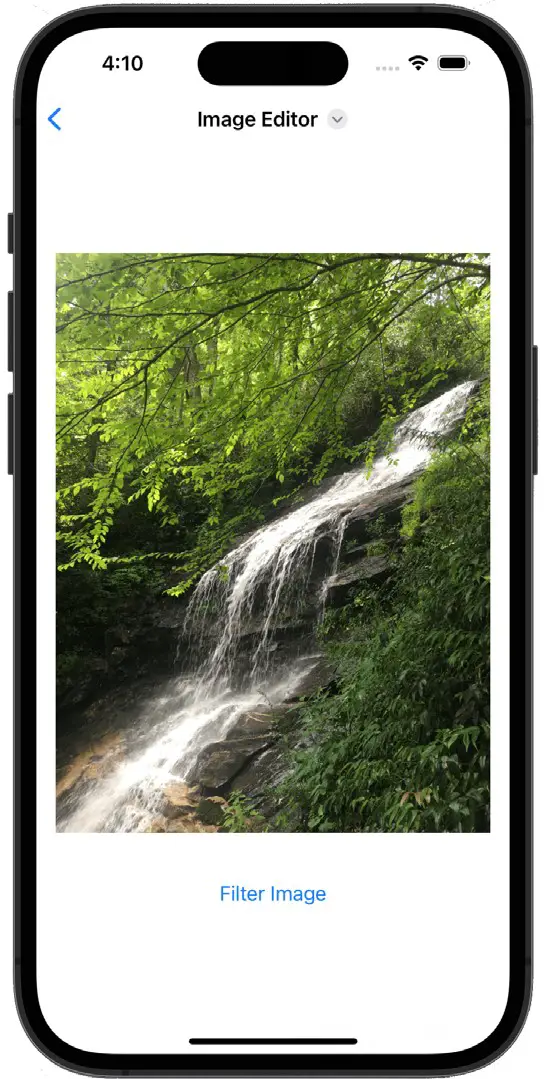
}Code language: Swift (swift)With the changes made, run the app on a device or simulator, use the browser to navigate to a suitable location, and then click on the + toolbar button. The app will create a new image document containing the sample image from the asset catalog and then display it in the content view:
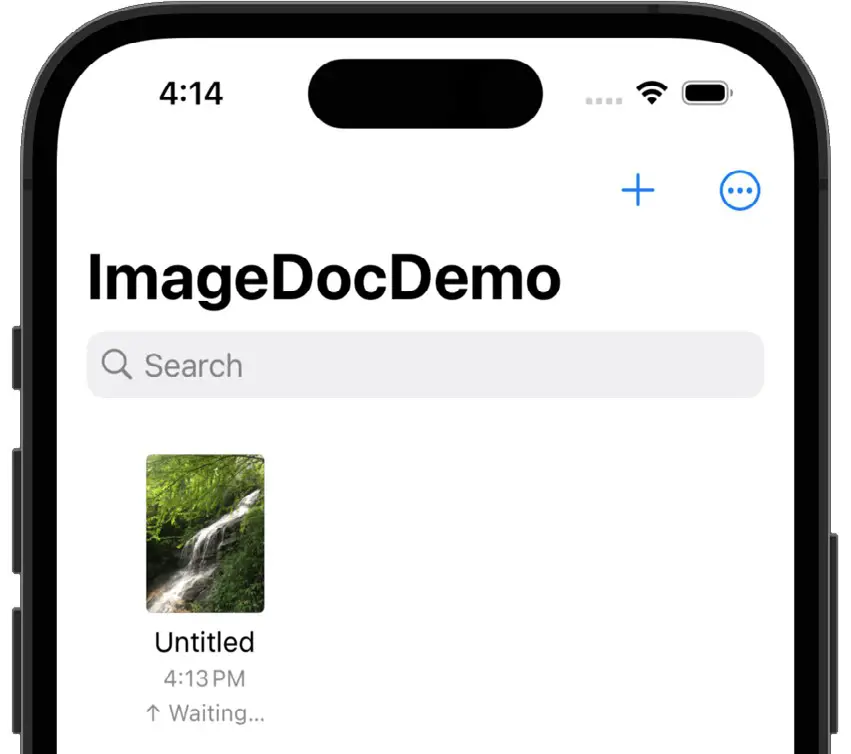
Tap the back arrow in the top left-hand corner to return to the browser, where the new document should be A SwiftUI DocumentGroup Tutorial
listed with an icon containing a thumbnail image:
Filtering the Image
The final step in this tutorial is to apply the sepia filter to the image when the Button in the content view is tapped. This will use the CoreImage Framework and involves converting the UIImage to a CIImage and applying the sepia tone filter before being converted back to a UIImage. Edit the ContentView.swift file and make the following changes:
|
You are reading a sample chapter from an old edition of iOS App Development Essentials. Purchase the fully updated iOS 18 App Development Essentials book. The full book contains 71 chapters, over 612 pages of in-depth information, downloadable source code, and access to over 50 SwiftUI knowledge test quizzes. |
import SwiftUI
import CoreImage
import CoreImage.CIFilterBuiltins

struct ContentView: View {

    @Binding var document: ImageDocDemoDocument
    @State private var ciFilter = CIFilter.sepiaTone()

    let context = CIContext()

    var body: some View {
        VStack {
            Image(uiImage: document.image)
                .resizable()
                .aspectRatio(contentMode: .fit)
                .padding()
            Button(action: {
                filterImage()
            }, label: {
                Text("Filter Image")
            })
            .padding()
        }
    }

    func filterImage() {
        ciFilter.intensity = Float(1.0)

        let ciImage = CIImage(image: document.image)

        ciFilter.setValue(ciImage, forKey: kCIInputImageKey)

        guard let outputImage = ciFilter.outputImage else { return }

        if let cgImage = context.createCGImage(outputImage,
                                       from: outputImage.extent) {
            document.image = UIImage(cgImage: cgImage)
        }
    }
}Code language: Swift (swift)
Testing the App
Run the app once again and either create a new image document or select the existing image to display the content view. Within the content view, tap the Filter Image button and wait while the sepia filter is applied to the image. Tap the back arrow to return to the browser where the thumbnail image will now appear in sepia tones. Select the image to load it into the content view and verify that the sepia changes were indeed saved to the document.
Summary
This chapter has demonstrated how to modify the Xcode Document App template to work with different content types. This involved changing the type identifiers, modifying the document declaration, and adapting the content view to handle image content.