
Using the CoreDataDemo project created in the chapter entitled A SwiftUI Core Data Tutorial, this chapter will demonstrate how to add CloudKit support to an Xcode project and migrate from Core Data to CloudKit-based storage. This chapter assumes that you have read the chapter entitled An Introduction to Core Data and SwiftUI.
Enabling CloudKit Support
Begin by launching Xcode and opening the CoreDataDemo project. Once the project has loaded into Xcode, the first step is to add the iCloud capability to the app. Select the CoreDataDemo target located at the top of the Project Navigator panel (marked A in Figure 51-1) so that the main panel displays the project settings. From within this panel, select the Signing & Capabilities tab (B) followed by the CoreDataDemo target entry (C):

Click on the “+ Capability” button (D) to display the dialog shown in Figure 51-2. Enter iCloud into the filter bar, select the result and press the keyboard enter key to add the capability to the project:
If iCloud is not listed as an option, you will need to pay to join the Apple Developer program as outlined in the chapter entitled How to Join the Apple Developer Program. If you are already a member, use the steps outlined in the chapter entitled “Installing Xcode 15 and the iOS 17 SDK” to ensure you have created a Developer ID Application certificate.
Within the iCloud entitlement settings, make sure that the CloudKit service is enabled before clicking on the “+” button indicated by the arrow in Figure 51-3 below to add an iCloud container for the project:
 |
You are reading a sample chapter from an old edition of iOS App Development Essentials. Purchase the fully updated iOS 18 App Development Essentials book. The full book contains 71 chapters, over 612 pages of in-depth information, downloadable source code, and access to over 50 SwiftUI knowledge test quizzes. |
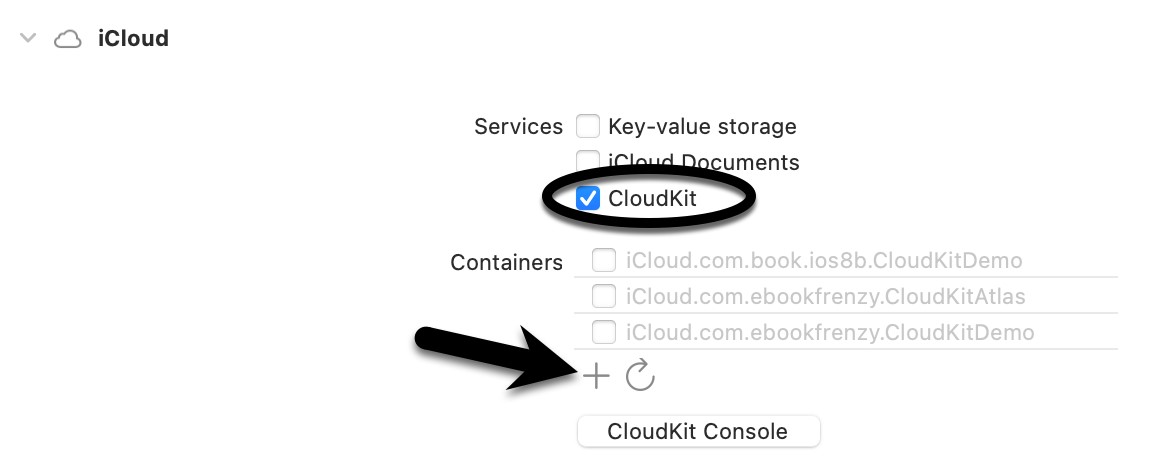
After clicking the “+” button, the dialog shown in Figure 51-4 will appear containing a text field into which you will need to enter the container identifier. This entry should uniquely identify the container within the CloudKit ecosystem, generally includes your organization identifier (as defined when the project was created), and should be set to something similar to iCloud.com.yourcompany.CoreDataDemo.
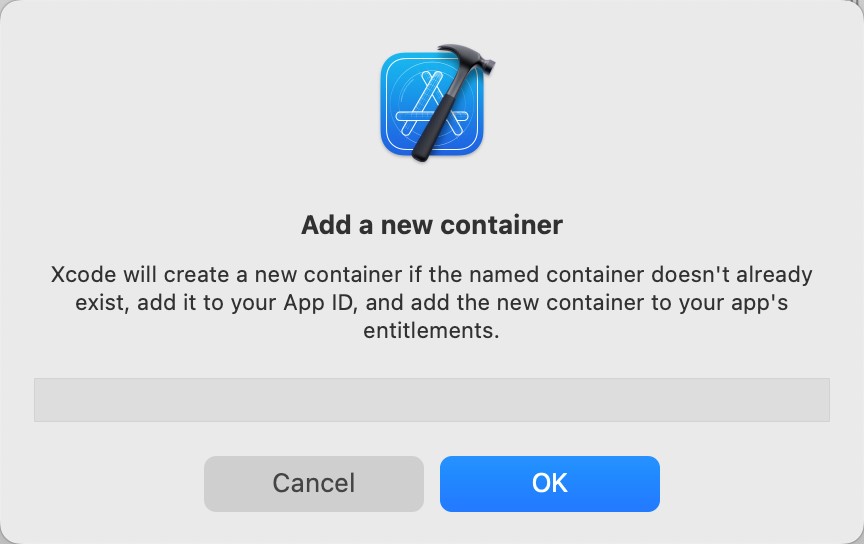
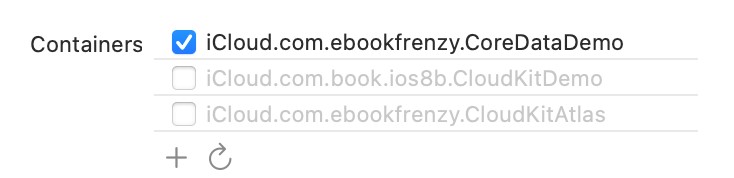
Once you have entered the container name, click the OK button to add it to the app entitlements. Returning to the Signing & Capabilities screen, make sure that the new container is selected:
Enabling Background Notifications Support
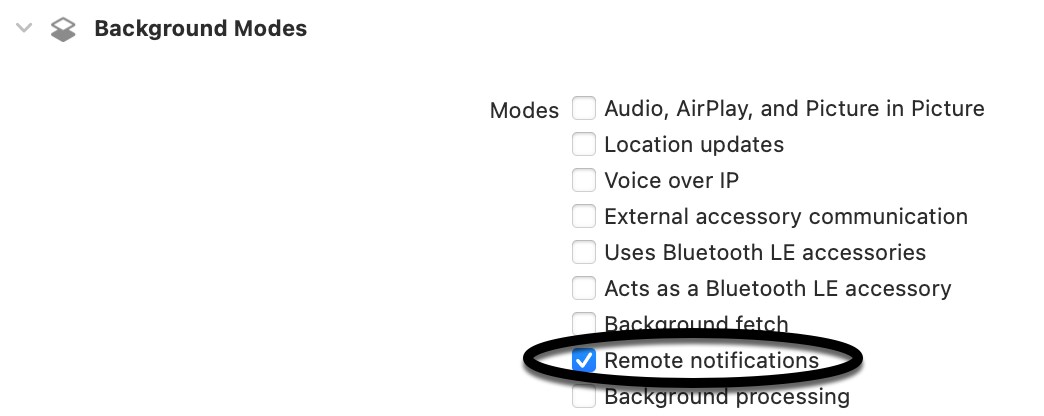
When the app is running on multiple devices and a data change is made in one instance of the app, CloudKit will use remote notifications to notify other instances of the app to update to the latest data. To enable background notifications, repeat the above steps, this time adding the Background Modes capability. Once the capability has been added, review the settings and make sure that Remote notifications mode is enabled as highlighted in Figure 51-6:
Now that the necessary entitlements have been enabled for the app, all that remains is to make some minor code changes to the project.
Switching to the CloudKit Persistent Container
Locate the Persistence.swift file in the project navigator panel and select it so that it loads into the code editor. Within the init() function, change the container creation call from NSPersistentContainer to NSPersistentCloudKitContainer as follows:
|
You are reading a sample chapter from an old edition of iOS App Development Essentials. Purchase the fully updated iOS 18 App Development Essentials book. The full book contains 71 chapters, over 612 pages of in-depth information, downloadable source code, and access to over 50 SwiftUI knowledge test quizzes. |
.
.
let container: NSPersistentCloudKitContainer
.
.
init() {
    container = NSPersistentCloudKitContainer(name: "Products")

    container.loadPersistentStores { (storeDescription, error) in
        if let error = error as NSError? {
            fatalError("Container load failed: \(error)")
        }
    }
}Code language: Swift (swift)
Since multiple instances of the app could potentially change the same data at the same time, we also need to define a merge policy to make sure that conflicting changes are handled:
init() {
    container = NSPersistentCloudKitContainer(name: "Products")

    container.loadPersistentStores { (storeDescription, error) in
        if let error = error as NSError? {
            fatalError("Container load failed: \(error)")
        }
    }
    container.viewContext.automaticallyMergesChangesFromParent = true
}Code language: Swift (swift)
Testing the App
CloudKit storage can be tested on either physical devices, simulators, or a mixture of both. All test devices and simulators must be signed in to iCloud using your Apple developer account and have the iCloud Drive option enabled. Once these requirements have been met, run the CoreDataDemo app and add some product entries. Next, run the app on another device or simulator and check that the newly added products appear. This confirms that the data is being stored and retrieved from iCloud.
With both app instances running, enter a new product in one instance and check that it appears in the other. Note that a bug in the simulator means that you may need to place the app in the background and then restore it before the new data will appear.
Reviewing the Saved Data in the CloudKit Console
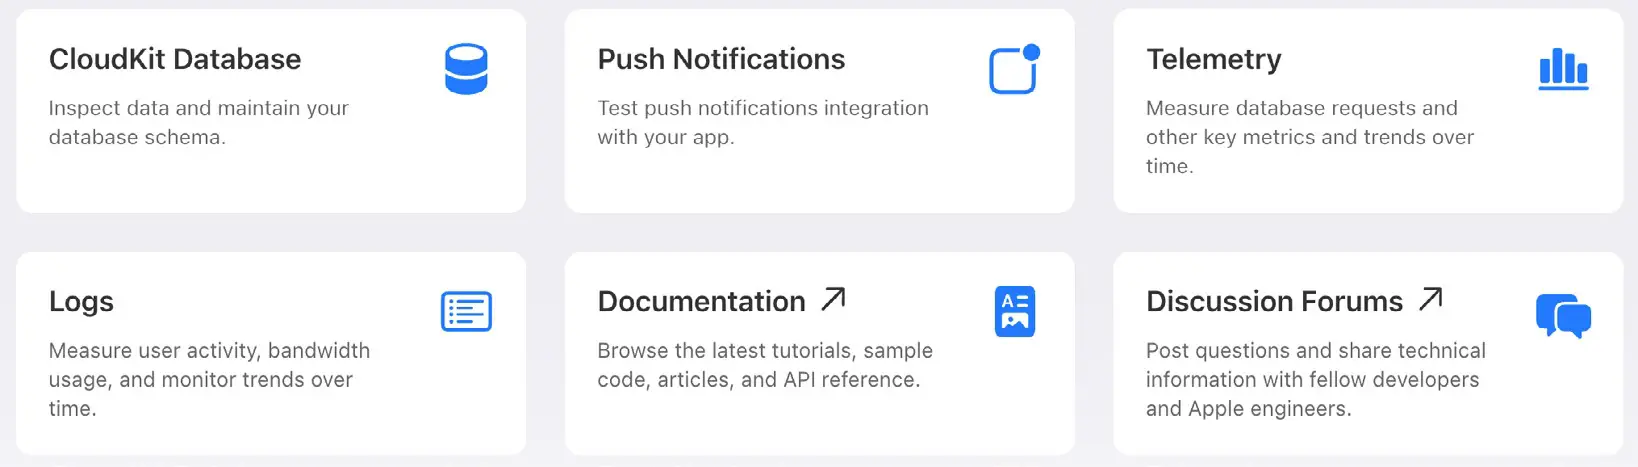
Once some product entries have been added to the database, return to the Signing & Capabilities screen for the project (Figure 51-1) and click on the CloudKit Console button. This will launch the default web browser on your system and load the CloudKit Dashboard portal. Enter your Apple developer login and password and, once the dashboard has loaded, the home screen will provide the range of options illustrated in Figure 51-7:
Select the CloudKit Database option and, on the resulting web page, select the container for your app from the drop-down menu (marked A in Figure 51-8 below). Since the app is still in development and has not been published to the App Store, make sure that menu B is set to Development and not Production:
|
You are reading a sample chapter from an old edition of iOS App Development Essentials. Purchase the fully updated iOS 18 App Development Essentials book. The full book contains 71 chapters, over 612 pages of in-depth information, downloadable source code, and access to over 50 SwiftUI knowledge test quizzes. |
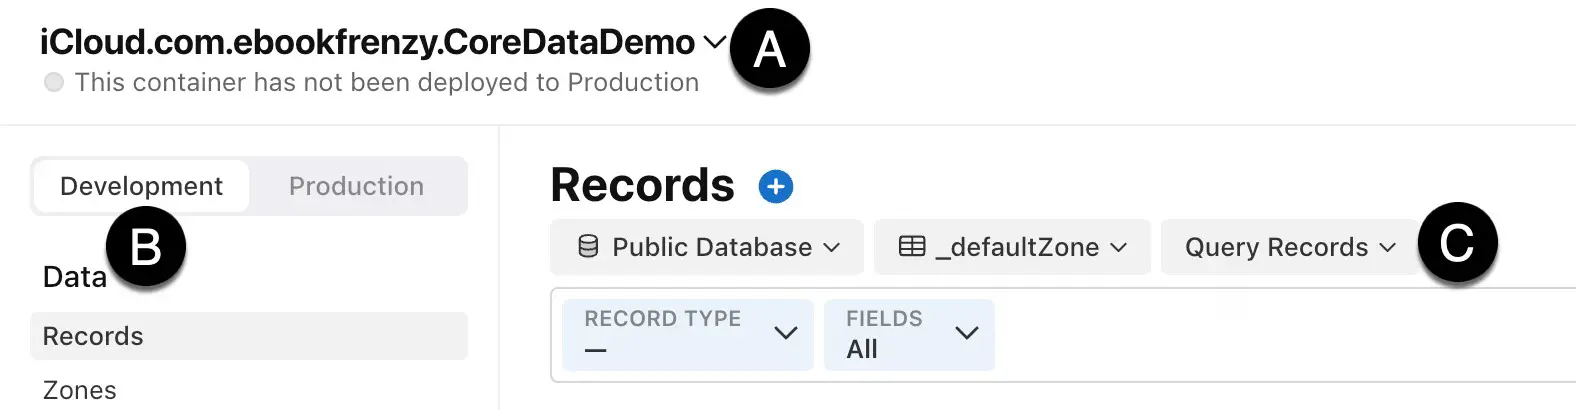
Next, we can query the records stored in the app container’s private database. Set the row of menus (C) to Private Database, com.apple.coredata.cloudkit.zone, and Query Records respectively. Finally, set the Record Type menu to CD_Product and the Fields menu to All:

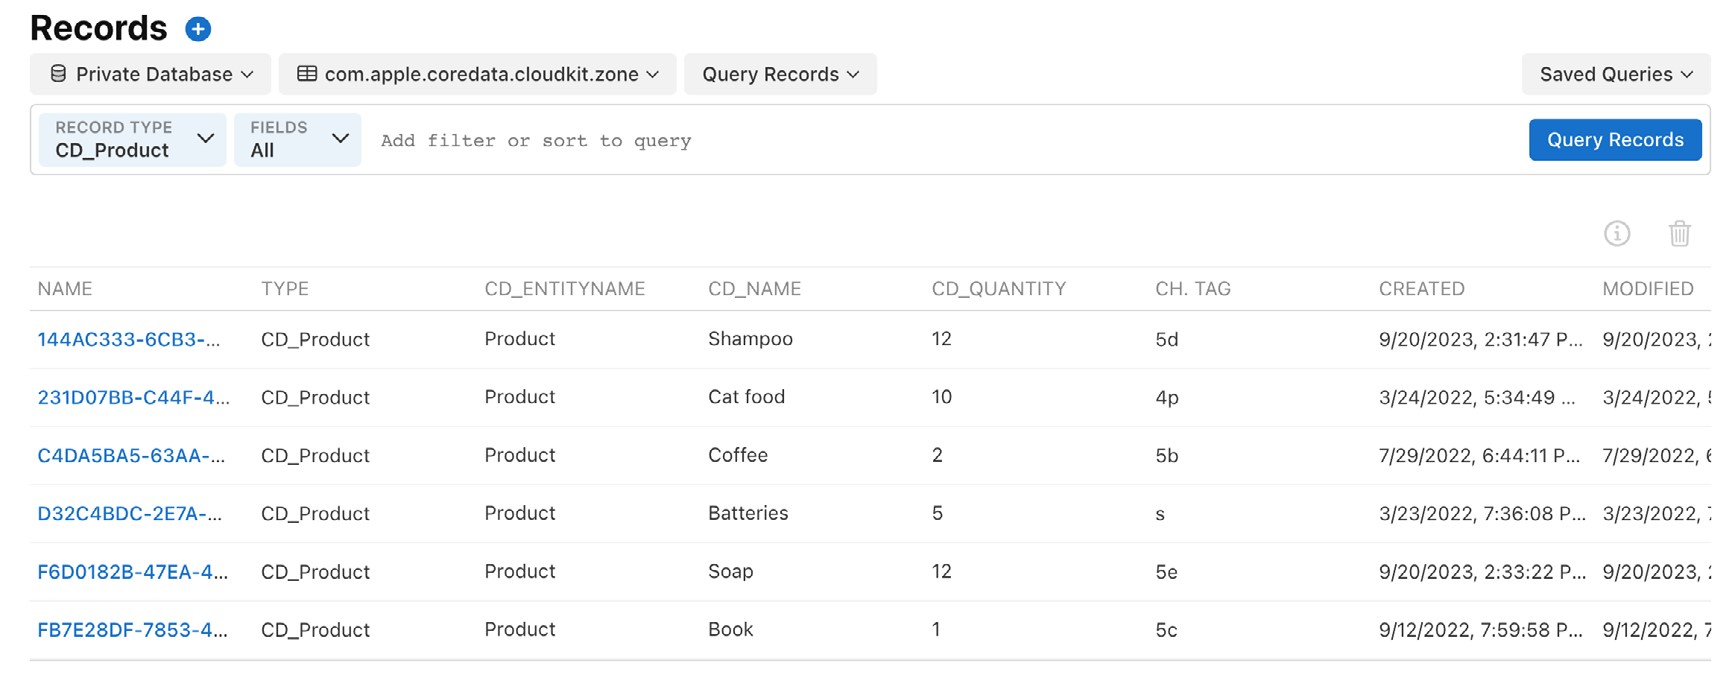
Clicking on the Query Records button should display a list of all the product items saved in the database, as illustrated in Figure 51-10:
Filtering and Sorting Queries
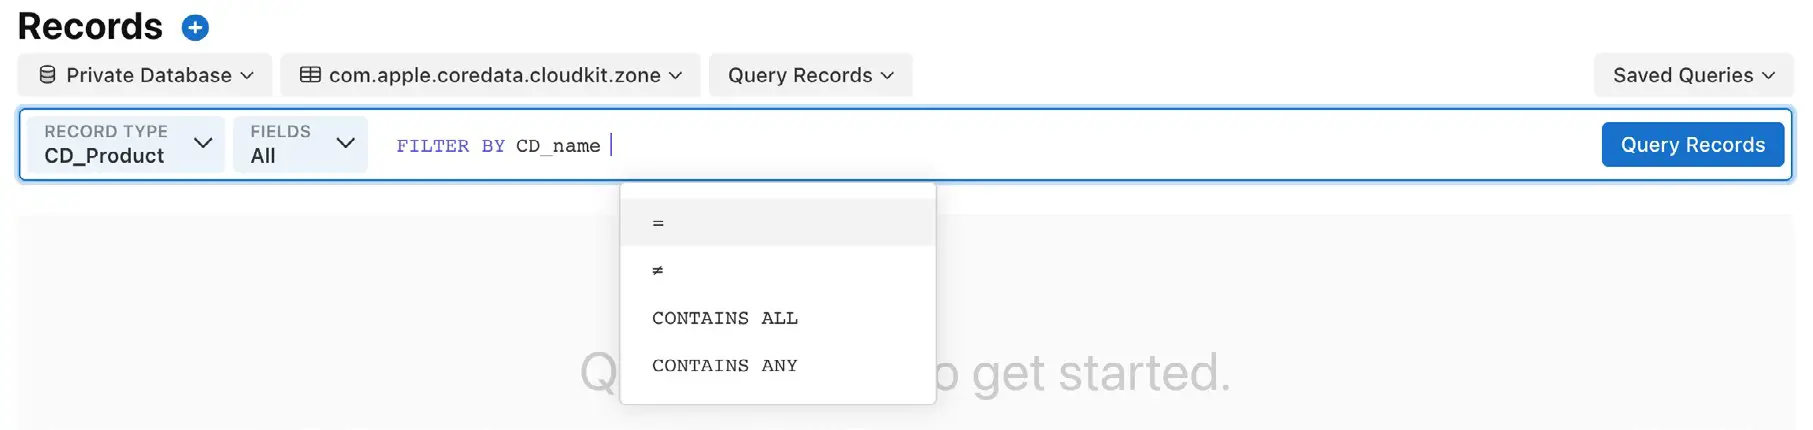
The queries we have been running so far are returning all of the records in the database. Queries may also be performed based on sorting and filtering criteria by clicking in the “Add filter or sort to query” field. Clicking in this field will display a menu system that will guide you through setting up the criteria. In Figure 51-11, for example, the menu system is being used to set up a filtered query based on the CD_name field:
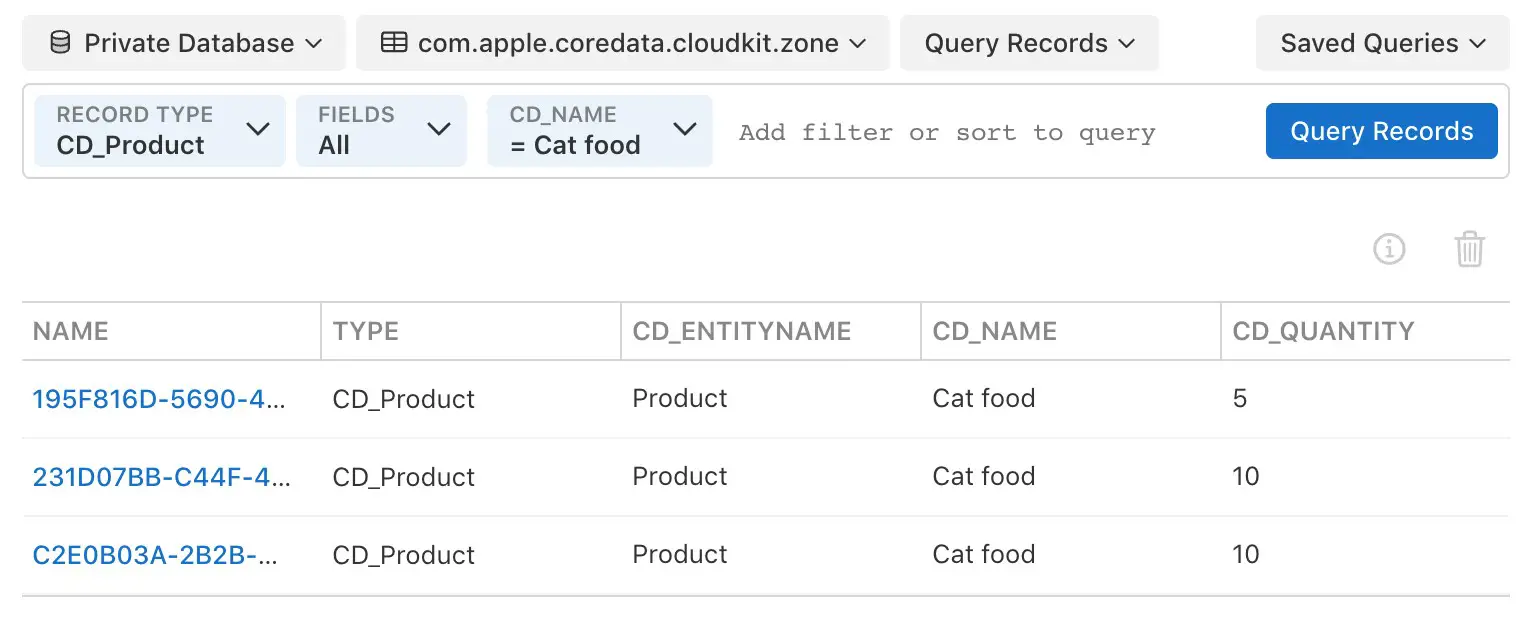
Similarly, Figure 51-12 shows the completed filter and query results:
The same technique can be used to sort the results in ascending or descending order. You can also combine multiple criteria in a single query. To edit or remove a query criterion, left-click on it and select the appropriate menu option.
|
You are reading a sample chapter from an old edition of iOS App Development Essentials. Purchase the fully updated iOS 18 App Development Essentials book. The full book contains 71 chapters, over 612 pages of in-depth information, downloadable source code, and access to over 50 SwiftUI knowledge test quizzes. |
Editing and Deleting Records
In addition to querying the records in the database, the CloudKit Console also allows records to be edited and deleted. To edit or delete a record, locate it in the query list and click on the entry in the name column as highlighted below:

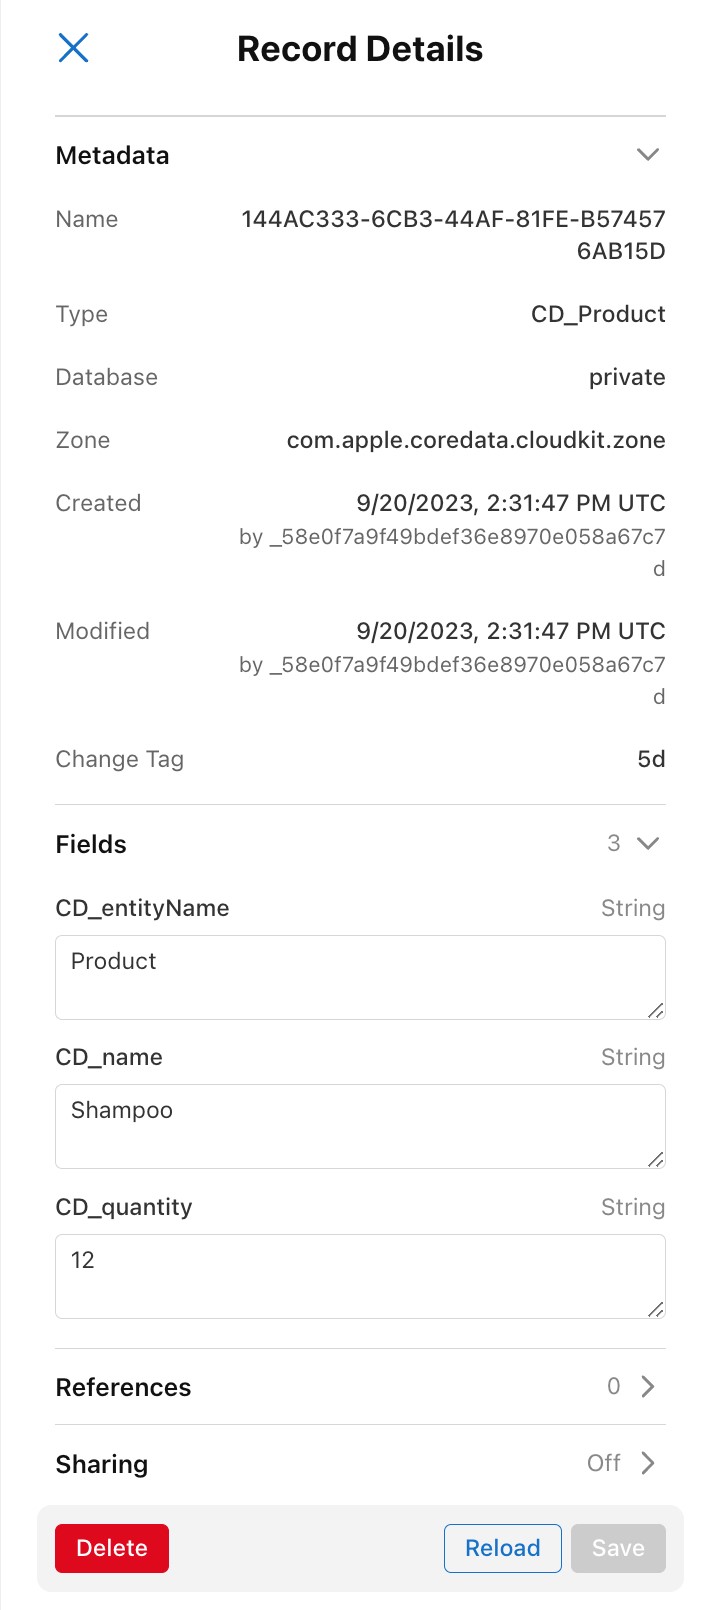
Once the record has been selected, the Record Details panel shown in Figure 51-14 will appear. In addition to displaying detailed information about the record, this panel also allows the record to be modified or deleted.
Adding New Records
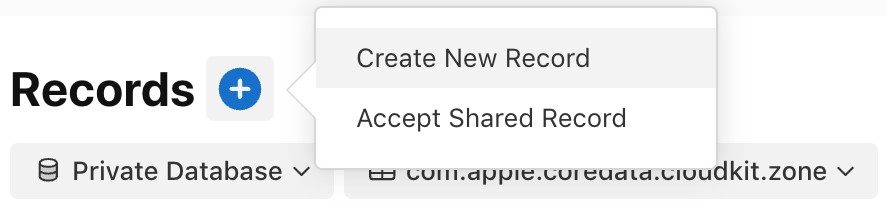
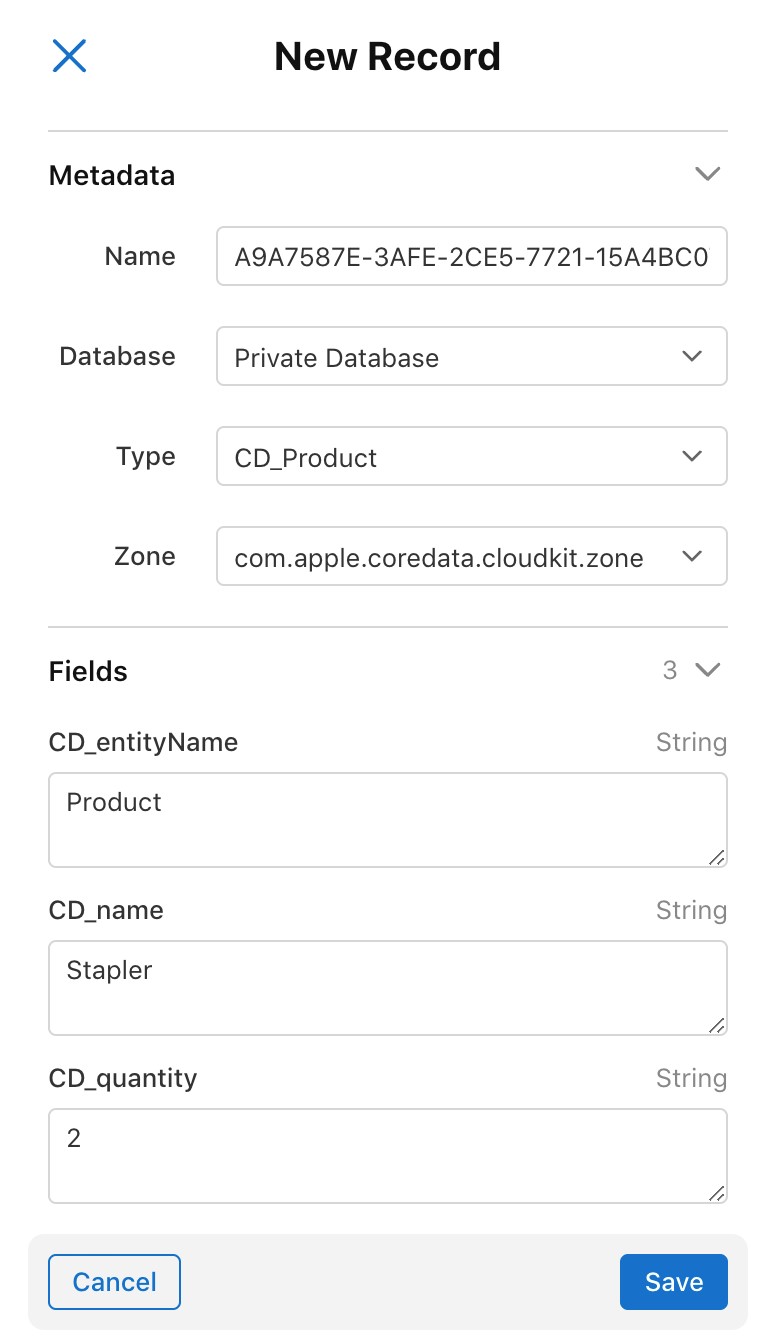
To add a new record to a database, click on the “+” located at the top of the query results list and select the Create New Record option:
When the New Record panel appears (Figure 51-16) enter the new data before clicking the Save button:
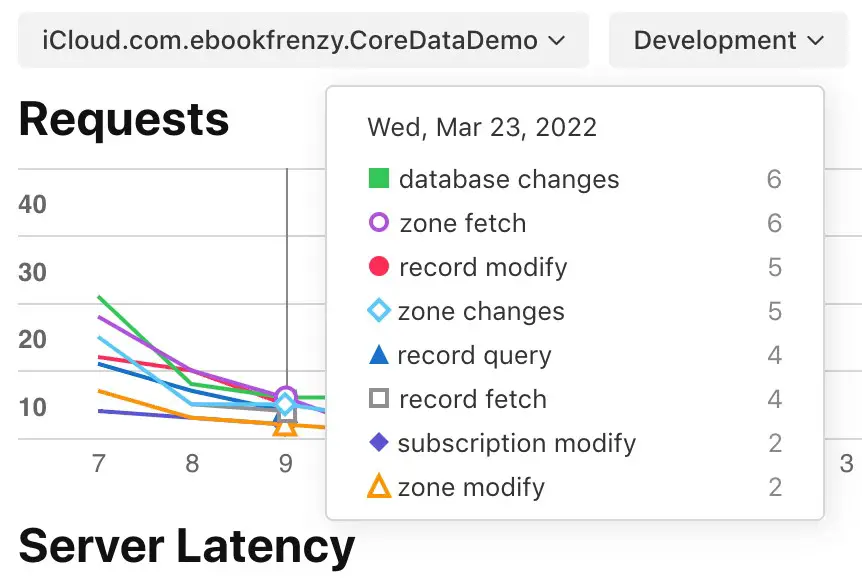
Viewing Telemetry Data
To view telemetry data, return to the console home screen (Figure 51-7) and select the Telemetry option. Within the telemetry screen, select the container, environment, timescale, and database type options:
|
You are reading a sample chapter from an old edition of iOS App Development Essentials. Purchase the fully updated iOS 18 App Development Essentials book. The full book contains 71 chapters, over 612 pages of in-depth information, downloadable source code, and access to over 50 SwiftUI knowledge test quizzes. |

Hovering the mouse pointer over a graph will display a key explaining the metric represented by the different line colors:
By default, telemetry data is displayed for database activity. This can be changed to display data relating to notifications or database usage using tabs highlighted in Figure 51-19:

Summary
The first step in adding CloudKit support to an Xcode SwiftUI project is to add the iCloud capability, enabling both the CloudKit service and remote notifications and configuring a container to store the databases associated with the app. The migration from Core Data to CloudKit is simply a matter of changing the code to use NSPersistentCloudKitContainer instead of NSPersistentContainer and rebuilding the project.
CloudKit databases can be queried, modified, managed, and monitored from within the CloudKit Console.