
Now that we have explored the concepts of Core Data, it is time to put that knowledge to use by creating an example app project. In this project tutorial, we will create a simple inventory app that uses Core Data to persistently store the names and quantities of products. This will include the ability to add, delete, and search for database entries.
Creating the CoreDataDemo Project
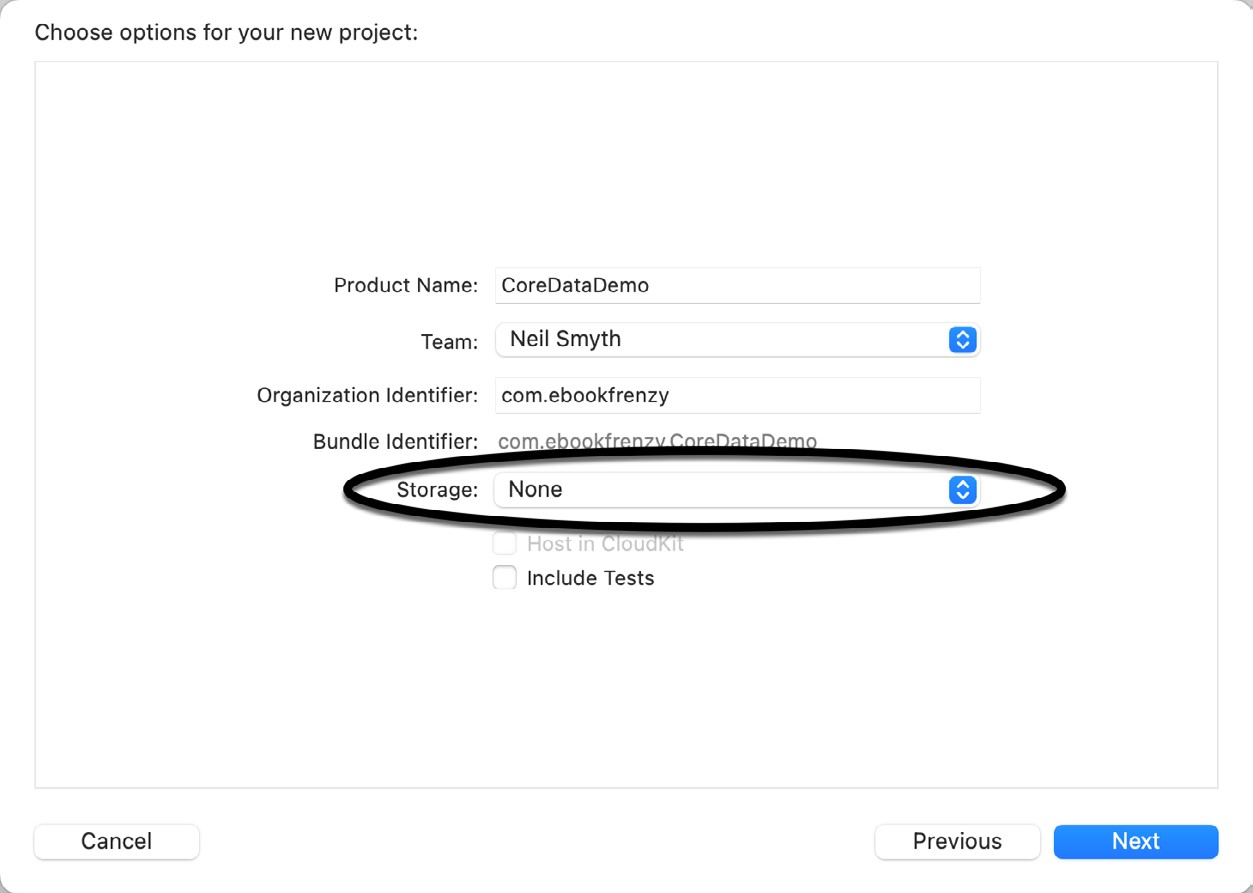
Launch Xcode, select the option to create a new project and choose the Multiplatform App template before clicking the Next button. On the project options screen, name the project CoreDataDemo and choose an organization identifier that will uniquely identify your app (this will be important when we add CloudKit support to the project in a later chapter).
Note that the options screen includes a Storage menu, as Figure 49-1 highlights. Xcode will configure the project for Core Data support and generate code to implement a simple app demonstrating Core Data in action when the Core Data option is selected from this menu. Instead of using this template, this tutorial will take you through the steps of manually adding Core Data support to a project so that you have a better understanding of how Core Data works. For this reason, make sure the Storage option is set to None before clicking the Next button:
Select a suitable location to save the project before clicking the Finish button.
Defining the Entity Description
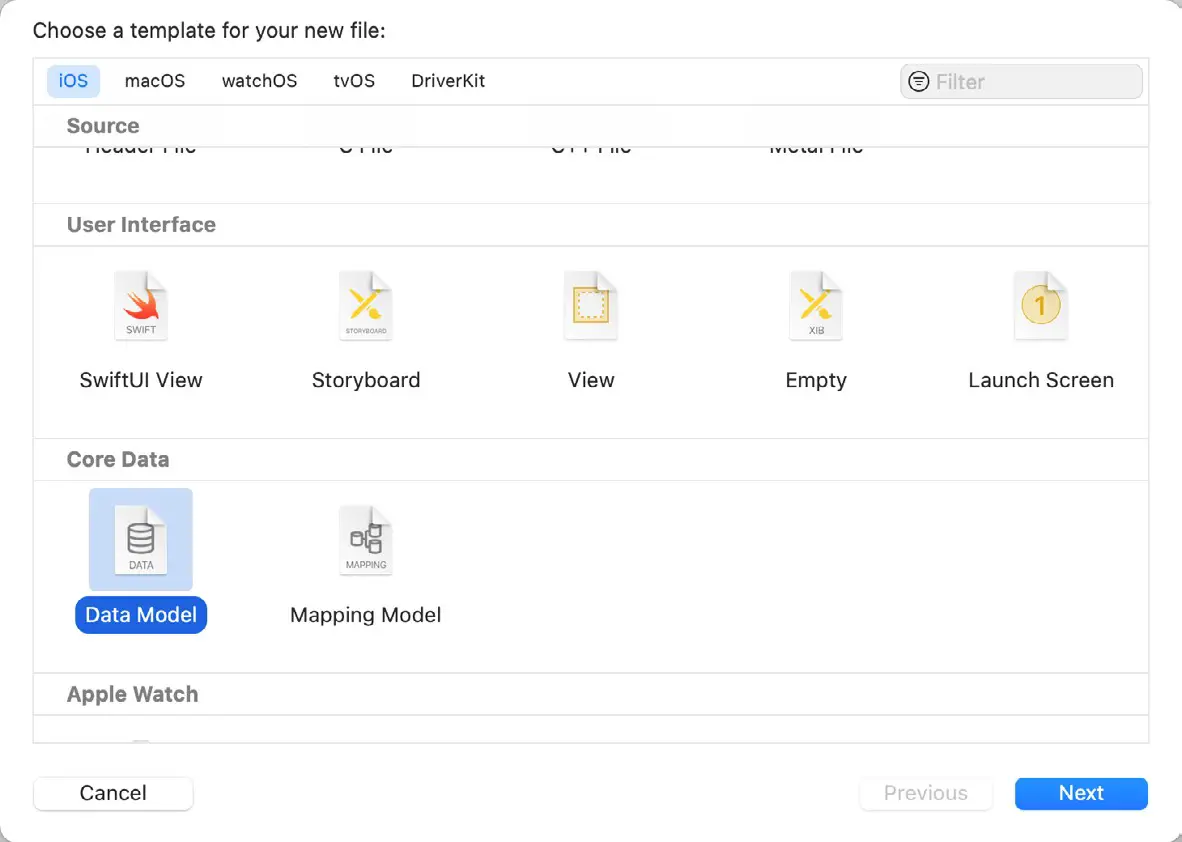
For this example, the entity takes the form of a data model designed to hold the names and quantities that will make up the product inventory. Select the File -> New -> File… menu option and, within the template dialog, select the Data Model entry located in the Core Data section, as shown in Figure 49-2, then click the Next button:
 |
You are reading a sample chapter from an old edition of iOS App Development Essentials. Purchase the fully updated iOS 18 App Development Essentials book. The full book contains 71 chapters, over 612 pages of in-depth information, downloadable source code, and access to over 50 SwiftUI knowledge test quizzes. |
Name the file Products and click on the Create button to generate the file. Once the file has been created, it will appear within the entity editor, as shown below:
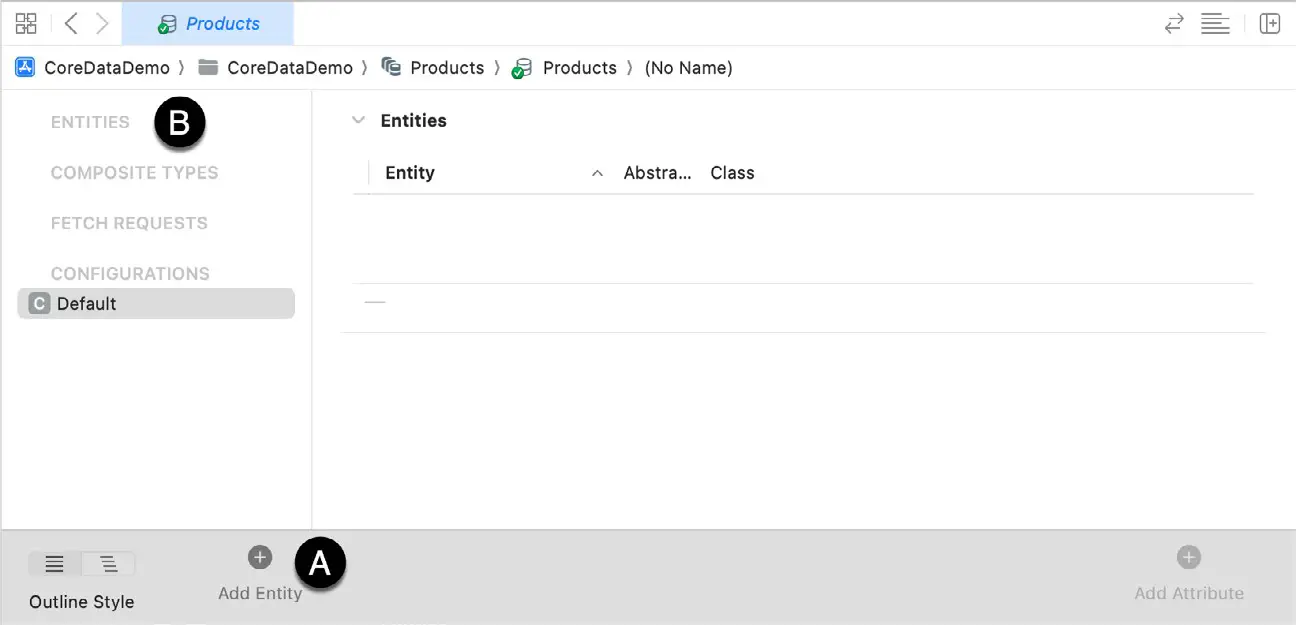
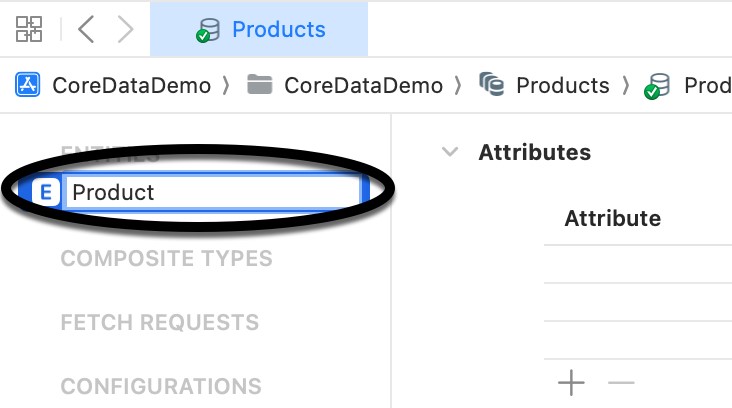
To add a new entity to the model, click on the Add Entity button marked A in Figure 49-3 above. Xcode will add a new entity (named Entity) to the model and list it beneath the Entities heading (B). Click on the new entity and change the name to Product:
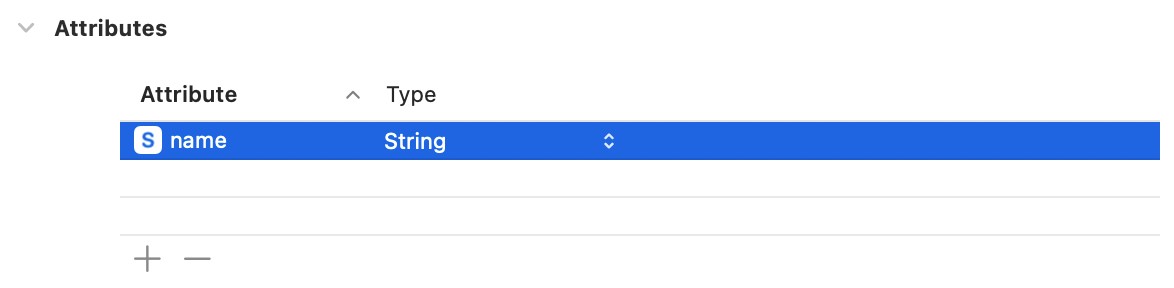
Now that the entity has been created, the next step is to add the name and quantity attributes. To add the first attribute, click on the + button located beneath the Attributes section of the main panel. Name the new attribute name and change the Type to String, as shown in Figure 49-5:
Repeat these steps to add a second attribute of type String named quantity. Upon completion of these steps, the attributes panel should match Figure 49-6:

Creating the Persistence Controller
The next requirement for our project is a persistence controller class in which to create and initialize an NSPersistentContainer instance. Select the File -> New -> File… menu option and, within the template dialog, select the Swift File template option and save it as Persistence.swift. With the new file loaded into the code editor, modify it so that it reads as follows:
|
You are reading a sample chapter from an old edition of iOS App Development Essentials. Purchase the fully updated iOS 18 App Development Essentials book. The full book contains 71 chapters, over 612 pages of in-depth information, downloadable source code, and access to over 50 SwiftUI knowledge test quizzes. |
import CoreData

struct PersistenceController {
    static let shared = PersistenceController()

    let container: NSPersistentContainer

    init() {
        container = NSPersistentContainer(name: "Products")

        container.loadPersistentStores { (storeDescription, error) in
            if let error = error as NSError? {
                fatalError("Container load failed: \(error)")
            }
        }
    }
}Code language: Swift (swift)
Setting up the View Context
Now that we have created a persistent controller, we can use it to obtain a reference to the view context. An ideal place to perform this task is within the CoreDataDemoApp.swift file. To make the context accessible to the views that will make up the app, we will insert it into the view hierarchy as an environment object as follows:
import SwiftUI

@main
struct CoreDataDemoApp: App {

    let persistenceController = PersistenceController.shared

    var body: some Scene {
        WindowGroup {
            ContentView()
                .environment(\.managedObjectContext,
                             persistenceController.container.viewContext)
        }
    }
}Code language: Swift (swift)
Preparing the ContentView for Core Data
Before we start adding views to design the app user interface, the following initial changes are required within the ContentView.swift file:
import SwiftUI
import CoreData

struct ContentView: View {

    @State var name: String = ""
    @State var quantity: String = ""

    @Environment(\.managedObjectContext) private var viewContext

    @FetchRequest(entity: Product.entity(), sortDescriptors: [])
    private var products: FetchedResults<Product>

    var body: some View {
.
.Code language: Swift (swift)
In addition to importing the CoreData library, we have also declared two state objects into which the product name and quantity will be stored as the user enters them. We have also accessed the view context environment object created in the CoreDataDemoApp.swift file.
The @FetchRequest property wrapper is also used to declare a variable named products into which Core Data will store the latest product data stored in the database.
Designing the User Interface
With most of the preparatory work complete, we can now begin designing the layout of the main content view. Remaining in the ContentView.swift file, modify the body of the ContentView structure so that it reads as follows:
|
You are reading a sample chapter from an old edition of iOS App Development Essentials. Purchase the fully updated iOS 18 App Development Essentials book. The full book contains 71 chapters, over 612 pages of in-depth information, downloadable source code, and access to over 50 SwiftUI knowledge test quizzes. |
.
.
var body: some View {
NavigationStack {
VStack {
TextField("Product name", text: $name)
TextField("Product quantity", text: $quantity)
HStack {
Spacer()
Button("Add") {
}
Spacer()
Button("Clear") {
name = ""
quantity = ""
}
Spacer()
}
.padding()
.frame(maxWidth: .infinity)
List {
ForEach(products) { product in
HStack {
Text(product.name ?? "Not found")
Spacer()
Text(product.quantity ?? "Not found")
}
}
}
.navigationTitle("Product Database")
}
.padding()
.textFieldStyle(RoundedBorderTextFieldStyle())
}
}
.
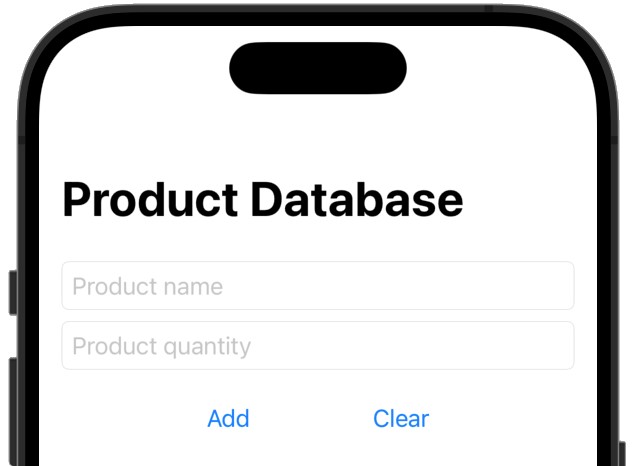
.Code language: Swift (swift)The layout initially consists of two TextField views, two Buttons, and a List, which should render within the preview canvas as follows:
Saving Products
More code changes are now required so that data entered into the product name and quantity text fields is saved by Core Data into persistent storage when the Add button is clicked. Edit the ContentView.swift file once again to add this functionality:
.
.
   var body: some View {
        NavigationStack {
            VStack {
                TextField("Product name", text: $name)
                TextField("Product quantity", text: $quantity)

                HStack {
                    Spacer()
                    Button("Add") {
                        addProduct()
                    }
                    Spacer()
                    Button("Clear") {
                        name = ""
                        quantity = ""
                    }
.
.
            .padding()
            .textFieldStyle(RoundedBorderTextFieldStyle())
        }
    }

    private func addProduct() {
        withAnimation {
            let product = Product(context: viewContext)
            product.name = name
            product.quantity = quantity

            saveContext()
        }
    }

    private func saveContext() {
        do {
            try viewContext.save()
        } catch {
            let error = error as NSError
            fatalError("An error occurred: \(error)")
        }
    }
}
.
.Code language: Swift (swift)
The first change configured the Add button to call a function named addProduct(), which was declared as follows:
private func addProduct() {
    withAnimation {
        let product = Product(context: viewContext)
        product.name = name
        product.quantity = quantity

        saveContext()
    }
}Code language: JavaScript (javascript)
The addProduct() function creates a new Product entity instance and assigns the current content of the product name and quantity state properties to the corresponding entity attributes. A call is then made to the following saveContext() function:
private func saveContext() {
    do {
        try viewContext.save()
    } catch {
        let error = error as NSError
        fatalError("An error occurred: \(error)")
    }
}Code language: Swift (swift)
The saveContext() function uses a “do.. try .. catch” construct to save the current viewContext to persistent storage. For testing purposes, a fatal error is triggered to terminate the app if the save action fails. More comprehensive error handling would typically be required for a production-quality app.
|
You are reading a sample chapter from an old edition of iOS App Development Essentials. Purchase the fully updated iOS 18 App Development Essentials book. The full book contains 71 chapters, over 612 pages of in-depth information, downloadable source code, and access to over 50 SwiftUI knowledge test quizzes. |
Saving the data will cause the latest data to be fetched and assigned to the products data variable. This, in turn, will cause the List view to update with the latest products. To make this update visually appealing, the code in the addProduct() function is placed in a withAnimation call.
Testing the addProduct() Function
Compile and run the app on a device or simulator, enter a few product and quantity entries, and verify that those entries appear in the List view as they are added. After entering information into the text fields, check that clicking on the Clear button clears the current entries.
At this point in the tutorial, the running app should resemble that shown in Figure 49-8 after some products have been added:

To make the list more organized, the product items need to be sorted in ascending alphabetical order based on the name attribute. To implement this, add a sort descriptor to the @FetchRequest definition as outlined below. This requires the creation of an NSSortDescriptor instance configured with the name attribute declared as the key and the ascending property set to true:
@FetchRequest(entity: Product.entity(),
           sortDescriptors: [NSSortDescriptor(key: "name", ascending: true)])
private var products: FetchedResults<Product>Code language: Swift (swift)
When the app is run, the product list will be sorted in ascending alphabetic order.
|
You are reading a sample chapter from an old edition of iOS App Development Essentials. Purchase the fully updated iOS 18 App Development Essentials book. The full book contains 71 chapters, over 612 pages of in-depth information, downloadable source code, and access to over 50 SwiftUI knowledge test quizzes. |
Deleting Products
Now that the app has a mechanism for adding product entries to the database, we need a way to delete entries that are no longer needed. For this project, we will use the same steps demonstrated in the chapter entitled SwiftUI Lists and Navigation. This will allow the user to delete entries by swiping on the list item and tapping the delete button. Beneath the existing addProduct() function, add a new function named deleteProduct() that reads as follows:
private func deleteProducts(offsets: IndexSet) {
    withAnimation {
        offsets.map { products[$0] }.forEach(viewContext.delete)
            saveContext()
        }
}Code language: PHP (php)
When the method is called, it is passed a set of offsets within the List entries representing the positions of the items selected by the user for deletion. The above code loops through these entries calling the viewContext delete() function for each deleted item. Once the deletions are complete, the changes are saved to the database via a call to our saveContext() function.
Now that we have added the deleteProduct() function, the List view can be modified to call it via the onDelete() modifier:
.
.
List {
ForEach(products) { product in
HStack {
Text(product.name ?? "Not found")
Spacer()
Text(product.quantity ?? "Not found")
}
}
.onDelete(perform: deleteProducts)
}
.navigationTitle("Product Database")
.
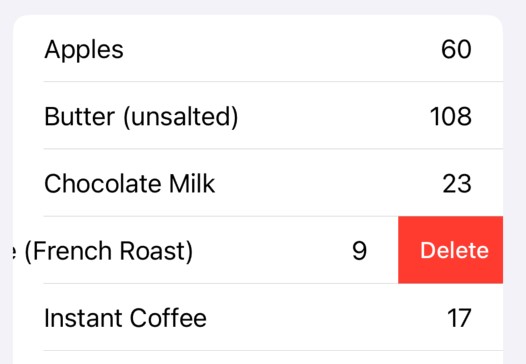
.Code language: Swift (swift)Run the app and verify both that performing a leftward swipe on a list item reveals the delete option and that clicking it removes the item from the list.
Adding the Search Function
The final feature to be added to the project will allow us to search the database for products that match the text entered into the name text field. The results will appear in a list contained within a second view named ResultsView. When it is called from ContentView, ResultsView will be passed the current value of the name state property and a reference to the viewContext object.
|
You are reading a sample chapter from an old edition of iOS App Development Essentials. Purchase the fully updated iOS 18 App Development Essentials book. The full book contains 71 chapters, over 612 pages of in-depth information, downloadable source code, and access to over 50 SwiftUI knowledge test quizzes. |
Begin by adding the ResultsView structure to the ContentView.swift file as follows:
struct ResultsView: View {

    var name: String
    var viewContext: NSManagedObjectContext
    @State var matches: [Product]?

    var body: some View {

        return VStack {
            List {
                ForEach(matches ?? []) { match in
                    HStack {
                        Text(match.name ?? "Not found")
                        Spacer()
                        Text(match.quantity ?? "Not found")
                    }
                }
            }
            .navigationTitle("Results")
        }
    }
}Code language: Swift (swift)
In addition to the name and viewContext parameters, the declaration also includes a state property named matches into which will be placed the matching product search results, which, in turn, will be displayed within the List view.
We now need to add some code to perform the search and will do so by applying a task() modifier to the VStack container view. This will ensure that searches are performed asynchronously and that all of the view’s properties have been initialized before the search is executed:
.
.
    return VStack {
        List {

            ForEach(myMatches ?? []) { match in
                HStack {
                    Text(match.name ?? "Not found")
                    Spacer()
                    Text(match.quantity ?? "Not found")
                }
            }
        }
        .navigationTitle("Results")
    }
    .task {
        let fetchRequest: NSFetchRequest<Product> = Product.fetchRequest()

        fetchRequest.entity = Product.entity()
        fetchRequest.predicate = NSPredicate(
            format: "name CONTAINS %@", name
        )
        matches = try? viewContext.fetch(fetchRequest)
    }
.
.
Code language: Swift (swift)
So that the search finds all products that contain the specified text, the predicate is configured using the CONTAINS keyword. This provides more flexibility than performing exact match searches using the LIKE keyword by finding partial matches.
The code in the closure of the task() modifier obtains an NSFetchRequest instance from the Product entity and assigns it an NSPredicate instance configured to find matches between the name variable and the name product entity attribute. The fetch request is then passed to the fetch() method of the view context, and the results are assigned to the matches state object. This, in turn, will cause the List to be re-rendered with the matching products.
|
You are reading a sample chapter from an old edition of iOS App Development Essentials. Purchase the fully updated iOS 18 App Development Essentials book. The full book contains 71 chapters, over 612 pages of in-depth information, downloadable source code, and access to over 50 SwiftUI knowledge test quizzes. |
The last task before testing the search feature is to add a navigation link to ResultsView, keeping in mind that ResultsView expects to be passed the name state object and a reference to viewContext. This needs to be positioned between the Add and Clear buttons as follows:
.
.
HStack {
Spacer()
Button("Add") {
addProduct()
}
Spacer()
NavigationLink(destination: ResultsView(name: name,
viewContext: viewContext)) {
Text("Find")
}
Spacer()
Button("Clear") {
name = ""
quantity = ""
}
Spacer()
}
.
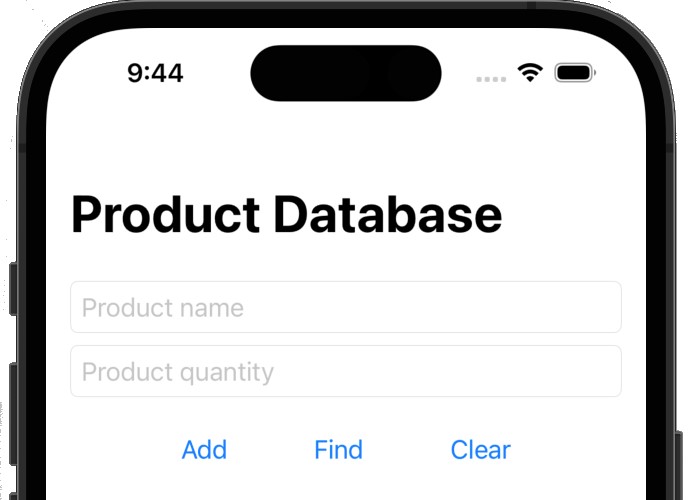
.Code language: Swift (swift)Check the preview canvas to confirm that the navigation link appears, as shown in Figure 49-10:
Testing the Completed App
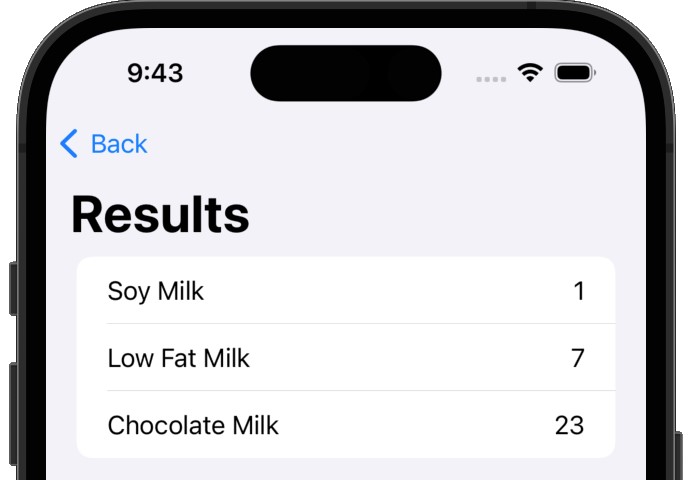
Rerun the app and add some products, preferably with some containing the same word. Enter the common word into the name text field and click on the Find link. The ResultsView screen should appear with a list of matching items. Figure 49-11, for example, illustrates a search performed on the word “Milk”:
Summary
In this chapter, we have used Core Data to provide persistent database storage within an app project. Topics covered include the creation of a Core Data entity model and the configuration of entity attributes. Steps were also taken to initialize a persistent container from which we obtained the view context. The project also used the @FetchRequest property wrapper configured to store entries alphabetically and used the view context to add, delete, and search for database entries. In implementing the search behavior, we used an NSFetchRequest instance configured with an NSPredicate object and passed that to the fetch() method of the view context to find matching results.