
In this chapter, we will be introducing 2D graphics drawing using the Compose Canvas component. As we explore the capabilities of Canvas it will quickly become clear that, as with just about everything else in Compose, impressive results can typically be achieved with just a few lines of code.
Introducing the Canvas component
The Canvas component provides a surface on which to perform 2D graphics drawing. Behind the scenes, however, Canvas does much more than just providing a drawing area, including making sure that the state of the graphical content is maintained and managed automatically. Canvas also has its own scope (DrawScope) which gives us access to properties of the canvas area including the size dimensions and center point of the current bounds area, in addition to a set of functions that can be used to draw shapes, lines, and paths, define insets, perform rotations, and much more.
Given the visual nature of this particular Compose feature, the rest of this chapter will make use of a project to demonstrate many of the features of the Canvas component in action.
Creating the CanvasDemo project
Launch Android Studio and create a new Empty Compose Activity project named CanvasDemo, specifying com.example.canvasdemo as the package name, and selecting a minimum API level of API 26: Android 8.0 (Oreo). Within the MainActivity.kt file, delete the Greeting function and add a new empty composable named MainScreen:
@Composable
fun MainScreen() {

}Code language: Kotlin (kotlin)
Next, edit the onCreateActivity() method and DefaultPreview function to call MainScreen instead of Greeting.
 |
You are reading a sample chapter from an old edition of the Jetpack Compose Essentials book. Purchase the fully updated Jetpack Compose 1.7 Essentials edition of this book in eBook or Print format. The full book contains 67 chapters and over 700 pages of in-depth information. Buy the full book now in Print or eBook format. Learn more. |
Drawing a line and getting the canvas size
The first drawing example we will look at involves drawing a straight diagonal line from one corner of the Canvas bounds to the other. To achieve this, we need to obtain the dimensions of the canvas by accessing the size properties provided by DrawScope. Edit the MainActivity.kt file to add a new function named DrawLine and add a call to this new function from within the MainScreen composable:
.
.
import androidx.compose.foundation.Canvas
import androidx.compose.foundation.layout.size
import androidx.compose.ui.geometry.Offset
import androidx.compose.ui.geometry.Size
import androidx.compose.ui.graphics.*
import androidx.compose.ui.unit.dp
.
.
@Composable
fun MainScreen() {
    DrawLine()
}

@Composable
fun DrawLine() {
    Canvas(modifier = Modifier.size(300.dp)) {
        val height = size.height
        val width = size.width
    }
}Code language: Kotlin (kotlin)
The DrawLine composable creates a fixed size Canvas and extracts the height and width properties from the DrawScope. All that remains is to draw a line via a call to the DrawScope drawLine() function:
@Composable
fun DrawLine() {
    Canvas(modifier = Modifier.size(300.dp)) {
        val height = size.height
        val width = size.width

        drawLine(
            start = Offset(x= 0f, y = 0f),
            end = Offset(x = width, y = height),
            color = Color.Blue,
            strokeWidth = 16.0f
        )
    }
}Code language: Kotlin (kotlin)
The drawLine() API function needs to know the x and y coordinates of the start and endpoints of the line, keeping in mind that the top left-hand corner of the Canvas is position 0, 0. In the above example, these coordinates are packaged into an Offset instance via a call to the Offset() function. The drawLine() function also needs to know the thickness and color of the line to be drawn. After making the above changes, refresh the Preview panel where the drawing should be rendered as shown in Figure 38-1:
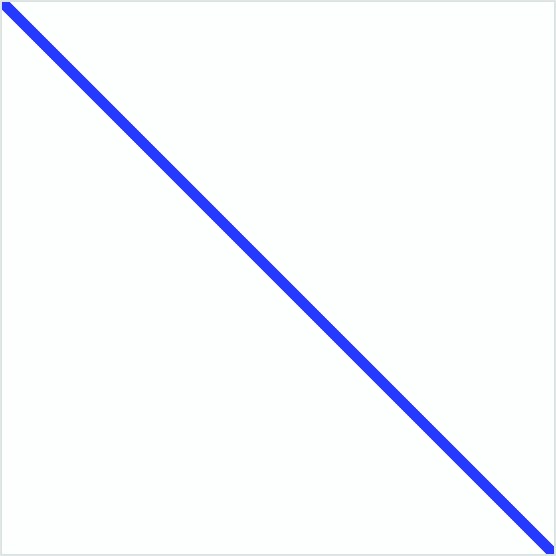
Figure 38-1
Drawing dashed lines
Any form of line drawing performed on a Canvas can be configured with dash effects by configuring a PathEffect instance and assigning it to the pathEffect argument of the drawing function call. To create a dashed line, we need to call the dashPathEffect() method of the PathEffect instance and pass it an array of floating-point numbers. The floating-point numbers indicate the “on” and “off” intervals in the line in pixels. There must be an even number of interval values with a minimum of 2 values. Modify the DrawLine composable to add a dashed line effect as follows:
|
You are reading a sample chapter from an old edition of the Jetpack Compose Essentials book. Purchase the fully updated Jetpack Compose 1.7 Essentials edition of this book in eBook or Print format. The full book contains 67 chapters and over 700 pages of in-depth information. Buy the full book now in Print or eBook format. Learn more. |
@Composable
fun DrawLine() {
    Canvas(modifier = Modifier.size(300.dp)) {
        val height = size.height
        val width = size.width

        drawLine(
            start = Offset(x= 0f, y = 0f),
            end = Offset(x = width, y = height),
            color = Color.Blue,
            strokeWidth = 16.0f,
            pathEffect = PathEffect.dashPathEffect(
                      floatArrayOf(30f, 10f, 10f, 10f), phase = 0f)
        )
    }
}Code language: Kotlin (kotlin)
The above path effect will draw a line beginning with a 30px dash and 10px space, followed by 10px dash and a 10px space, repeating this sequence until the end of the line as shown in Figure 38-2:
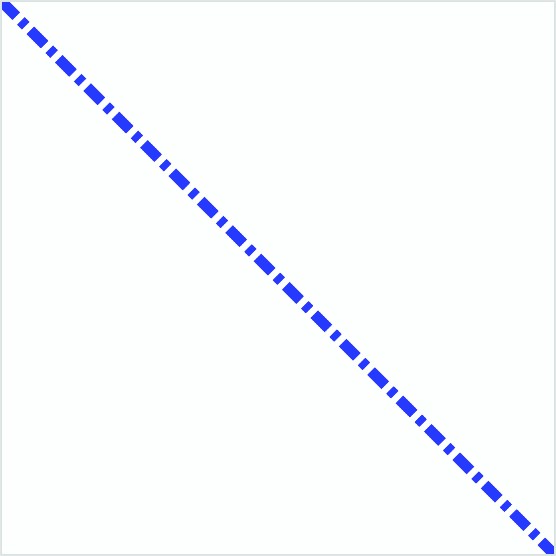
Figure 38-2
Drawing a rectangle
Rectangles are drawn on a Canvas using the drawRect() function which can be used in several different ways. The following code changes draw a rectangle of specific dimensions at the default position (0, 0) within the canvas area:
@Composable
fun MainScreen() {
    DrawRect()
}

@Composable
fun DrawRect() {
    Canvas(modifier = Modifier.size(300.dp)) {
        val size = Size(600f, 250f)
        drawRect(
            color = Color.Blue,
            size = size
        )
    }
}Code language: Kotlin (kotlin)
When rendered within the Preview panel, the rectangle will appear as shown in Figure 38-3:
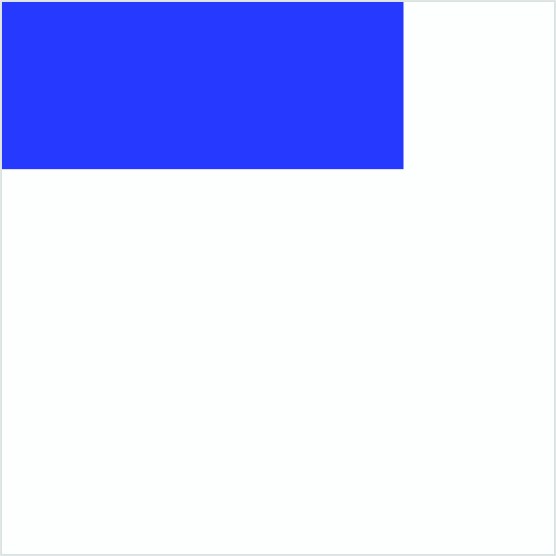
Figure 38-3
|
You are reading a sample chapter from an old edition of the Jetpack Compose Essentials book. Purchase the fully updated Jetpack Compose 1.7 Essentials edition of this book in eBook or Print format. The full book contains 67 chapters and over 700 pages of in-depth information. Buy the full book now in Print or eBook format. Learn more. |
Note that the dimensions of the Canvas are 300 x 300 while the rectangle is sized to 600 x 250. At first glance, this suggests that the rectangle should be much wider than it appears in the above figure relative to the Canvas. In practice, however, the Canvas size is declared in density-independent pixels (dp) while the rectangle size is specified in pixels (px). Density independent pixels are an abstract measurement that is calculated based on the physical density of the screen defined in dots per inch (dpi). Pixels, on the other hand, refer to the actual physical pixels on the screen. To work solely in pixels, start with dp values and then convert them to pixels as follows:
@Composable
fun DrawRect() {
Canvas(modifier = Modifier.size(300.dp)) {
val size = Size(200.dp.toPx(), 100.dp.toPx())
drawRect(
color = Color.Blue,
size = size
)
}
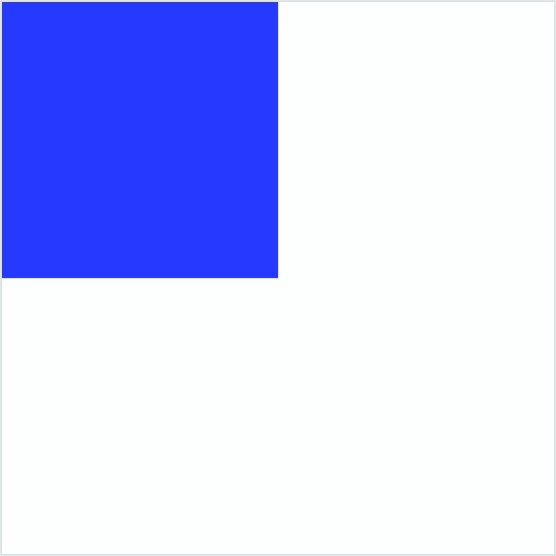
}Code language: Kotlin (kotlin)Instead of specifying dimensions, the size of the rectangle can also be defined relative to the size of the Canvas. For example, the following code draws a square that is half the size of the Canvas:
Composable
fun DrawRect() {
    Canvas(modifier = Modifier.size(300.dp)) {
        drawRect(
            color = Color.Blue,
            size = size / 2f
        )
    }
}Code language: Kotlin (kotlin)
The above changes will result in the following drawing output:
The position of the rectangle within the Canvas area can be specified by providing the coordinates of the top left-hand corner of the drawing:
@Composable
fun DrawRect() {
    Canvas(modifier = Modifier.size(300.dp)) {
        drawRect(
            color = Color.Blue,
            topLeft = Offset(x=350f, y = 300f),
            size = size / 2f
        )
    }
}Code language: Kotlin (kotlin)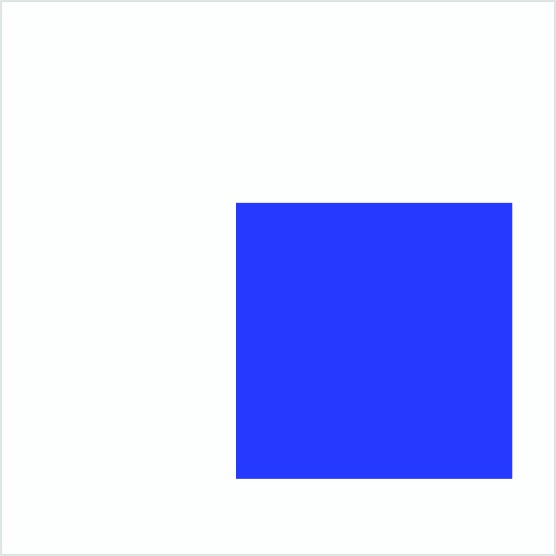
Figure 38-4
|
You are reading a sample chapter from an old edition of the Jetpack Compose Essentials book. Purchase the fully updated Jetpack Compose 1.7 Essentials edition of this book in eBook or Print format. The full book contains 67 chapters and over 700 pages of in-depth information. Buy the full book now in Print or eBook format. Learn more. |
Alternatively, the inset() function may be used to modify the bounds of the Canvas component:
.
.
import androidx.compose.ui.graphics.drawscope.inset
.
.
@Composable
fun DrawRect() {
    Canvas(modifier = Modifier.size(300.dp)) {
        inset(100f, 200f) {
            drawRect(
                color = Color.Blue,
                size = size / 2f
            )
        }
    }
}Code language: Kotlin (kotlin)
The inset() function can be called with a wide range of settings affecting different sides of the canvas. The function is also particularly useful because multiple drawing functions can be called from within the trailing lambda, with each adopting the same inset values.
The drawRoundRect() function is also available for drawing rectangles with rounded corners. In addition to size and position, this function also needs to be passed an appropriately configured CornerRadius component. It is also worth noting that rectangles (both with and without rounded corners) can be drawn in outline only by specifying a Stroke for the style property, for example:
.
.
import androidx.compose.ui.geometry.CornerRadius
import androidx.compose.ui.graphics.drawscope.Stroke
.
.
@Composable
fun DrawRect() {
    Canvas(modifier = Modifier.size(300.dp)) {

        val size = Size(
            width = 280.dp.toPx(),
            height = 200.dp.toPx())

        drawRoundRect(
            color = Color.Blue,
            size = size,
            topLeft = Offset(20f, 20f),
            style = Stroke(width = 8.dp.toPx()),
            cornerRadius = CornerRadius(
                x = 30.dp.toPx(),
                y = 30.dp.toPx()
            )
        )
    }
}Code language: Kotlin (kotlin)
The above code produces an outline of a rectangle with rounded corners:
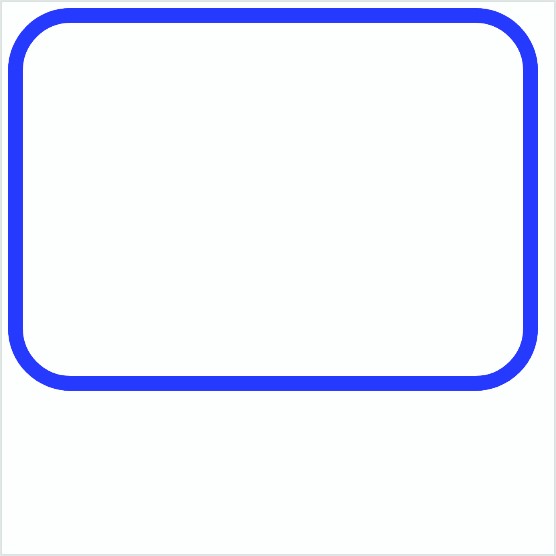
Figure 38-5
|
You are reading a sample chapter from an old edition of the Jetpack Compose Essentials book. Purchase the fully updated Jetpack Compose 1.7 Essentials edition of this book in eBook or Print format. The full book contains 67 chapters and over 700 pages of in-depth information. Buy the full book now in Print or eBook format. Learn more. |
Applying rotation
Any element drawn on a Canvas component can be rotated via a call to the scope rotate() function. The following code, for example, rotates a rectangle drawing by 45°:
.
.
import androidx.compose.ui.graphics.drawscope.rotate
.
.
@Composable
fun DrawRect() {
    Canvas(modifier = Modifier.size(300.dp)) {
        rotate(45f) {
            drawRect(
                color = Color.Blue,
                topLeft = Offset(200f, 200f),
                size = size / 2f
            )
        }
    }
}Code language: Kotlin (kotlin)
The above changes will render the drawing as shown in Figure 38-6 below:
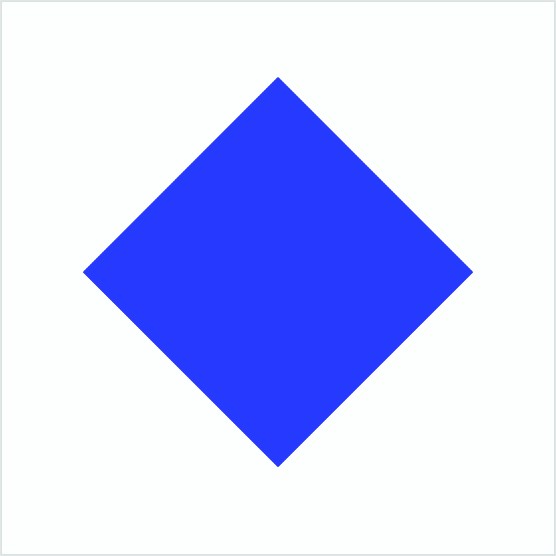
Figure 38-6
Drawing circles and ovals
Circles are drawn in Compose using the drawCircle() function. The following code draws a circle centered within a Canvas. Note that we find the center of the canvas by referencing the DrawScope center property:
@Composable
fun MainScreen() {
    DrawCircle()
}

@Composable
fun DrawCircle() {
    Canvas(modifier = Modifier.size(300.dp)) {
        val canvasWidth = size.width
        val canvasHeight = size.height

        drawCircle(
            color = Color.Blue,
            center = center,
            radius = 120.dp.toPx()
        )
    }
}Code language: Kotlin (kotlin)
When previewed, the canvas should appear as shown in Figure 38-7 below:
|
You are reading a sample chapter from an old edition of the Jetpack Compose Essentials book. Purchase the fully updated Jetpack Compose 1.7 Essentials edition of this book in eBook or Print format. The full book contains 67 chapters and over 700 pages of in-depth information. Buy the full book now in Print or eBook format. Learn more. |
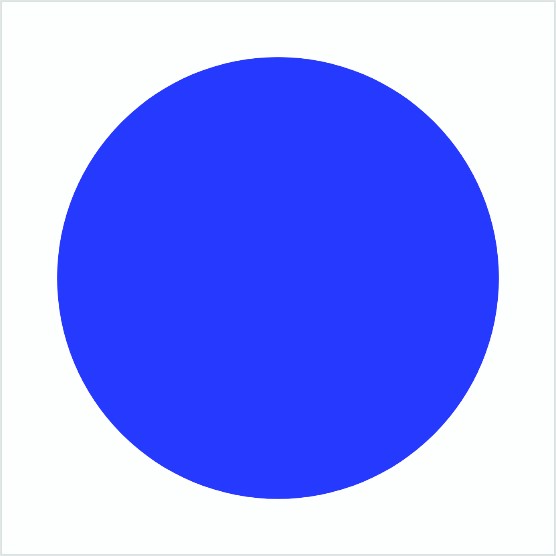
Figure 38-7
Oval shapes, on the other hand, are drawn by calling the drawOval() function. The following composable, for example, draws the outline of an oval shape:
@Composable
fun MainScreen() {
    DrawOval()
}

@Composable
fun DrawOval() {
    Canvas(modifier = Modifier.size(300.dp)) {
        val canvasWidth = size.width
        val canvasHeight = size.height
        drawOval(
            color = Color.Blue,
            topLeft = Offset(x = 25.dp.toPx(), y = 90.dp.toPx()),
            size = Size(
                width = canvasHeight - 50.dp.toPx(),
                height = canvasHeight / 2 - 50.dp.toPx()
            ),
            style = Stroke(width = 12.dp.toPx())
        )
    }
}Code language: Kotlin (kotlin)
The above code will render in the Preview panel as illustrated in Figure 38-8:

Figure 38-8
Drawing gradients
Shapes can be filled using gradient patterns by making use of the Brush component which can, in turn, paint horizontal, vertical, linear, radial, and sweeping gradients. For example, to fill a rectangle with a horizontal gradient, we need a Brush initialized with a list of colors together with the start and end positions along the x-axis and an optional tile mode setting. The following example draws a rectangle that occupies the entire canvas and fills it with a horizontal gradient:
|
You are reading a sample chapter from an old edition of the Jetpack Compose Essentials book. Purchase the fully updated Jetpack Compose 1.7 Essentials edition of this book in eBook or Print format. The full book contains 67 chapters and over 700 pages of in-depth information. Buy the full book now in Print or eBook format. Learn more. |
@Composable
fun MainScreen() {
    GradientFill()
}

@Composable
fun GradientFill() {

    Canvas(modifier = Modifier.size(300.dp)) {
        val canvasSize = size
        val colorList: List<Color> = listOf(Color.Red, Color.Blue,
                   Color.Magenta, Color.Yellow, Color.Green, Color.Cyan)

        val brush = Brush.horizontalGradient(
            colors = colorList,
            startX = 0f,
            endX = 300.dp.toPx(),
            tileMode = TileMode.Repeated
        )

        drawRect(
            brush = brush,
            size = canvasSize
        )
    }
}Code language: Kotlin (kotlin)
Try out the above example within the Preview panel where it should appear as follows:
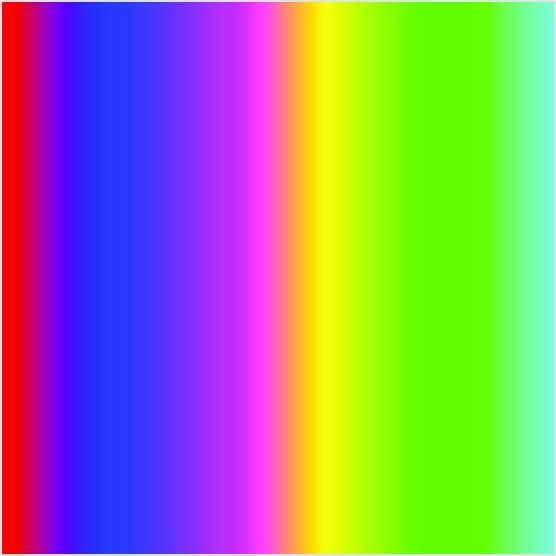
Figure 38-9
The following example, on the other hand, uses a radial gradient to fill a circle:
@Composable
fun MainScreen() {
    RadialFill()
}

@Composable
fun RadialFill() {
    Canvas(modifier = Modifier.size(300.dp)) {

        val canvasWidth = size.width
        val canvasHeight = size.height
        val radius = 150.dp.toPx()
        val colorList: List<Color> = listOf(Color.Red, Color.Blue,
                 Color.Magenta, Color.Yellow, Color.Green, Color.Cyan)

        val brush = Brush.radialGradient(
            colors = colorList,
            center = center,
            radius = radius,
            tileMode = TileMode.Repeated
        )

        drawCircle(
            brush = brush,
            center = center,
            radius = radius
        )
    }
}Code language: Kotlin (kotlin)
Note that the center parameter in the above drawCircle() call is optional in this example. In the absence of this parameter, the function will automatically default to the center of the canvas. When previewed, the circle will appear as shown in Figure 38-10:
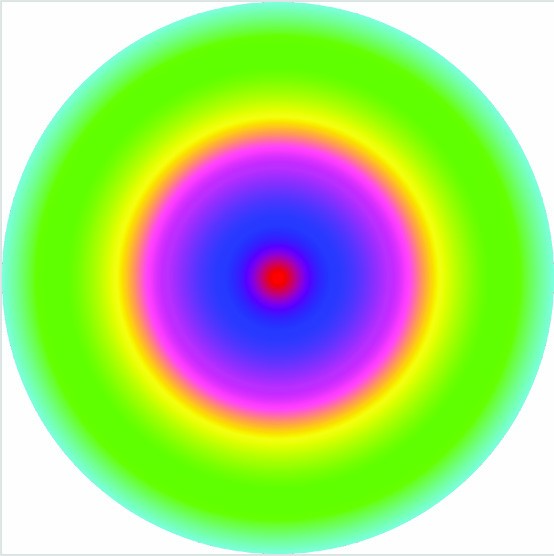
Figure 38-10
|
You are reading a sample chapter from an old edition of the Jetpack Compose Essentials book. Purchase the fully updated Jetpack Compose 1.7 Essentials edition of this book in eBook or Print format. The full book contains 67 chapters and over 700 pages of in-depth information. Buy the full book now in Print or eBook format. Learn more. |
Gradients are particularly useful for adding shadow effects to drawings. Consider, for example, the following horizontal gradient applied to a circle drawing:
@Composable
fun MainScreen() {
    ShadowCircle()
}

@Composable
fun ShadowCircle() {
    Canvas(modifier = Modifier.size(300.dp)) {
        val radius = 150.dp.toPx()
        val colorList: List<Color> =
            listOf(Color.Blue, Color.Black)

        val brush = Brush.horizontalGradient(
            colors = colorList,
            startX = 0f,
            endX = 300.dp.toPx(),
            tileMode = TileMode.Repeated
        )

        drawCircle(
            brush = brush,
            radius = radius
        )
    }
}Code language: Kotlin (kotlin)
When previewed, the circle will appear with a shadow effect on the right-hand side as illustrated in Figure 38-11:
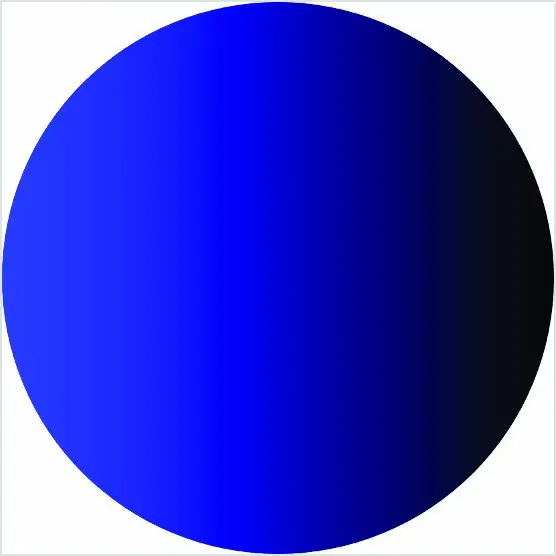
Figure 38-11
Drawing arcs
The drawArc() DrawScope function is used to draw an arc to fit within a specified rectangle and requires either a Brush or Color setting together with the start and sweep angles. The following code, for example, draws an arc starting at 20° with a sweep of 90° within a 250dp by 250dp rectangle:
@Composable
fun MainScreen() {
    DrawArc()
}

@Composable
fun DrawArc() {
    Canvas(modifier = Modifier.size(300.dp)) {
        drawArc(
            Color.Blue,
            startAngle = 20f,
            sweepAngle = 90f,
            useCenter = true,
            size = Size(250.dp.toPx(), 250.dp.toPx())
        )
    }
}Code language: Kotlin (kotlin)
The above code will render the arc as shown in Figure 38-12:
|
You are reading a sample chapter from an old edition of the Jetpack Compose Essentials book. Purchase the fully updated Jetpack Compose 1.7 Essentials edition of this book in eBook or Print format. The full book contains 67 chapters and over 700 pages of in-depth information. Buy the full book now in Print or eBook format. Learn more. |
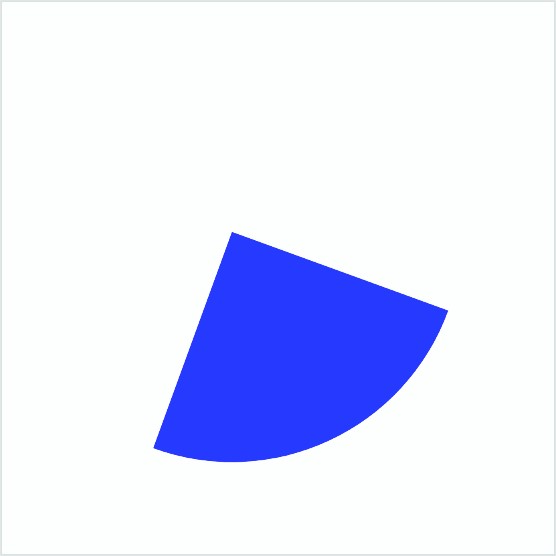
Figure 38-12
Drawing paths
So far in this chapter, we have focused on drawing predefined shapes such as circles and rectangles. DrawScope also supports the drawing of paths. Paths are essentially lines drawn between a series of coordinates within the canvas area. Paths are stored in an instance of the Path class which, once defined, is passed to the drawPath() function for rendering on the Canvas.
When designing a path, the moveTo() function is called first to define the start point of the first line. A line is then drawn to the next position using either the lineTo() or relativeLineTo() functions. The lineTo() function accepts the x and y coordinates of the next position relative to the top left-hand corner of the parent Canvas. The relativeLineTo() function, on the other hand, assumes that the coordinates passed to it are relative to the previous position and can be negative or positive. The Path class also includes functions for drawing non-straight lines including Cubic and Quadratic Bézier curves.
Once the path is complete, the close() function must be called to end the drawing.
Within the MainActivity.kt file, make the following modifications to draw a custom shape using a combination of straight lines and Quadratic Bézier curves:
|
You are reading a sample chapter from an old edition of the Jetpack Compose Essentials book. Purchase the fully updated Jetpack Compose 1.7 Essentials edition of this book in eBook or Print format. The full book contains 67 chapters and over 700 pages of in-depth information. Buy the full book now in Print or eBook format. Learn more. |
@Composable
fun MainScreen() {
    DrawPath()
}

@Composable
fun DrawPath() {
    Canvas(modifier = Modifier.size(300.dp)) {

        val path = Path().apply {
            moveTo(0f, 0f)
            quadraticBezierTo(50.dp.toPx(), 200.dp.toPx(),
                        300.dp.toPx(), 300.dp.toPx())
            lineTo(270.dp.toPx(), 100.dp.toPx())
            quadraticBezierTo(60.dp.toPx(), 80.dp.toPx(), 0f, 0f)
            close()
        }

        drawPath(
            path = path,
            Color.Blue,
        )
    }
}Code language: Kotlin (kotlin)
Refresh the Preview panel where the drawing should appear as illustrated below:
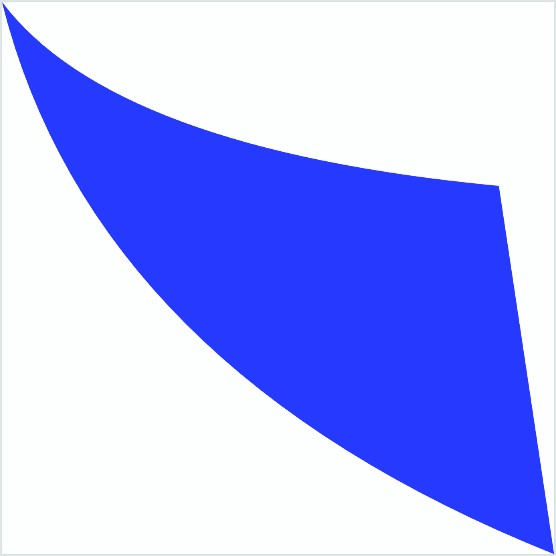
Figure 38-13
Drawing points
The drawPoints() function is used to draw individual points at the locations specified by a list of Offset instances. The pointMode parameter of the drawPoints() function is used to control whether each point is plotted separately (using Points mode) or connected by lines using the Lines and Polygon modes. The drawPoints() function in Points mode is particularly useful for algorithm-driven drawing. The following code, for example, plots a sine wave comprised of individual points:
.
.
import java.lang.Math.PI
import java.lang.Math.sin
.
.
@Composable
fun MainScreen() {
    DrawPoints()
}

@Composable
fun DrawPoints() {
    Canvas(modifier = Modifier.size(300.dp)) {

        val height = size.height
        val width = size.width
        val points = mutableListOf<Offset>()

        for (x in 0..size.width.toInt()) {
            val y = (sin(x * (2f * PI /   width))
                * (height / 2) + (height / 2)).toFloat()
            points.add(Offset(x.toFloat(), y))
        }
        drawPoints(
            points = points,
            strokeWidth = 3f,
            pointMode = PointMode.Points,
            color = Color.Blue
        )
    }
}Code language: Kotlin (kotlin)
After making the above changes, the Canvas should appear as illustrated below:
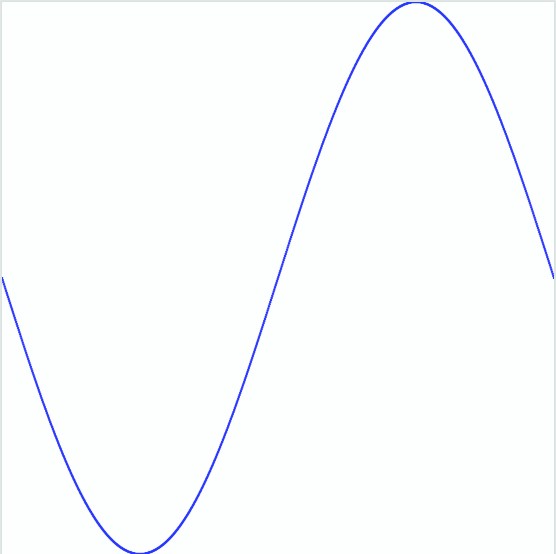
Figure 38-14
|
You are reading a sample chapter from an old edition of the Jetpack Compose Essentials book. Purchase the fully updated Jetpack Compose 1.7 Essentials edition of this book in eBook or Print format. The full book contains 67 chapters and over 700 pages of in-depth information. Buy the full book now in Print or eBook format. Learn more. |
Drawing an image
An image resource can be drawn onto a canvas via a call to the drawImage() function. To see this function in action, we first need to add an image resource to the project. The image is named vacation.jpg and can be found in the images folder of the sample code archive which can be downloaded from the following web page:
https://www.ebookfrenzy.com/web/compose14/index.php
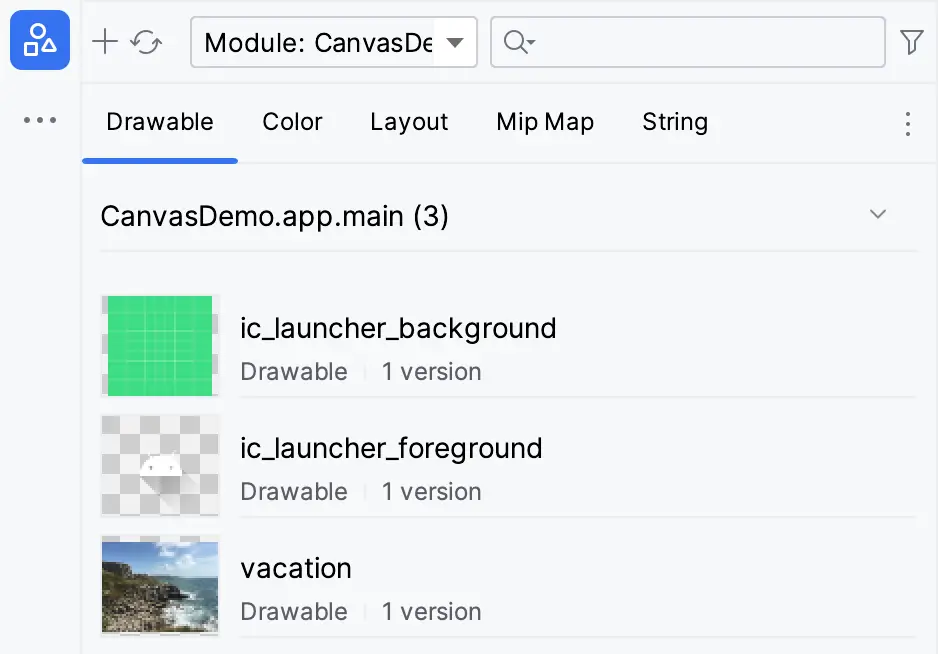
Within Android Studio, display the Resource Manager tool window (View -> Tool Windows -> Resource Manager). Locate the vacation.png image in the file system navigator for your operating system and drag and drop it onto the Resource Manager tool window. In the resulting dialog, click Next followed by the Import button to add the image to the project. The image should now appear in the Resource Manager as shown in Figure 38-15 below:
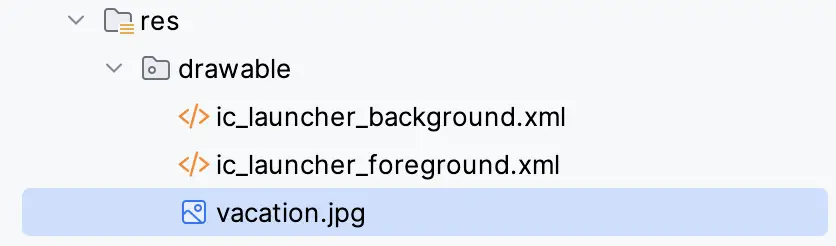
The image will also appear in the res -> drawables section of the Project tool window:
With the image added to the project, return to the MainActivity.kt file and make the following modifications:
|
You are reading a sample chapter from an old edition of the Jetpack Compose Essentials book. Purchase the fully updated Jetpack Compose 1.7 Essentials edition of this book in eBook or Print format. The full book contains 67 chapters and over 700 pages of in-depth information. Buy the full book now in Print or eBook format. Learn more. |
.
.
import androidx.compose.ui.res.imageResource
.
.
@Composable
fun MainScreen() {
    DrawImage()
}

@Composable
fun DrawImage() {

    val image = ImageBitmap.imageResource(id = R.drawable.vacation)

    Canvas(
        modifier = Modifier
            .size(360.dp, 270.dp)
    ) {
        drawImage(
            image = image,
            topLeft = Offset(x = 0f, y = 0f)
        )
    }
}Code language: Kotlin (kotlin)
The DrawImage composable begins by creating an ImageBitmap version of the resource image and then passes it as an argument to the drawImage() function together with an Offset instance configured to position the image in the top left-hand corner of the canvas area. Refresh the preview and confirm that the Canvas appears as follows:
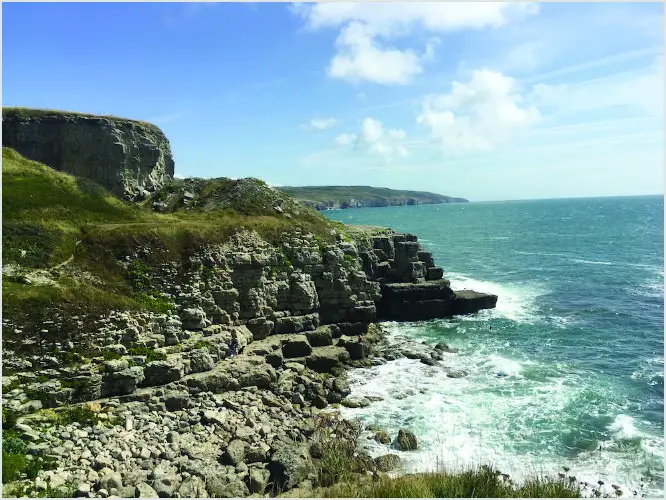
Figure 38-17
The drawImage() function also allows color filters to be applied to the rendered image. This requires a ColorFilter instance which can be configured with tint, lighting, color matrix, and blend settings. A full explanation of color filtering is beyond the scope of this book, but more information can be found on the following web page:
https://developer.android.com/reference/kotlin/androidx/compose/ui/graphics/ColorFilter
For this example, add a tint color filter blending with a color matrix as follows:
|
You are reading a sample chapter from an old edition of the Jetpack Compose Essentials book. Purchase the fully updated Jetpack Compose 1.7 Essentials edition of this book in eBook or Print format. The full book contains 67 chapters and over 700 pages of in-depth information. Buy the full book now in Print or eBook format. Learn more. |
.
.
drawImage(
    image = image,
    topLeft = Offset(x = 0f, y = 0f),
    colorFilter = ColorFilter.tint(
        color = Color(0xADFFAA2E),
        blendMode = BlendMode.ColorBurn
    )
)
.
.Code language: Kotlin (kotlin)
When the canvas renders the image in the Preview panel, it will now do so with a yellowish hue.
Drawing text
Text is drawn on a canvas using DrawScope’s drawText() function and a TextMeasurer instance. The role of TextMeasurer is to calculate the size of the text drawing based on factors such as font family and size. We can obtain a TextMeasurer instance by making a call to the rememberTextMeasurer() function as follows:
val textMeasurer = rememberTextMeasurer()Code language: Kotlin (kotlin)Having obtained a TextMeasurer instance, we can pass it to the drawText() function along with the text to be drawn:
Canvas(modifier = Modifier.fillMaxSize()) {
    drawText(textMeasurer, "Sample Text")
}Code language: Kotlin (kotlin)
While the above example displays a plain text string, text drawing works best when used with annotated strings (a topic covered in this book’s “Annotated Strings and Brush Styles” chapter). Try out text drawing within the CanvasDemo project by making the following changes to the MainActivity.kt file:
.
.
import androidx.compose.ui.text.*
import androidx.compose.ui.text.font.FontWeight
import androidx.compose.ui.unit.sp
import androidx.compose.ui.unit.toSize
.
.
@Composable
fun MainScreen() {
    DrawText()
}

@OptIn(ExperimentalTextApi::class)
@Composable
fun DrawText() {

    val colorList: List<Color> = listOf(Color.Black,
        Color.Blue, Color.Yellow, Color.Red, Color.Green, Color.Magenta)

    val textMeasurer = rememberTextMeasurer()

    val annotatedText = buildAnnotatedString {
        withStyle(
            style = SpanStyle(
                fontSize = 60.sp,
                fontWeight = FontWeight.ExtraBold,
                brush = Brush.verticalGradient(colors = colorList)
            )
        ) {
            append("Text Drawing")
        }
    }

    Canvas(modifier = Modifier.fillMaxSize()) {
        drawText(textMeasurer, annotatedText)
    }
}Code language: Kotlin (kotlin)
The code we have added declares a list of colors, obtains a TextMeasurer and builds an annotated string that uses a large font size with extra bold font weight. A brush style is then used to apply a vertical gradient consisting of the color list. Next, the text measurer and annotated string are passed to the drawText() function of a Canvas scope resulting in the following output displayed in the preview panel:
|
You are reading a sample chapter from an old edition of the Jetpack Compose Essentials book. Purchase the fully updated Jetpack Compose 1.7 Essentials edition of this book in eBook or Print format. The full book contains 67 chapters and over 700 pages of in-depth information. Buy the full book now in Print or eBook format. Learn more. |

An interesting benefit of using TextMeasurer is that it gives us access to the dimensions of the drawn text. This information is beneficial when you need to include a background matching the text size. The text size can be obtained by passing the annotated string to TextMeasurer’s measure() function. The measure() function will return a TextLayoutResult object from which we can extract size properties.
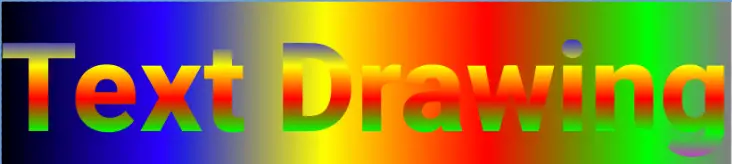
To see this in action, modify the DrawText function as follows so that the text is drawn on an appropriately sized horizontal gradient background:
@OptIn(ExperimentalTextApi::class)
@Composable
fun DrawText() {
.
.
    Canvas(modifier = Modifier.fillMaxSize()) {

        val dimensions = textMeasurer.measure(annotatedText)

        drawRect(
            brush = Brush.horizontalGradient(colors = colorList),
            size = dimensions.size.toSize()
        )
        drawText(textMeasurer, annotatedText)
    }
}Code language: Kotlin (kotlin)
After making the above changes, the text should appear in the preview panel as illustrated in Figure 38-19:
Summary
The Compose Canvas component provides a surface on which to draw graphics. The Canvas DrawScope includes a set of functions that allow us to perform drawing operations within the canvas area, including drawing lines, shapes, gradients, images, text, and paths. In this chapter, we have explored some of the more common drawing features provided by Canvas and the DrawScope functions.