
Two related areas of iOS development will be covered in this chapter in the form of Live Views in Interface Builder and Embedded Frameworks, both designed to make the tasks of sharing common code between projects and designing dynamic user interfaces easier.
Embedded Frameworks
Apple defines a framework as “a collection of code and resources to encapsulate functionality that is valuable across multiple projects.” A typical iOS app project will use many Frameworks from the iOS SDK. For example, all apps use the Foundation Framework, while a game might also use the SpriteKit Framework.
Embedded Frameworks allow developers to create their own frameworks. Embedded frameworks are easy to create and provide several advantages, the most obvious of which is the ability to share common code between multiple app projects.
Embedded Frameworks are particularly useful when working with extensions. By nature, an extension will inevitably need to share code that already exists within the containing app. Rather than duplicate code between the app and the extension, a better solution is to place common code into an embedded framework.
Another benefit of embedded frameworks is the ability to publish code in the form of 3rd party frameworks that can be downloaded for use by other developers in their own projects.
 |
You are reading a sample chapter from Building iOS 17 Apps using Xcode Storyboards.
Buy the full book now in eBook or Print format. The full book contains 96 chapters and 760 pages of in-depth information. |
However, one of the more intriguing features of embedded frameworks is that they facilitate a powerful feature of Interface Builder known as Live Views.
Interface Builder Live Views
Traditionally, designing a user interface layout using Interface Builder has involved placing static representations of view components onto a canvas. The app logic behind these views to implement dynamic behavior is then implemented within the view controller, and the app is compiled and run on a device or simulator to see the live user interface in action.
Live views allow the dynamic code behind the views to be executed from within the Interface Builder storyboard file as the user interface is being designed without compiling and running the app.
Live views also allow variables within the code behind a view to be exposed so that they can be accessed and modified in the Interface Builder Attributes Inspector panel, with the changes reflected in real-time within the live view.
The reason embedded frameworks and live views are covered in this chapter is that a prerequisite for live views is for the underlying code for a live view to be contained within an embedded framework.
|
You are reading a sample chapter from Building iOS 17 Apps using Xcode Storyboards.
Buy the full book now in eBook or Print format. The full book contains 96 chapters and 760 pages of in-depth information. |
The best way to better understand both embedded frameworks and live views is to see them in action in an example project.
Creating the Example Project
Launch Xcode and create a new project using the iOS App template with the Swift and Storyboard options selected, entering LiveViewDemo as the product name.
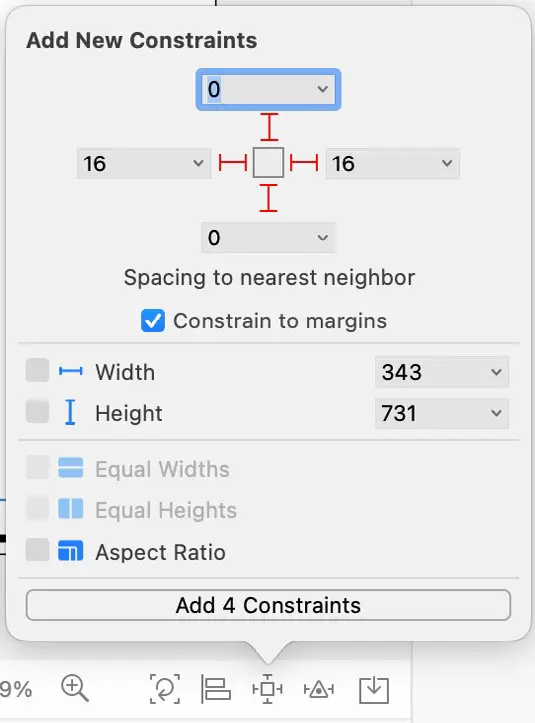
When the project has been created, select the Main.storyboard file and drag and drop a View object from the Library panel onto the view controller canvas. Resize the view, stretching it in each dimension until the blue dotted line indicates the recommended margin. Display the Auto Layout Add New Constraints menu and enable “spacing to nearest neighbor” constraints on all four sides of the view with the Constrain to margins option enabled as shown in Figure 59-1 before clicking on the Add 4 Constraints button:
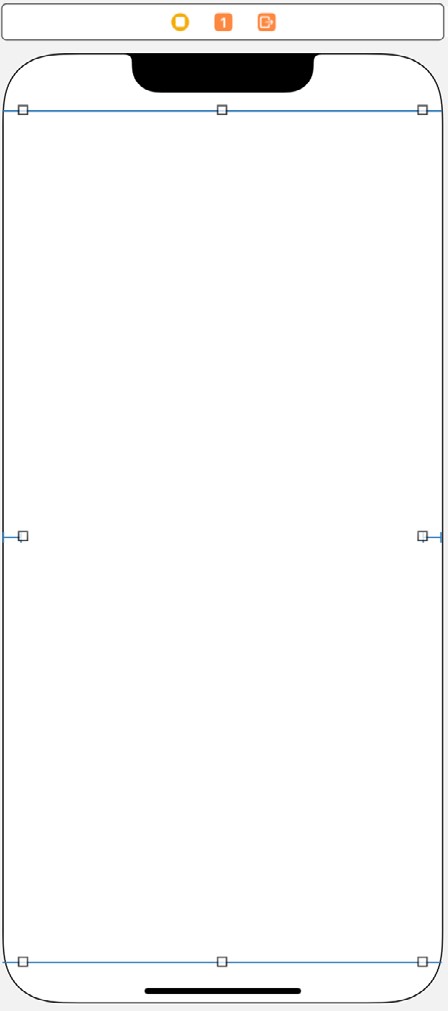
Once the above steps are complete, the layout should resemble that illustrated in Figure 59-2 below:
With the user interface designed, the next step is to add a framework to the project.
|
You are reading a sample chapter from Building iOS 17 Apps using Xcode Storyboards.
Buy the full book now in eBook or Print format. The full book contains 96 chapters and 760 pages of in-depth information. |
Adding an Embedded Framework
The framework to be added to the project will contain a UIView subclass containing some graphics drawing code.
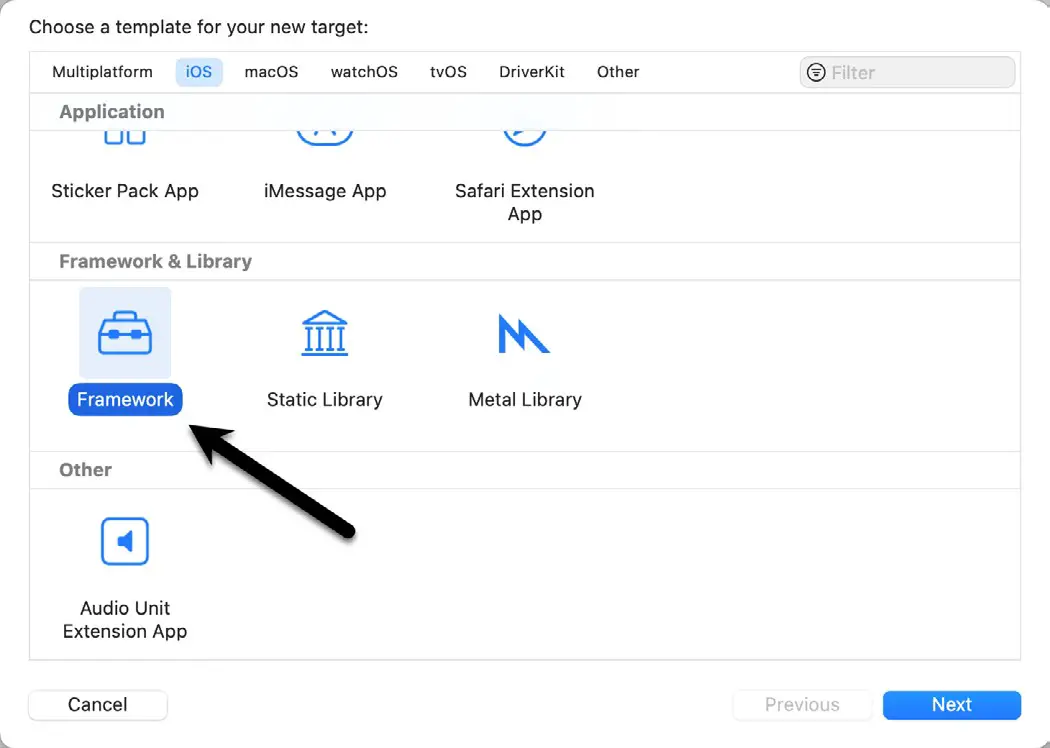
Within Xcode, select the File -> New -> Target… menu option and, in the template selection panel, scroll to and select the Framework template (Figure 59-3):
Click on the Next button and, on the subsequent screen, enter MyDrawKit into the product name field before clicking on the Finish button.
Within the project navigator panel, a new folder will have been added named MyDrawKit, into which will be stored the files that make up the new framework. Ctrl-click on this entry and select the New File… menu option. In the template chooser panel, select Cocoa Touch Class before clicking on Next.
On the next screen, name the class MyDrawView and configure it as a subclass of UIView. Then, click the Next button and save the new class file into the MyDrawKit subfolder of the project directory.
|
You are reading a sample chapter from Building iOS 17 Apps using Xcode Storyboards.
Buy the full book now in eBook or Print format. The full book contains 96 chapters and 760 pages of in-depth information. |
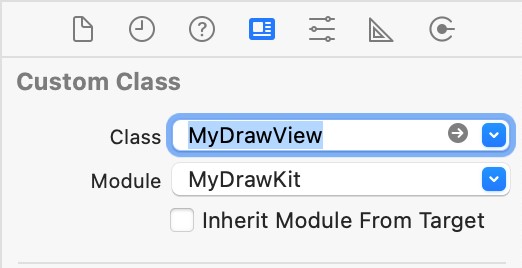
Select the Main.storyboard file in the project navigator panel and click on the View object added in the previous section. Display the Identity Inspector in the Utilities panel and change the Class setting from UIView to MyDrawView:
Implementing the Drawing Code in the Framework
The code to perform the graphics drawing on the View will reside in the MyDrawView.swift file in the MyDrawKit folder. Locate this file in the project navigator panel and double-click on it to load it into a separate editing window (thereby allowing the Main.storyboard file to remain visible in Interface Builder).
Remove the comment markers (/* and */) from around the template draw method and implement the code for this method so that it reads as follows:
import UIKit
import QuartzCore

class MyDrawView: UIView {

    var startColor: UIColor = UIColor.white
    var endColor: UIColor = UIColor.blue
    var endRadius: CGFloat = 100

    override func draw(_ rect: CGRect) {
        let context = UIGraphicsGetCurrentContext()

        let colorspace = CGColorSpaceCreateDeviceRGB()
        let locations: [CGFloat] = [ 0.0, 1.0]

        if let gradient = CGGradient(colorsSpace: colorspace,
                            colors: [startColor.cgColor, endColor.cgColor]
						as CFArray,
                            locations: locations) {

            var startPoint = CGPoint()
            var endPoint = CGPoint()

            let startRadius: CGFloat = 0

            startPoint.x = 130
            startPoint.y = 100
            endPoint.x = 130
            endPoint.y = 120

            context?.drawRadialGradient(gradient,
                   startCenter: startPoint, startRadius: startRadius,
                   endCenter: endPoint, endRadius: endRadius,
                   options: .drawsBeforeStartLocation)
        }
    }
}
Making the View Designable
At this point, the code has been added, and running the app on a device or simulator will show the view with the graphics drawn on it. The object of this chapter, however, is to avoid the need to compile and run the app to see the results of the code. To make the view “live” within Interface Builder, the class must be declared as being “Interface Builder designable.” This is achieved by adding an @IBDesignable directive immediately before the class declaration in the MyDrawView.swift file:
import UIKit
import QuartzCore

@IBDesignable
class MyDrawView: UIView {

    var startColor: UIColor = UIColor.white
    var endColor: UIColor = UIColor.blue
    var endRadius: CGFloat = 100
.
.
}
As soon as the directive is added to the file, Xcode will compile the class and render it within the Interface Builder storyboard canvas (Figure 59-5):
|
You are reading a sample chapter from Building iOS 17 Apps using Xcode Storyboards.
Buy the full book now in eBook or Print format. The full book contains 96 chapters and 760 pages of in-depth information. |
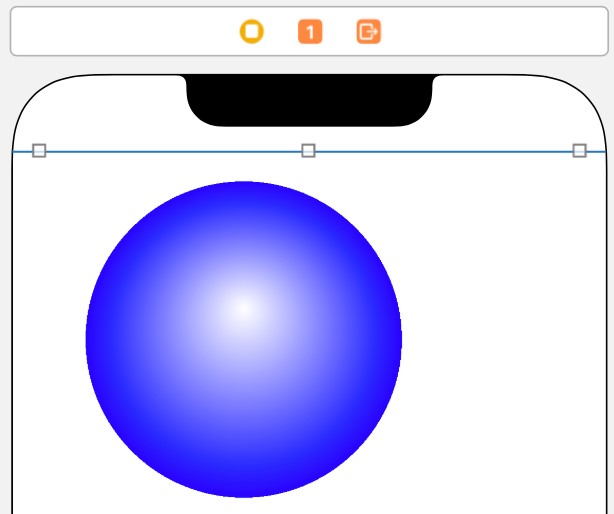
Changes to the MyDrawView code will now be reflected in the Interface Builder live view. To see this in action, right-click on the MyDrawView.swift file and select the Open in New Window entry in the resulting menu. Then, with the Main storyboard scene visible, change the endColor variable declaration in the MyDrawView.swift file so that it is assigned a different color and observe the color change take effect in the Interface Builder live view:
var endColor: UIColor = UIColor.red
Making Variables Inspectable
Although it is possible to modify variables by editing the code in the framework class, it would be easier if they could be changed just like any other property using the Attributes Inspector panel. This can be achieved simply by prefixing the variable declarations with the @IBInspectable directive as follows:
@IBDesignable
class MyDrawView: UIView {
@IBInspectable var startColor: UIColor = UIColor.white
@IBInspectable var endColor: UIColor = UIColor.red
@IBInspectable var endRadius: CGFloat = 100
.
.
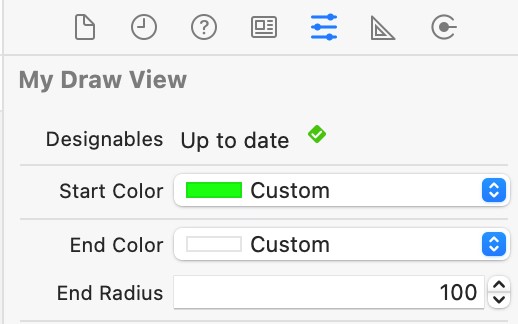
}With changes to the code, select the View in the storyboard file and display the Attributes Inspector panel. The properties should now be listed for the view (Figure 59-6) and can be modified. Any changes to these variables made through the Attributes Inspector will take effect in real time without requiring Xcode to recompile the framework code. When compiled and run on a device or simulator, these settings will also be generated into the app.
Summary
This chapter has introduced two concepts: embedded frameworks and Interface Builder live views. Embedded frameworks allow developers to place source code into frameworks that can be shared between multiple app projects. Embedded frameworks also provide the basis for the live views feature of Interface Builder. Before the introduction of live views, it was necessary to compile and run an app to see dynamic user interface behavior in action. With live views, the dynamic behavior of a view can now be seen within Interface Builder, with code changes reflected in real-time.