
After developing an iOS application, the final step is submitting it to Apple’s App Store. Preparing and submitting an application is a multi-step process details of which will be covered in this chapter.
Verifying the iOS Distribution Certificate
The chapter entitled How to Join the Apple Developer Program covered the steps involved in generating signing certificates. In that chapter, both a development and distribution certificate were generated. Up until this point in the book, applications have been signed using the development certificate so that testing could be performed on physical iOS devices. Before an application can be submitted to the App Store, however, it must be signed using the distribution certificate. The presence of the distribution certificate may be verified from within the Xcode settings.
With Xcode running, select the Xcode -> Preferences… menu option and select the Accounts category from the toolbar of the resulting window. Assuming that Apple IDs have been configured as outlined in How to Join the Apple Developer Program, a list of one or more Apple IDs will be shown in the accounts panel, as illustrated in Figure 68-1:
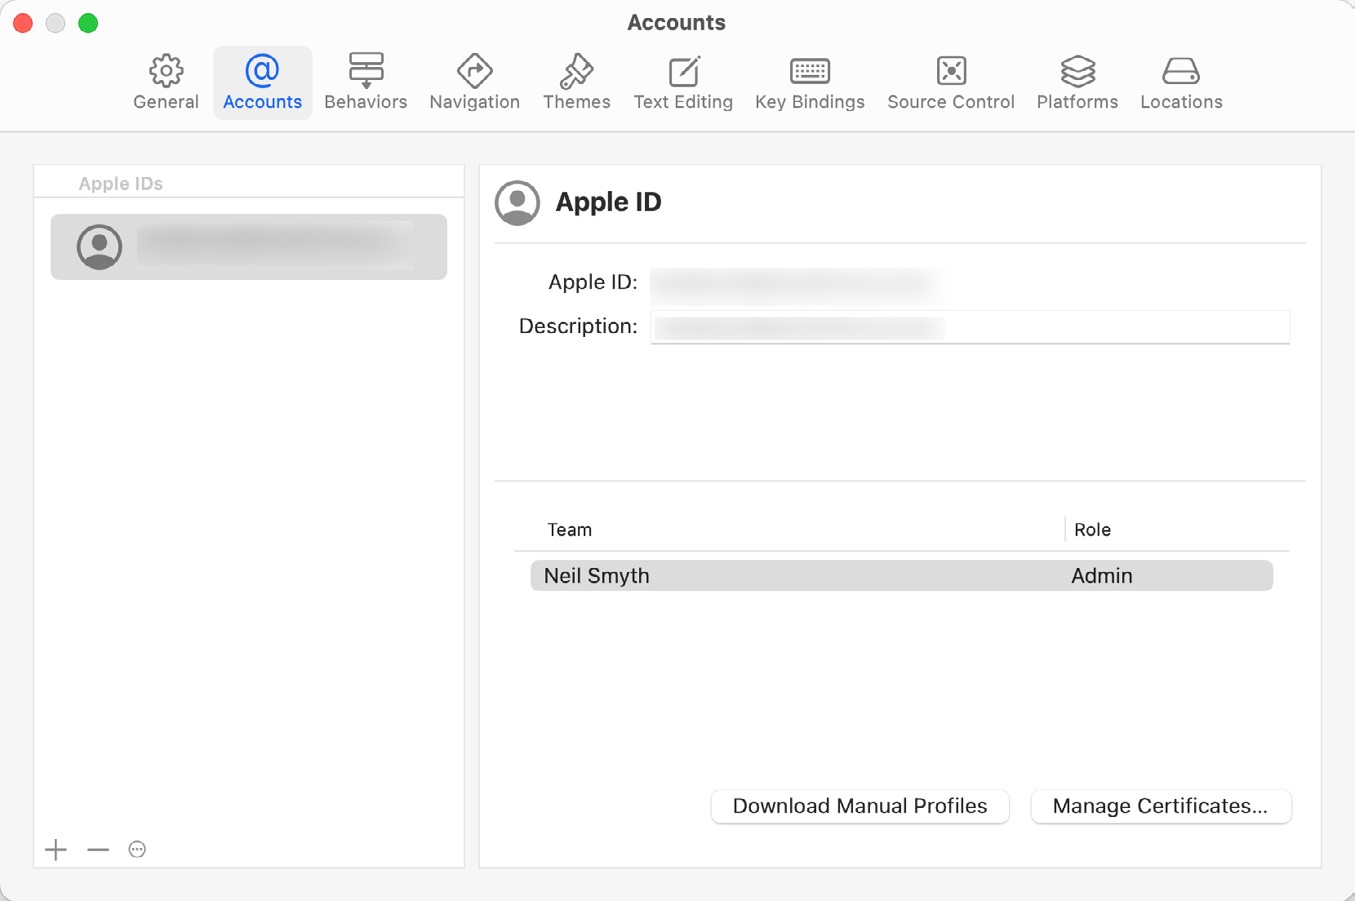
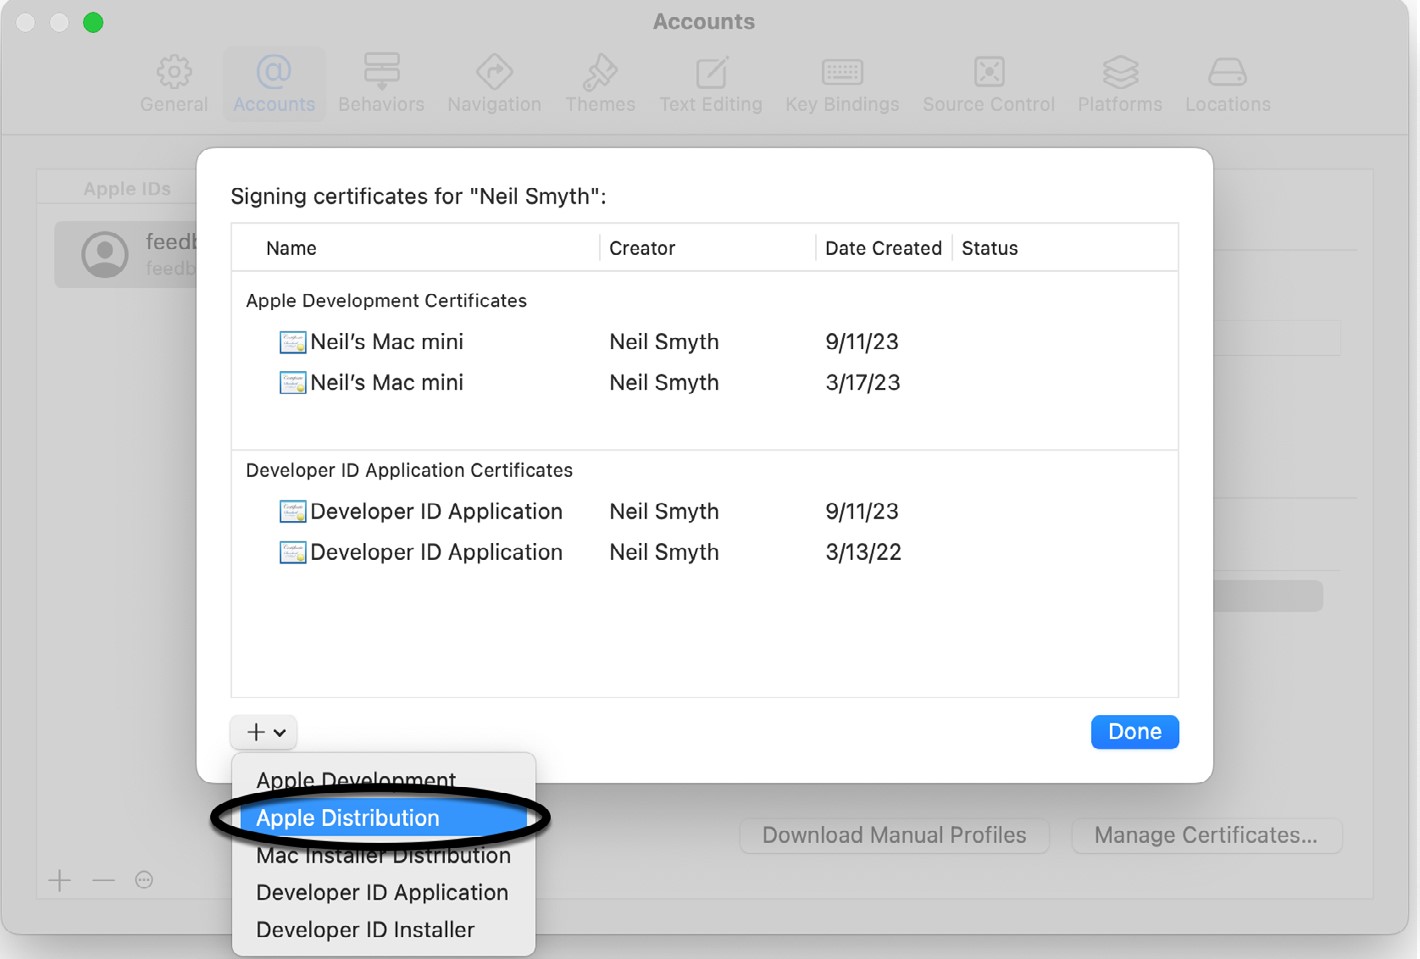
Select the Apple ID to be used to sign the application and click on the Manage Certificates… button to display the list of signing identities and provisioning profiles associated with that ID:

If no Apple Distribution certificate is listed, use the menu highlighted in Figure 68-3 to generate one:
 |
You are reading a sample chapter from an old edition of iOS App Development Essentials. Purchase the fully updated iOS 18 App Development Essentials book. The full book contains 71 chapters, over 612 pages of in-depth information, downloadable source code, and access to over 50 SwiftUI knowledge test quizzes. |
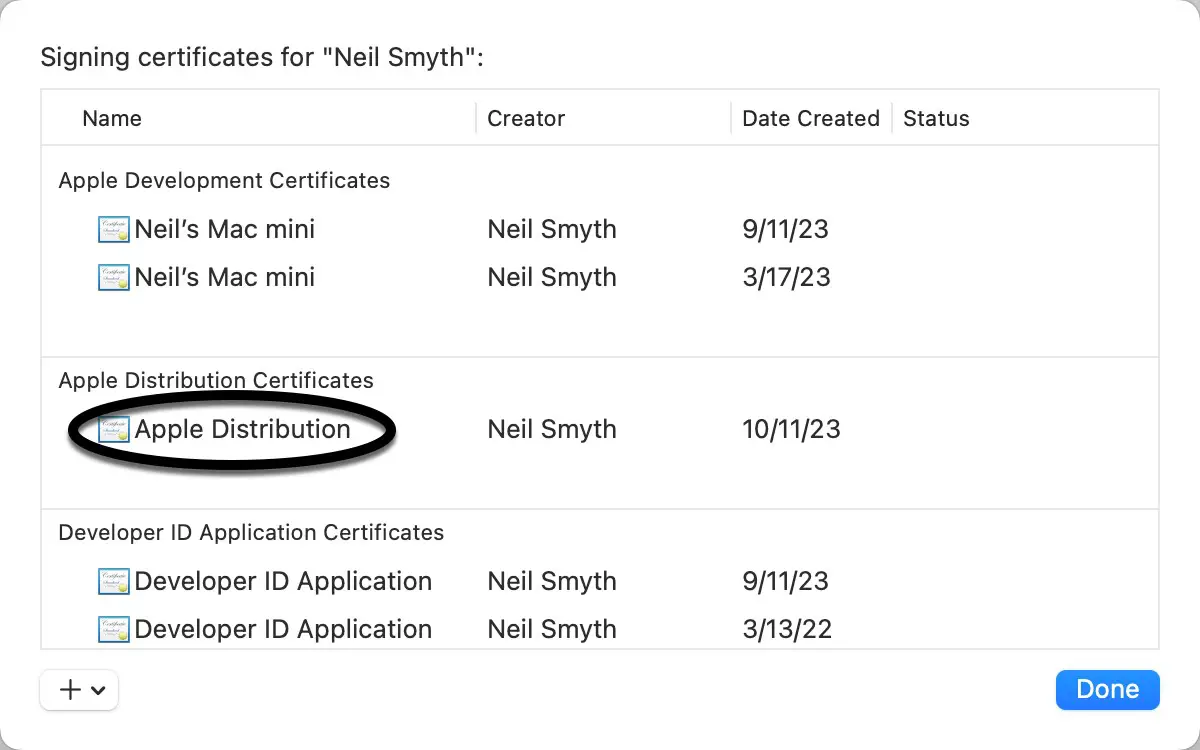
Xcode will then contact the developer portal and generate and download a new signing certificate suitable for use when signing applications for submission to the App Store. Once the signing identity has been generated, the certificate will appear in the list, as shown in Figure 68-4:
Adding App Icons
Before rebuilding the application for distribution it is important to ensure that app icons have been added to the application. The app icons are used to represent your application on the home screen, settings panel and search results on the device. Each of these categories requires a suitable icon in PNG format and formatted for a number of different dimensions. Alternatively, you can add a single 1024 x 1024 icon to the project and Xcode will adapt it for each requirement.
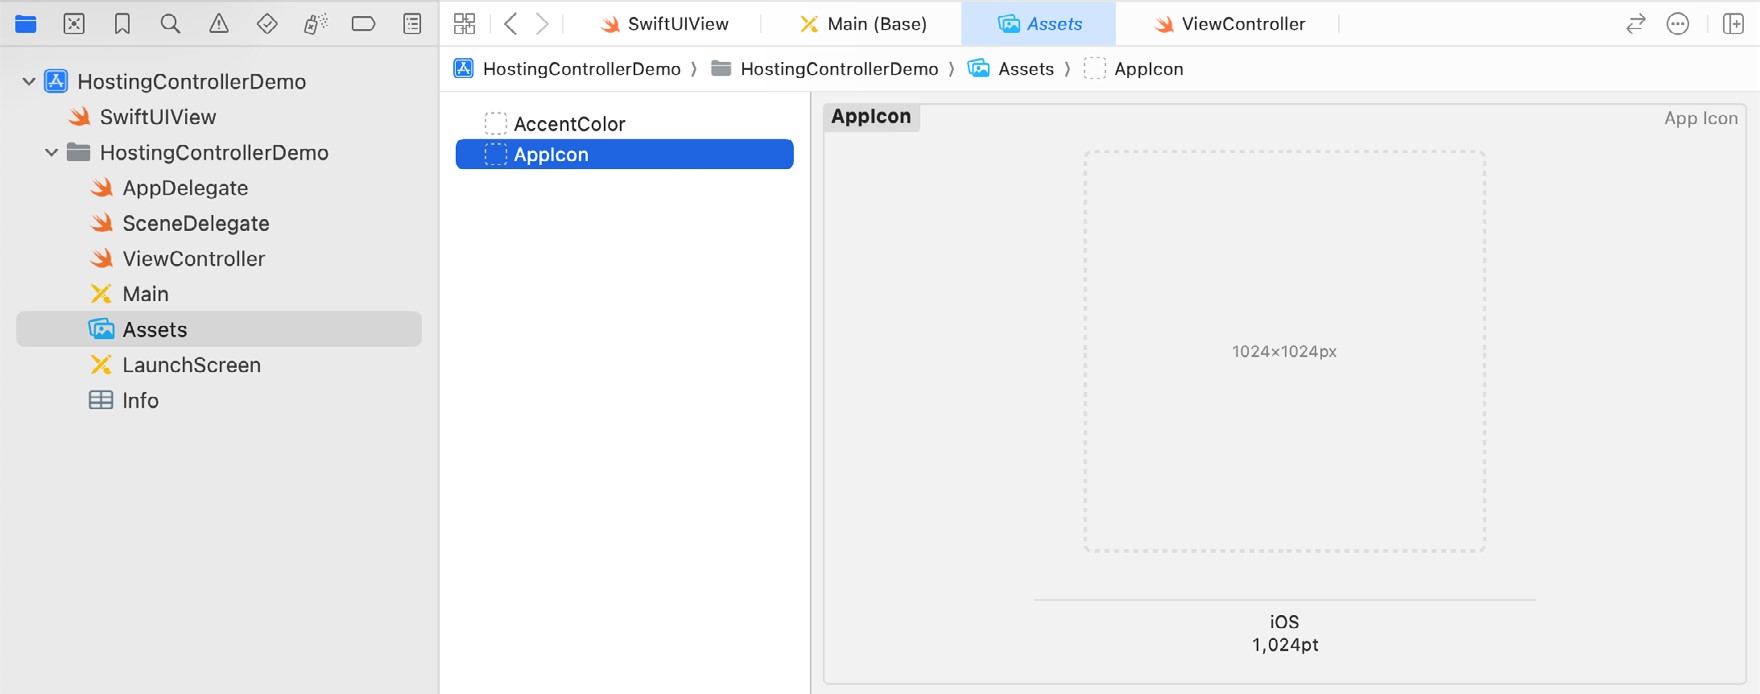
App icons are added in the Assets.xcassets asset catalog within the AppIcon image set. When the AppIcon image set is selected, it will display a placeholder for an icon:
To add an images, simply drag and drop the PNG format image from a Finder window onto the placeholder in the asset catalog.
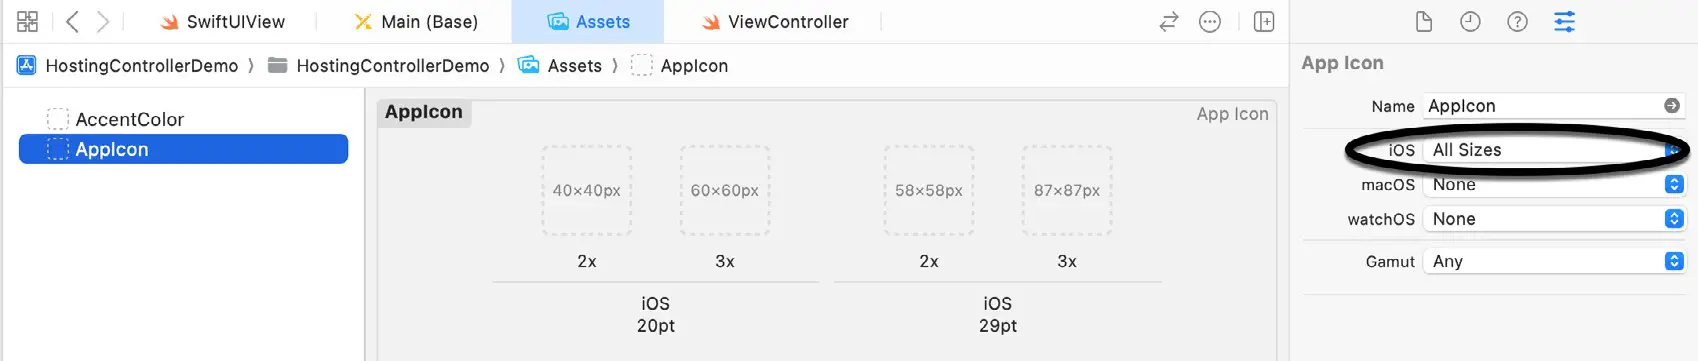
To add multiple image sizes, change the iOS Size menu in the Attributes inspector panel to All Sizes, as illustrated in Figure 68-6:
|
You are reading a sample chapter from an old edition of iOS App Development Essentials. Purchase the fully updated iOS 18 App Development Essentials book. The full book contains 71 chapters, over 612 pages of in-depth information, downloadable source code, and access to over 50 SwiftUI knowledge test quizzes. |
Assign the Project to a Team
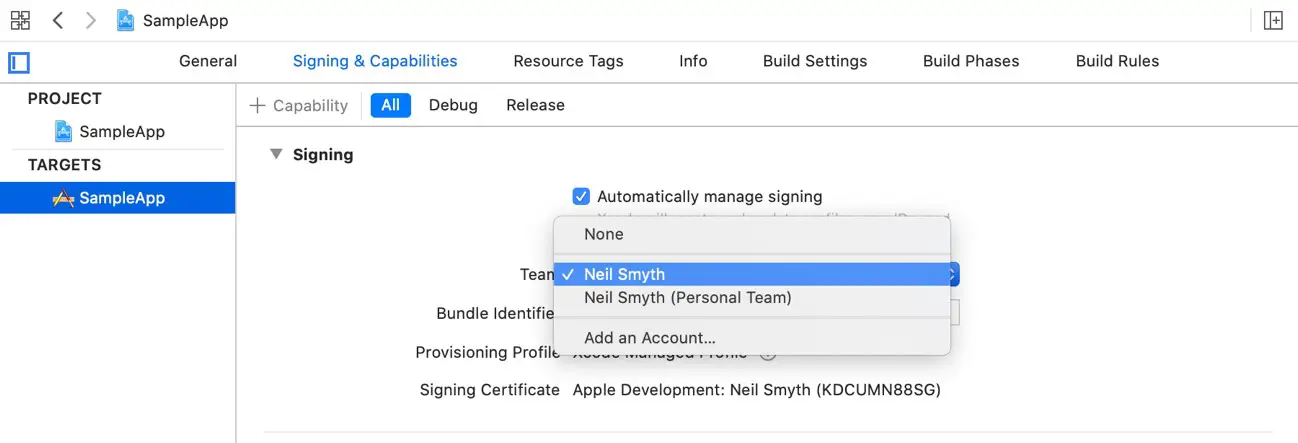
As part of the submission process, the project must be associated with a development team to ensure that the correct signing credentials are used. In the project navigator panel, select the project name to display the project settings panel. Click the Signing & Capabilities tab and within the Identity section, select a team from the menu, as shown in Figure 68-7:
Archiving the App for Distribution
The application must now be rebuilt using the previously installed distribution profile. To generate the archive, select the Xcode Product -> Archive menu option. Note that if the Archive menu is disabled this is most likely because a simulator option is currently selected as the run target in the Xcode toolbar. Changing this menu either to a connected device, or the generic iOS Device target option should enable the Archive option in the Product menu.
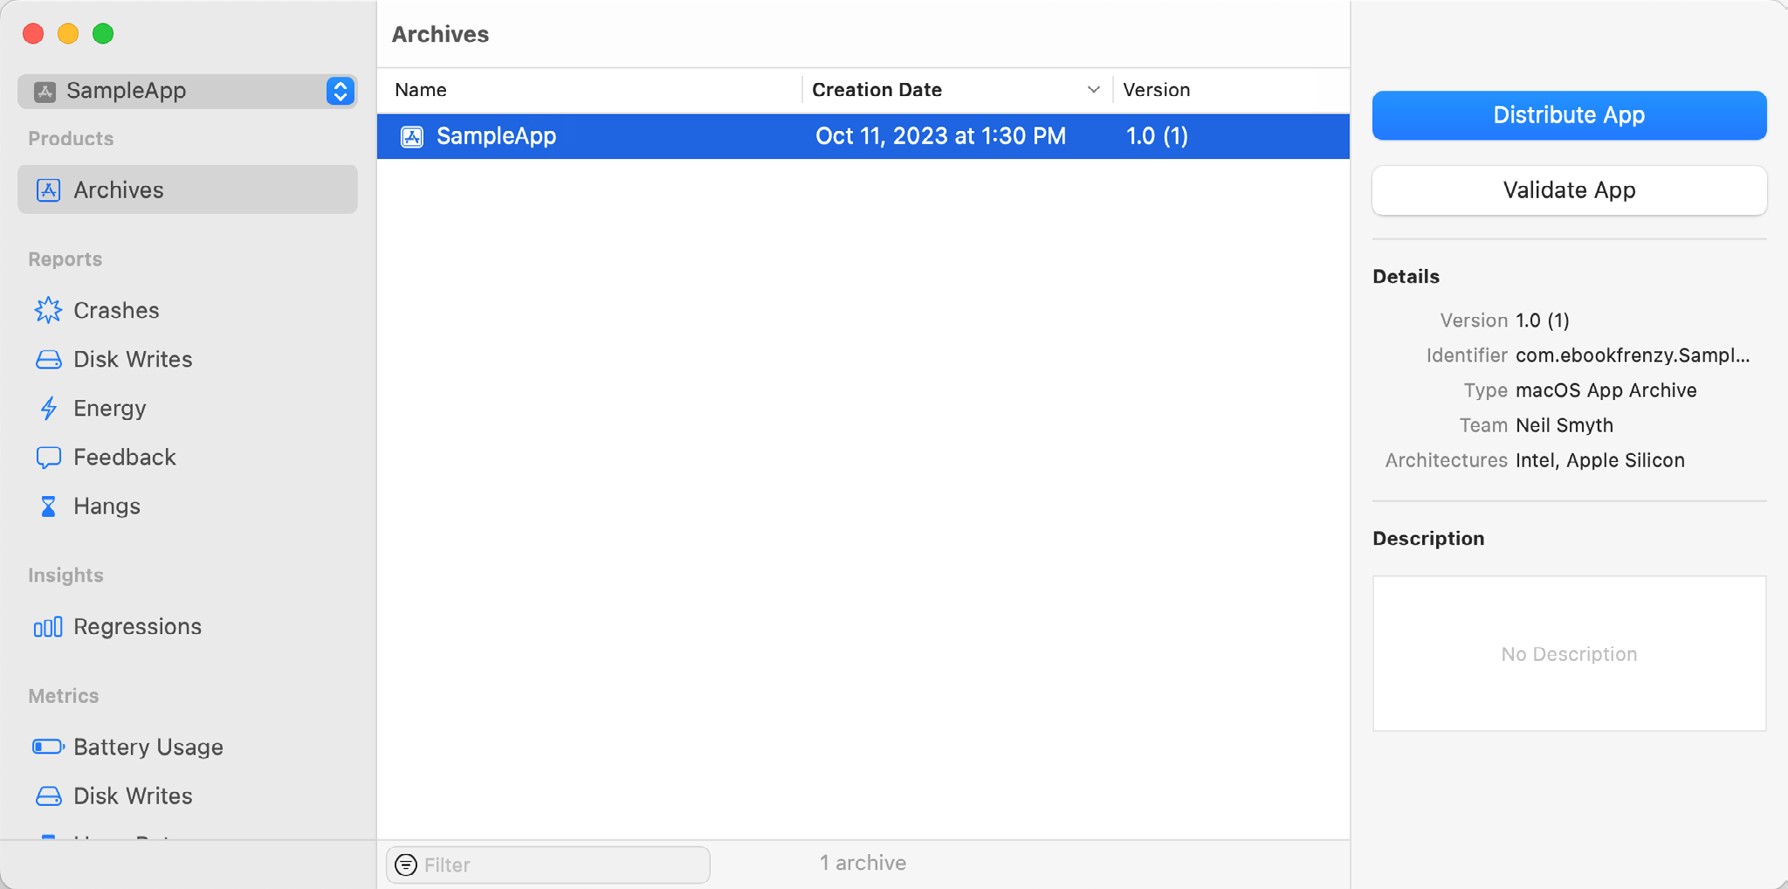
Xcode will proceed to archive the application ready for submission. Once the process is complete the archive will be displayed in the Archive screen of the Organizer dialog ready for upload and distribution:
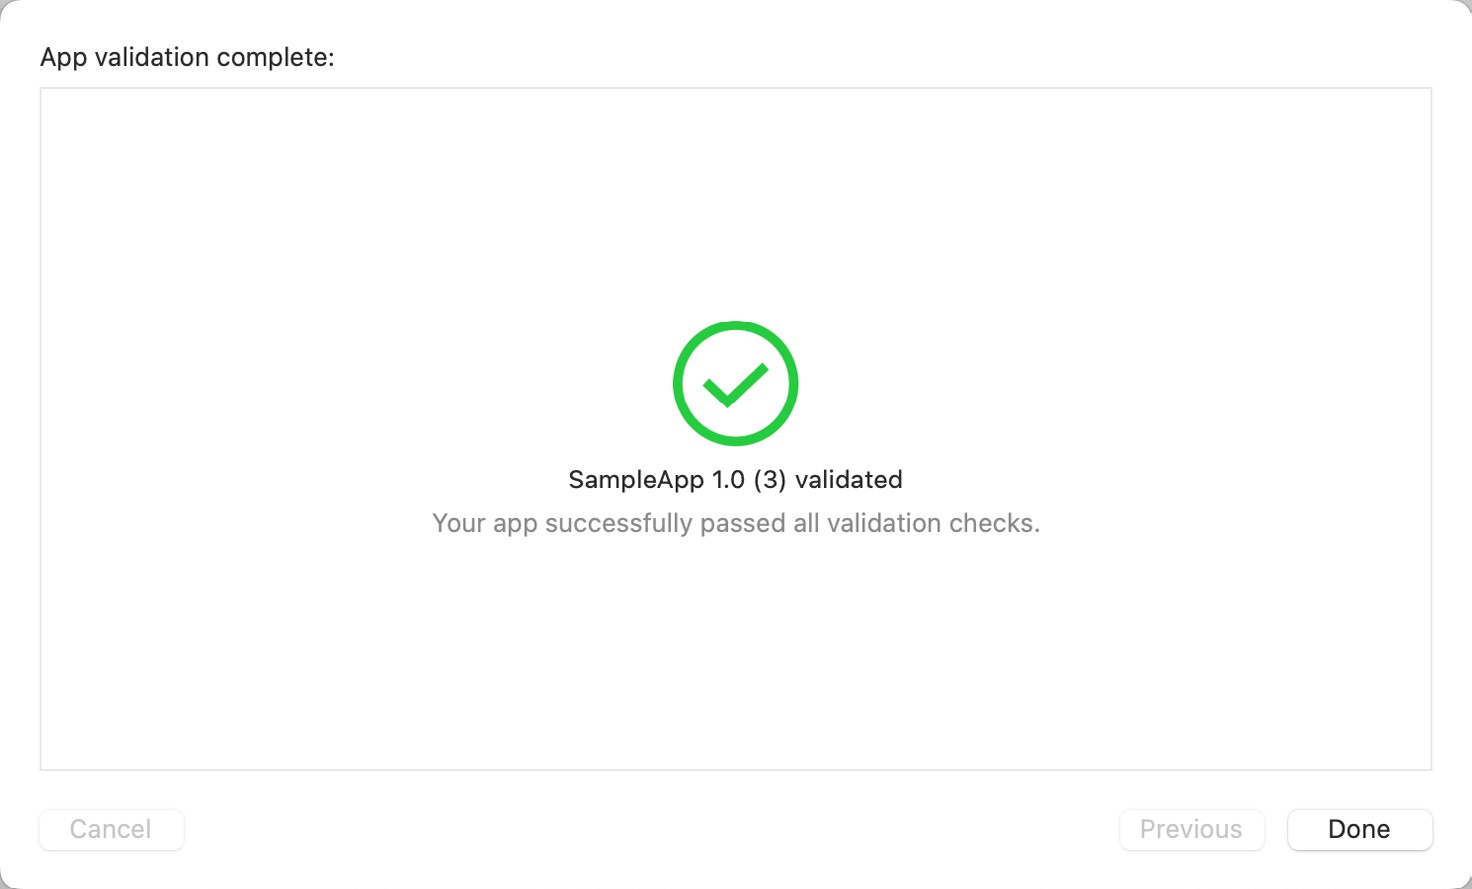
Click the Validate App button and wait until the validation is complete. Correct any errors that are reported and archive and validate the product again until the validation is successful:
Configuring the App in App Store Connect
Before an application can be submitted to the App Store for review it must first be configured in App Store Connect. Enrollment in the Apple Developer program automatically results in the creation of an App Store Connect account using the same login credentials. App Store Connect is a portal where developers enter tax and payment information, input details about applications and track the status of those applications in terms of sales and revenues.
|
You are reading a sample chapter from an old edition of iOS App Development Essentials. Purchase the fully updated iOS 18 App Development Essentials book. The full book contains 71 chapters, over 612 pages of in-depth information, downloadable source code, and access to over 50 SwiftUI knowledge test quizzes. |
Access App Store Connect by navigating to https://appstoreconnect.apple.com in a web browser and entering your Apple Developer program login and password details.
First time users should click on the Agreements, Tax, and Banking option and work through the various tasks to accept Apple’s terms and conditions and to input appropriate tax and banking information for the receipt of sales revenue.
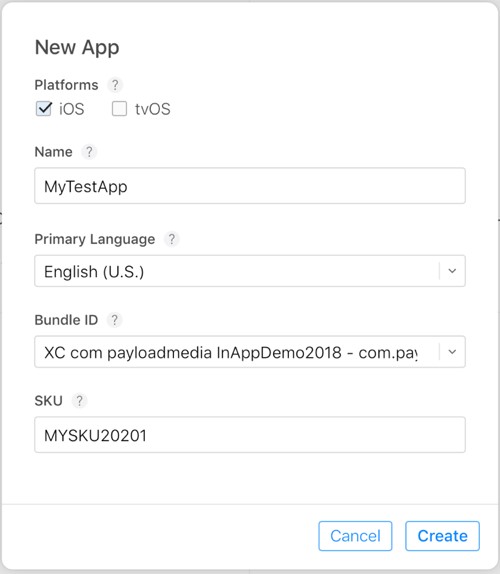
Once the administrative tasks are complete, select the My Apps option and click on the + button followed by New App to enter information about the application. Begin by selecting the iOS checkbox and entering a name for the application together with an SKU of your own creation. Also select or enter the bundle ID that matches the application that has been prepared for upload in Xcode:
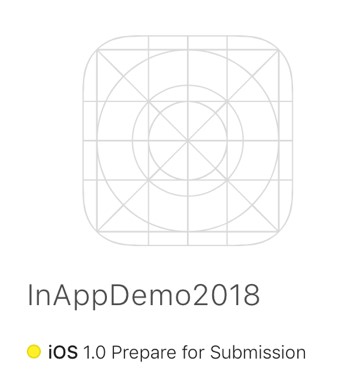
Once the application has been added it will appear within the My Apps screen listed as Prepare for submission:
Validating and Submitting the App
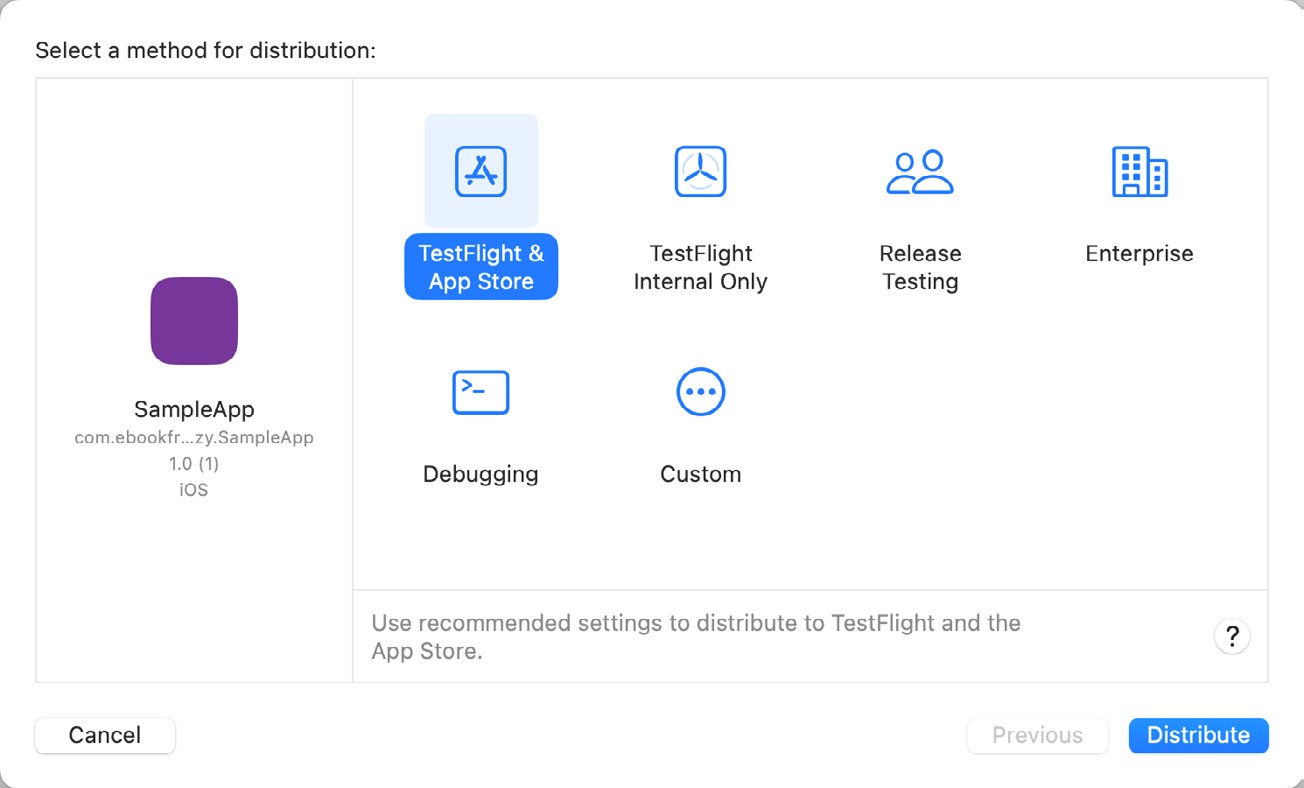
To validate the application, return to the Xcode archives window, make sure the application archive is selected and click on the Distribute App button. On the next screen, select the TestFlight & App Store option as highlighted in Figure 68-12 before clicking the Distribute button:
|
You are reading a sample chapter from an old edition of iOS App Development Essentials. Purchase the fully updated iOS 18 App Development Essentials book. The full book contains 71 chapters, over 612 pages of in-depth information, downloadable source code, and access to over 50 SwiftUI knowledge test quizzes. |
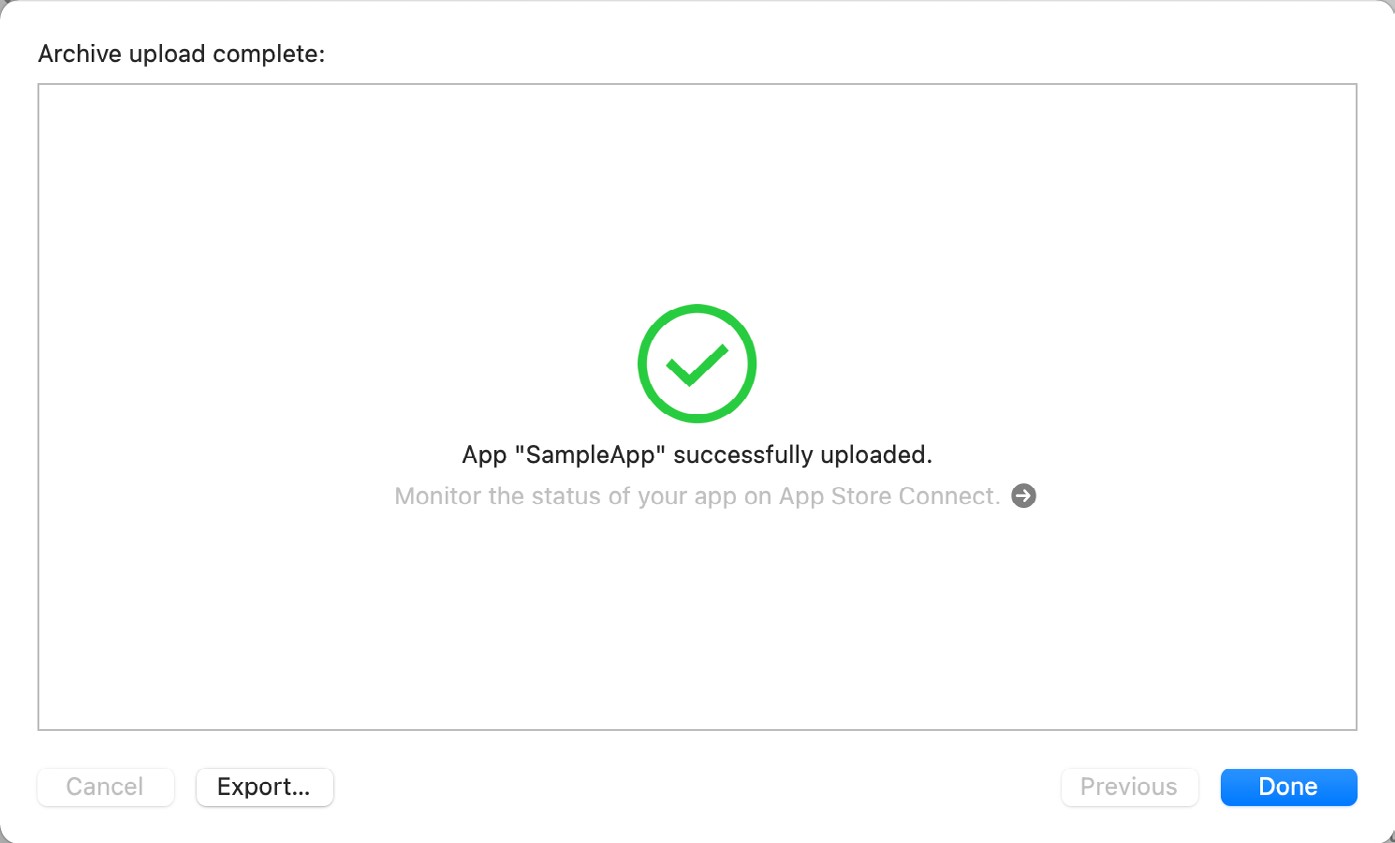
Xcode will connect to the App Store Connect service, locate the matching app entry added in the previous step and display the summary screen shown in Figure 68-13:
Configuring and Submitting the App for Review
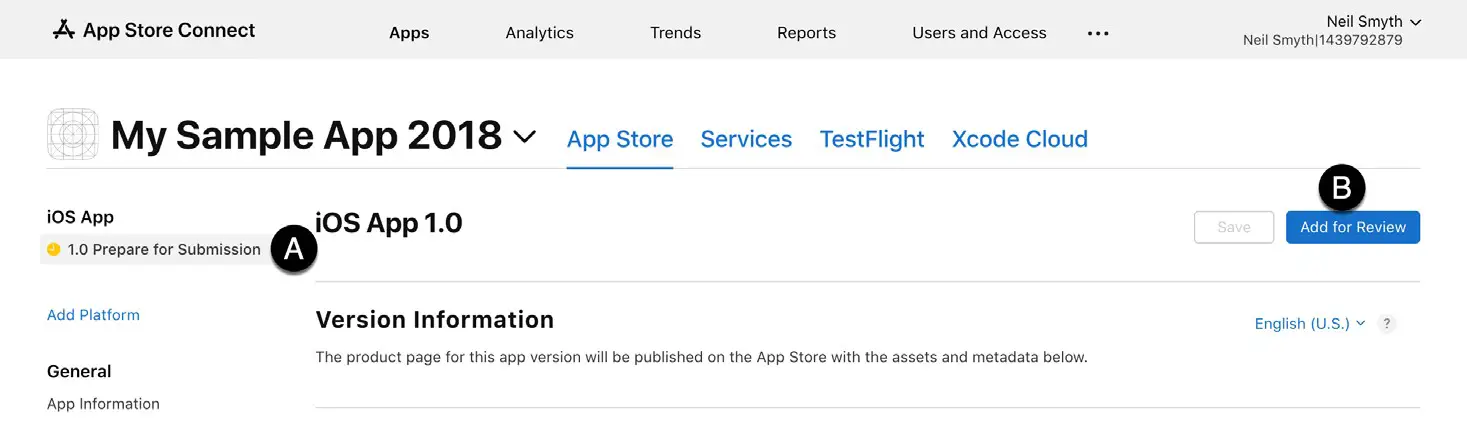
On the My Apps screen of the App Store Connect portal, select the new app entry to display the configuration screen where options are available to set up pre-release test users, designate pricing, enter product descriptions and upload screenshots and preview videos. Once this information has been entered and saved and the app is ready for submission to the App Store, select the Prepare for Submission option (marked A in Figure 68-14) followed by the Add for Review button (marked B):
Once Apple has completed the review process an email will arrive stating whether the application has been accepted or not. In the event that the application has been rejected, reasons for the rejection will be stated and the application may be resubmitted once these issues have been addressed.