
Red Hat Enterprise Linux 9 includes the GNOME 40 desktop environment. Although lacking the complexity of Windows and macOS desktops, GNOME 40 provides an uncluttered and intuitive desktop environment that provides all of the essential features of a windowing environment with the added advantage that it can be learned quickly.
In this chapter, the main features of the GNOME desktop will be covered together with an outline of how basic tasks are performed.
Installing the GNOME Desktop
If the Workstation or Server with GUI software configuration was selected during the RHEL 9 installation process, the GNOME desktop will be installed and automatically launched each time the system starts.
If any other software configuration had been selected during the RHEL 9 installation process, the GNOME desktop would not have been included in the packages installed on the system. Installing a graphical desktop environment may seem redundant on server-based systems without a display attached. It is worth noting, however, that remote access to the GNOME desktop is also possible; even on headless servers (i.e., servers lacking a monitor, keyboard, and mouse), it may still be beneficial to install the GNOME desktop packages. The topic of establishing remote desktop access will be covered in detail in this book’s RHEL 9 Remote Desktop Access with VNC chapter.
If the installation configuration did not include the GNOME desktop, it can be installed at any time using the following command:
 |
You are reading a sample chapter from Red Hat Enterprise Linux 9 Essentials. Buy the full book now in eBook or Print format.
Includes 34 chapters and 290 pages. Learn more. |
# dnf groupinstall workstation
Once the installation is complete, the desktop environment may be launched from the command prompt on a monitor as follows:
$ startx
An Overview of the GNOME 40 Desktop
The screen shown in Figure 6-1 below shows the appearance of a typical, newly launched GNOME desktop session before any other programs have been launched or configuration changes made:
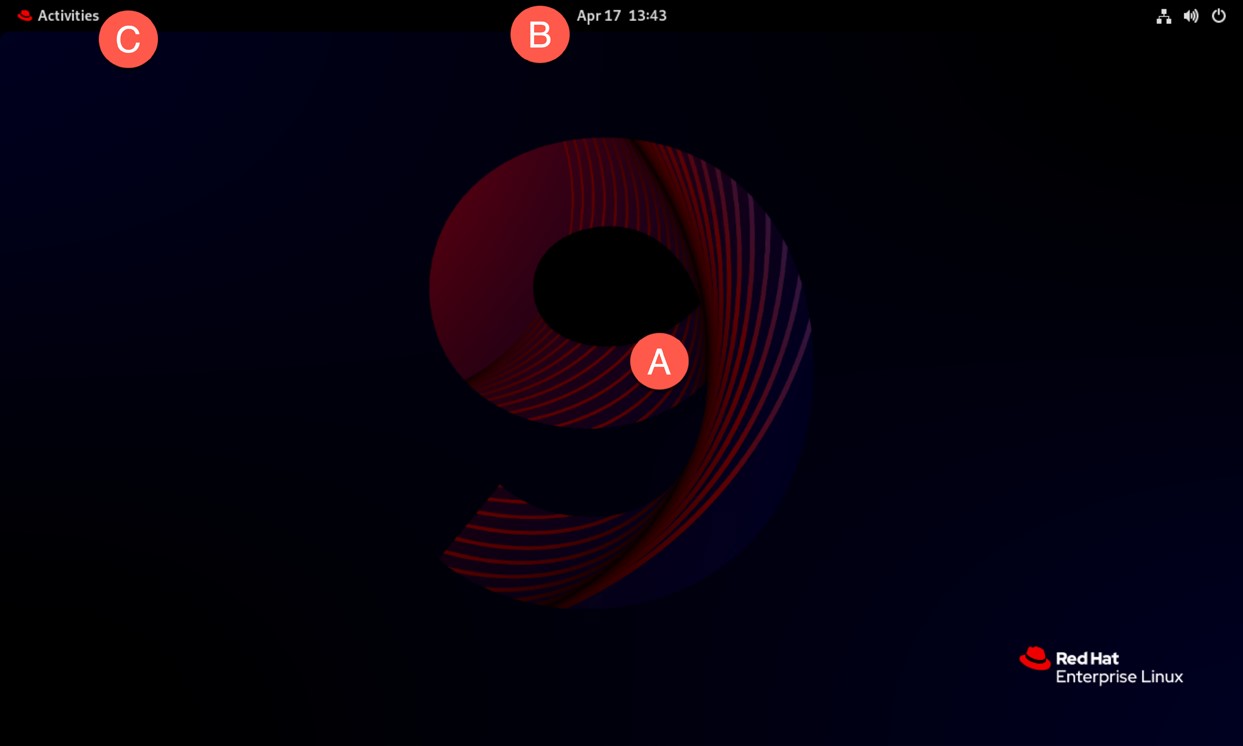
The main desktop area (marked A) is where windows will appear when applications and utilities are launched. Unlike other desktop environments, dragging and dropping files or applications onto the desktop is impossible, providing a clean and uncluttered workspace.
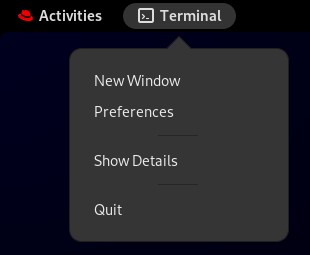
The bar at the top of the screen (B) is called the top bar and includes the Activities menu (C), the day and time, and a collection of buttons and icons, including network status, audio volume, battery power, and other status and account settings. In addition, the application menu for the currently active application running on the desktop will also appear in the top bar. Figure 6-2, for example, shows the application menu for the Terminal program:
Activity Overview
Applications and utilities are launched using the Activities Overview, which may be displayed by clicking the Activities button in the top bar or pressing the special key on the keyboard. On Windows keyboards, this is the Windows key; on macOS, the Command key and Chromebooks, the key displaying a magnifying glass.
|
You are reading a sample chapter from Red Hat Enterprise Linux 9 Essentials. Buy the full book now in eBook or Print format.
Includes 34 chapters and 290 pages. Learn more. |
When displayed, the Activities Overview will resemble Figure 6-3 below:
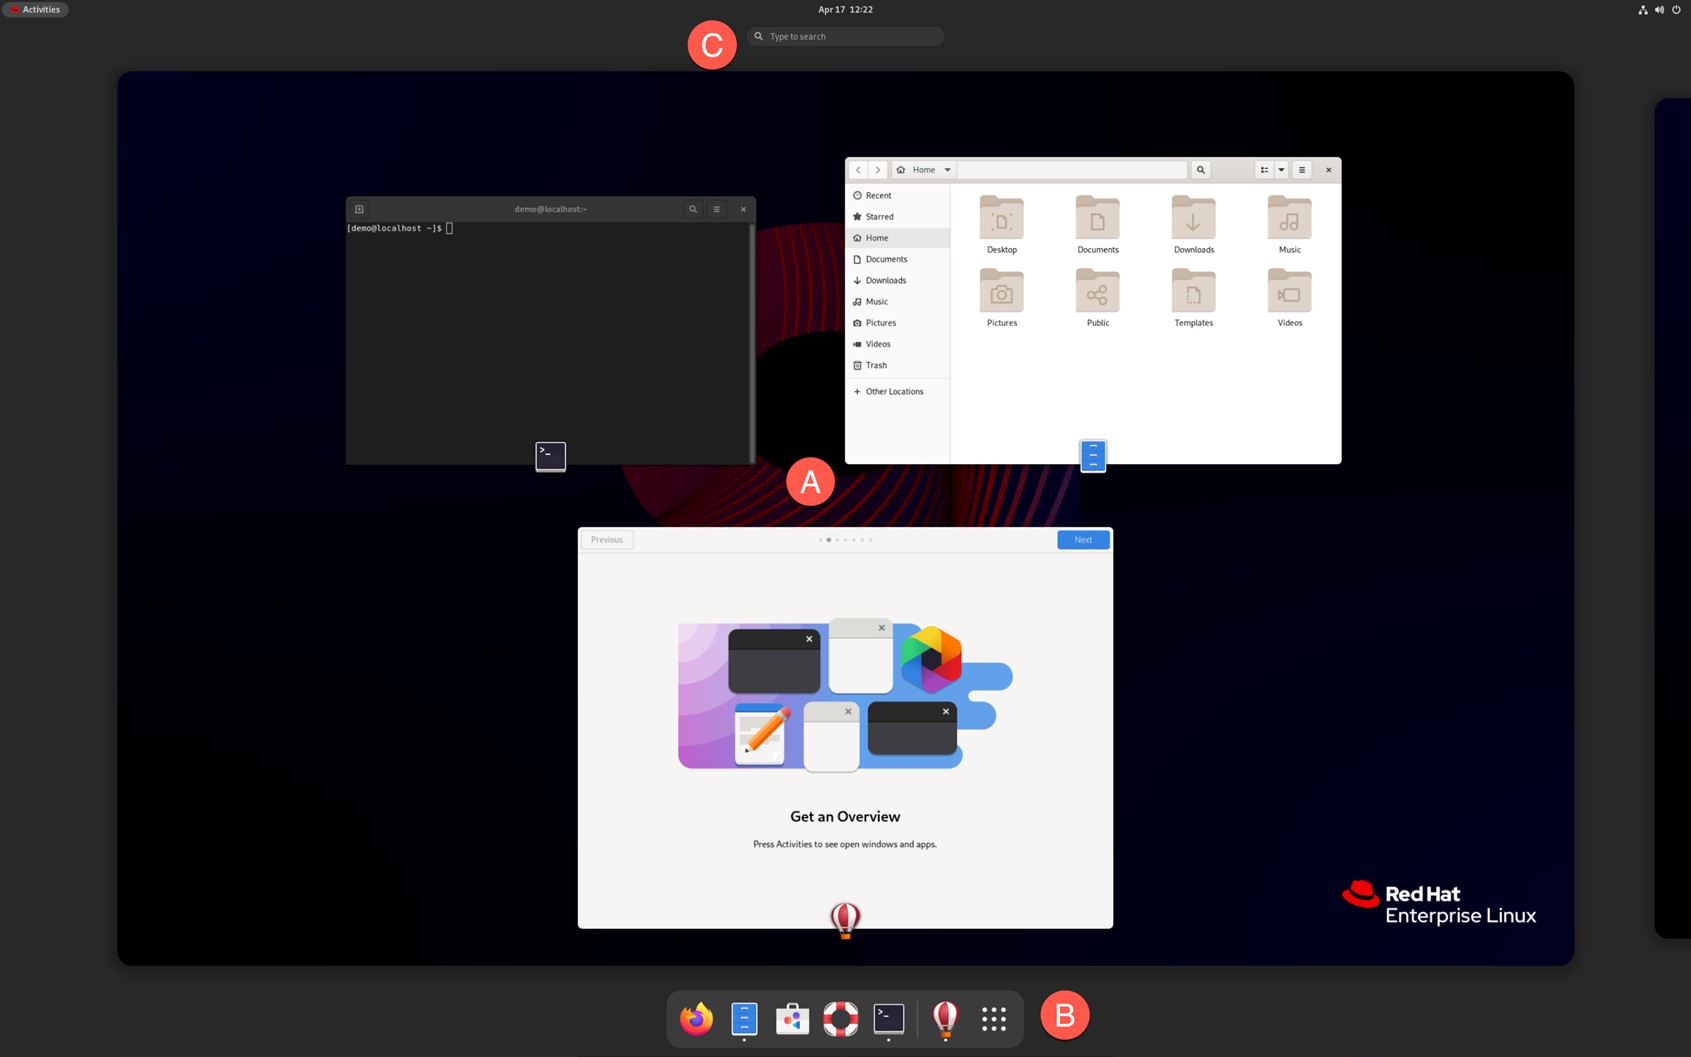
The central area of the overview (marked A in Figure 6-3 above) displays all of the currently open app windows. At the bottom of the screen (B) is the dashboard (the dash) from which apps are launched. By default, the dash will display an icon for a predefined set of commonly used applications and an icon for any currently running applications. If the application is running, it will appear with a dot beneath the icon. To launch an application, simply click on the icon in the dash.
To find an application not included on the dash, one option is to select the right-most grid icon (the square comprising nine dots) to display a browsable list of applications as shown in Figure 6-4:
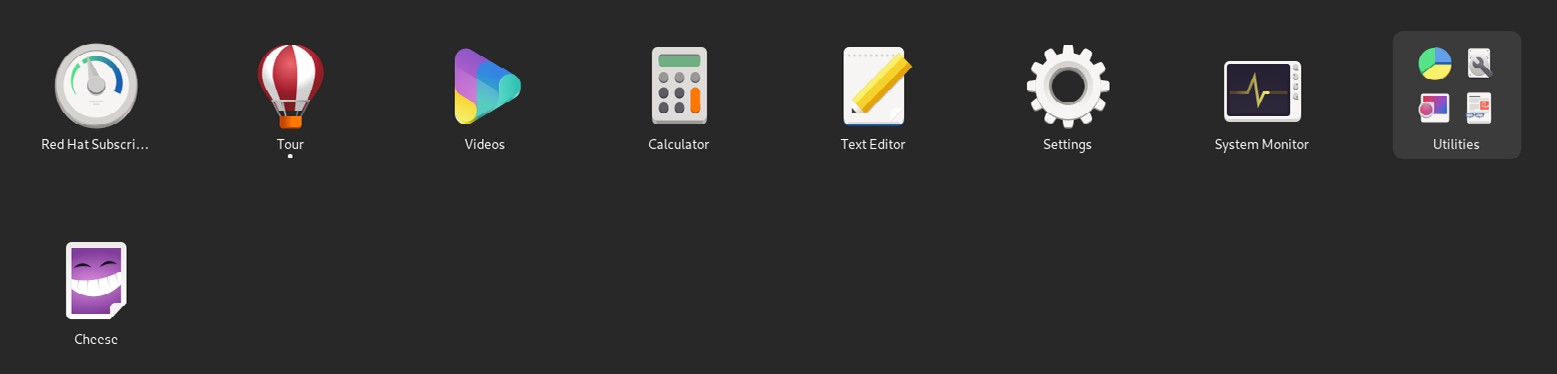
It is also important to be aware that some entries in the list are folders holding additional applications. Items in the grid may be repositioned by dragging and dropping the icons. To add an app to a folder, locate it in the grid and drag it into the folder. Moreover, dragging one icon and dropping it onto another will create a new folder containing both apps and to which other apps may be added.
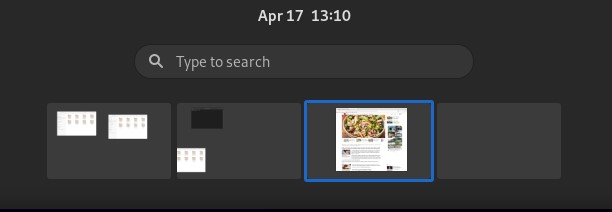
An alternative to browsing the applications is to perform a search using the search bar (marked C in Figure 6-3 above) and shown in action in the figure below:
|
You are reading a sample chapter from Red Hat Enterprise Linux 9 Essentials. Buy the full book now in eBook or Print format.
Includes 34 chapters and 290 pages. Learn more. |
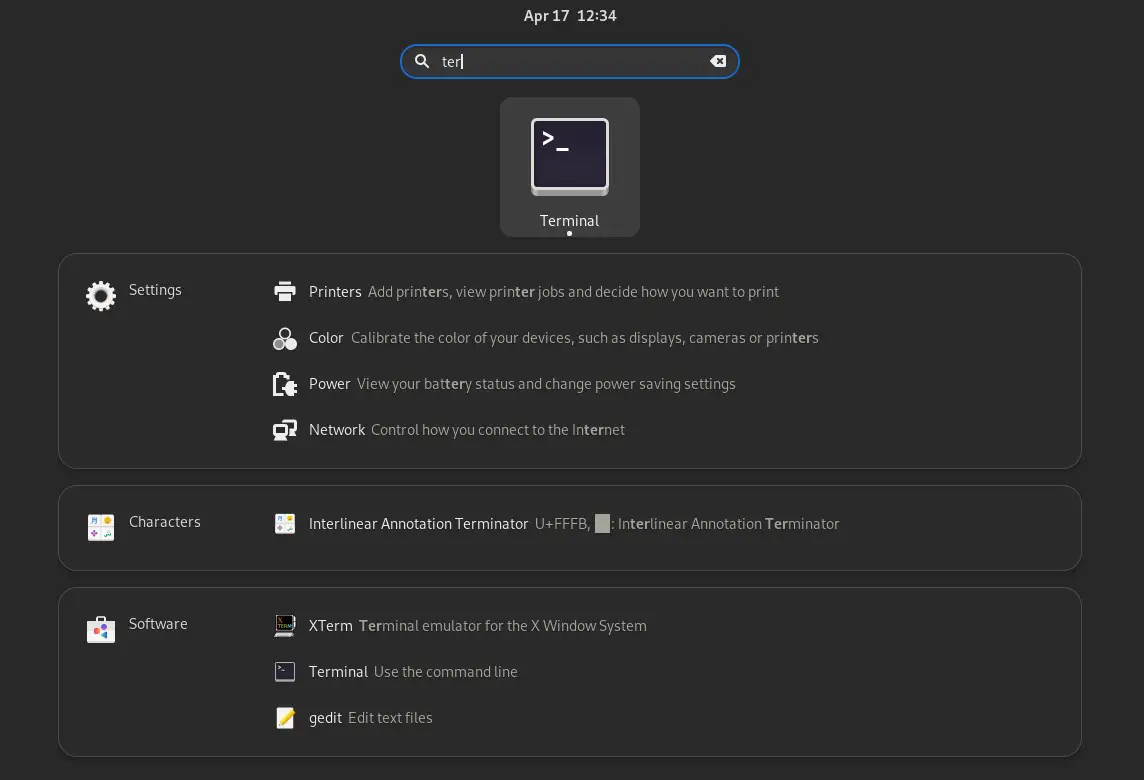
The list of possible matches will be refined as the text is typed into the search box.
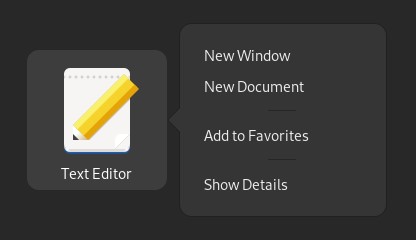
To add an application to the dash for more convenient access, locate the icon for the application, right-click on it, and select the Add to Favorites menu option:
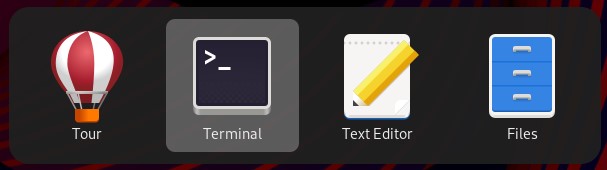
To remove an app from the dash, right-click on the icon in the dash and select Remove from Favorites. Alternatively, drag and drop icons to and from the dash to add and remove them.
Managing Windows
As with other desktop environments, applications run on GNOME in windows. When multiple application windows are open, the Super + Tab keyboard shortcut will display the switcher panel (Figure 6-7), allowing a different window to be chosen as the currently active window (the Super key is either the Windows key or, in the case of a Mac keyboard, the Cmd key):
If a single application has more than one window open, the switcher will display those windows in a second panel so that a specific window can be selected:
|
You are reading a sample chapter from Red Hat Enterprise Linux 9 Essentials. Buy the full book now in eBook or Print format.
Includes 34 chapters and 290 pages. Learn more. |

To cycle backward through the icons in the switcher, use the Shift + Tab keyboard shortcut.
To maximize a window so it fills the entire screen, click the title bar and drag the window to the top of the screen. To return the window to its original size, click on the title bar and drag it downwards. Alternatively, double-click on the title bar to toggle between window sizes. Similarly, dragging a window to the left or right side of the screen will cause the window to fill that half of the screen.
Using Workspaces
The area of the screen where the application windows appear is referred to as the workspace, and GNOME 40 allows multiple workspaces to be configured. The GNOME desktop will launch with two workspaces you can switch between using the Super+Alt+Left and Super+Alt+Right key combinations. When a window is added to a blank workspace, another blank workspace is added to the workspace panel, allowing additional workspaces to be created.
Thumbnails of the current workspaces appear beneath the search field in the Activities Overview, as shown in Figure 6-9:
To switch to a different workspace, select the corresponding thumbnail. To move a window from one workspace to another, display the workspaces panel and drag and drop the application window (either the actual window from the current workspace or the thumbnail window in the workspaces panel) onto the destination workspace. To remove a workspace, close all its windows or move them to another workspace.
|
You are reading a sample chapter from Red Hat Enterprise Linux 9 Essentials. Buy the full book now in eBook or Print format.
Includes 34 chapters and 290 pages. Learn more. |
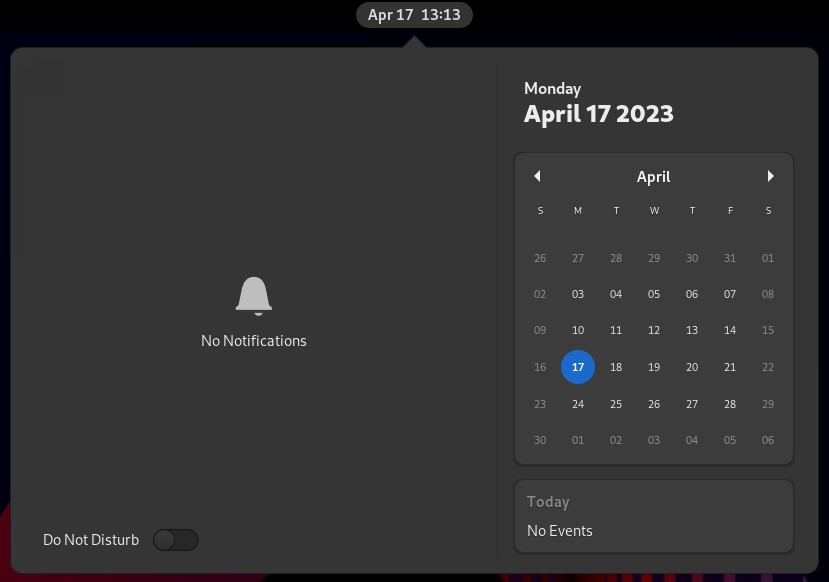
Calendar and Notifications
When the system needs to notify you of an event (such as the availability of system or application updates), a popup panel will appear at the top of the workspace. In addition, access to the calendar and any previous notifications is available by clicking on the day and time in the top bar, as shown in Figure 6-10:
GNOME Desktop Settings
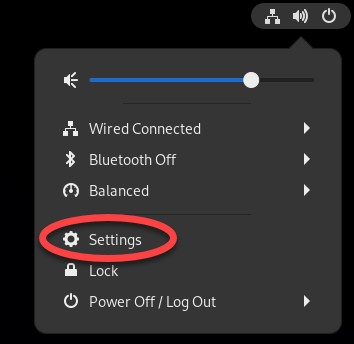
To access the Settings application, click on the down arrow on the far right of the top bar and select the button with the tools icon as highlighted in Figure 6-11:
The Settings application provides many options, such as Ethernet and WiFi connections, screen background customization options, screen locking and power management controls, and language preferences. To explore the settings available in each category, select an option from the left-hand panel in the Settings window:

The menu shown in Figure 6-11 above also includes options to switch users, adjust audio volume, change to a different WiFi network, and log out, restart, or power off the system.
Beyond Basic Customization
The GNOME 40 desktop is, by design, a clean and uncluttered environment with minimal customization options. However, it is possible to make additional changes to the desktop. The GNOME Project has developed a tool called GNOME Tweaks for this purpose. Use the following commands to install and run this tool:
|
You are reading a sample chapter from Red Hat Enterprise Linux 9 Essentials. Buy the full book now in eBook or Print format.
Includes 34 chapters and 290 pages. Learn more. |
# dnf install gnome-tweaks
$ gnome-tweaks
Once GNOME Tweaks has loaded, the interface shown in Figure 6-13 will appear:
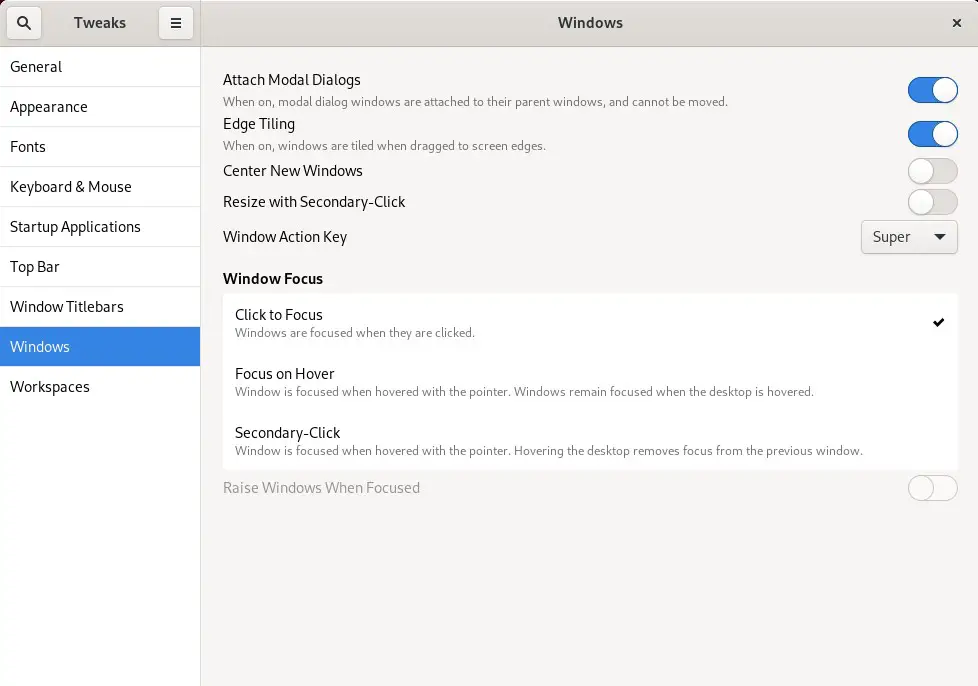
A wide range of options for customizing the desktop is now available. Too many to cover in this chapter, so experiment with these settings before proceeding to the next chapter.
Summary
RHEL 9 includes the GNOME 40 desktop environment, which may either be included during the initial installation or installed later using the dnf group package installation feature. Unlike most other desktop environments, GNOME 40 is intended to provide a clean and easy-to-use windowing user interface. Key areas of the GNOME 40 desktop include the top bar, Activities overview, and dash. In addition, GNOME 40 supports multiple workspaces keeping running applications organized and the screen uncluttered. Various configuration options are available within the Settings app, including desktop background settings, audio, network configuration, and WiFi network selection.