
So far in this book, we have covered the basic concepts of modern Android app architecture and looked in more detail at the ViewModel and LiveData components. The concept of data binding was also covered in the previous chapter and will now be used in this chapter to modify the ViewModelDemo app further.
Removing the Redundant Code
If you still need to, copy the ViewModelDemo project folder and save it as ViewModelDemo_LiveData for the next chapter. Once copied, open the original ViewModelDemo project, ready to implement data binding.
Before implementing data binding within the ViewModelDemo app, the power of data binding will be demonstrated by deleting all of the code within the project that will no longer be needed by the end of this chapter.
Launch Android Studio, open the ViewModelDemo project, edit the FirstFragment.kt file, and modify the code as follows:
package com.ebookfrenzy.viewmodeldemo
.
.
// import androidx.lifecycle.Observer

class FirstFragment : Fragment() {
.
.
   override fun onViewCreated(view: View, savedInstanceState: Bundle?) {
        super.onViewCreated(view, savedInstanceState)

        // val resultObserver = Observer<Float> {
        //        result -> binding.resultText.text = result.toString()
        // }

        // viewModel.getResult().observe(viewLifecycleOwner, resultObserver)

        // binding.convertButton.setOnClickListener {
        //     if (binding.dollarText.text.isNotEmpty()) {
        //         viewModel.setAmount(binding.dollarText.text.toString())
        //     } else {
        //         binding.resultText.text = "No Value"
        //     }
        // }
    }
}Code language: Kotlin (kotlin)
Next, edit the MainViewModel.kt file and continue deleting code as follows (note also the conversion of the dollarText variable to LiveData):
 |
You are reading a sample chapter from an old edition of the Android Studio Essentials – Kotlin Edition book.
Purchase the fully updated Android Studio Ladybug Kotlin Edition of this publication in eBook or Print format. The full book contains 100 chapters and over 878 pages of in-depth information. |
package com.ebookfrenzy.viewmodeldemo

import androidx.lifecycle.ViewModel
import androidx.lifecycle.MutableLiveData

class MainViewModel : ViewModel() {

    private val rate = 0.74f
    // private var dollarText = ""
    var dollarValue: MutableLiveData<String> = MutableLiveData()
    var result: MutableLiveData<Float> = MutableLiveData()

    // fun setAmount(value: String) {
    //     this.dollarText = value
    //     result.value = value.toFloat() * rate
    // }

    // fun getResult(): MutableLiveData<Float> {
    //     return result
    // }
}Code language: Kotlin (kotlin)
Though we‘ll add a few additional lines of code in implementing data binding, data binding has significantly reduced the amount of code that needs to be written.
Enabling Data Binding
The first step in using data binding is to enable it within the Android Studio project. This involves adding a new property to the Gradle Scripts -> build.gradle.kts (Module :app) file.
Within the build.gradle.kts file, add the element below to enable data binding within the project, and apply the Kotlin kapt plugin. This plugin is required to process the data binding annotations that will be added to the fragment XML layout file later in the chapter:
plugins {
    id("com.android.application")
    id("org.jetbrains.kotlin.android")
    id ("kotlin-kapt")
}

android {
.
.
    buildFeatures {
        viewBinding = true
        dataBinding = true
    }
.
.
}Code language: Gradle (gradle)
Once the entry has been added, a bar will appear across the top of the editor screen containing a Sync Now link. Click this to resynchronize the project with the new build configuration settings.
Adding the Layout Element
As described in Data Binding in Android Studio, the layout hierarchy must have a layout component as the root view to use data binding. This requires that the following changes be made to the fragment_first.xml layout file (app -> res -> layout -> fragment_first.xml). Open this file in the layout editor tool, switch to Code mode, and make these changes:
|
You are reading a sample chapter from an old edition of the Android Studio Essentials – Kotlin Edition book.
Purchase the fully updated Android Studio Ladybug Kotlin Edition of this publication in eBook or Print format. The full book contains 100 chapters and over 878 pages of in-depth information. |
<?xml version="1.0" encoding="utf-8"?>
<layout xmlns:app="http://schemas.android.com/apk/res-auto"
xmlns:tools="http://schemas.android.com/tools"
xmlns:android="http://schemas.android.com/apk/res/android">
<androidx.constraintlayout.widget.ConstraintLayout
android:id="@+id/main"
android:layout_width="match_parent"
android:layout_height="match_parent"
tools:context=".FirstFragment">
.
.
</androidx.constraintlayout.widget.ConstraintLayout>
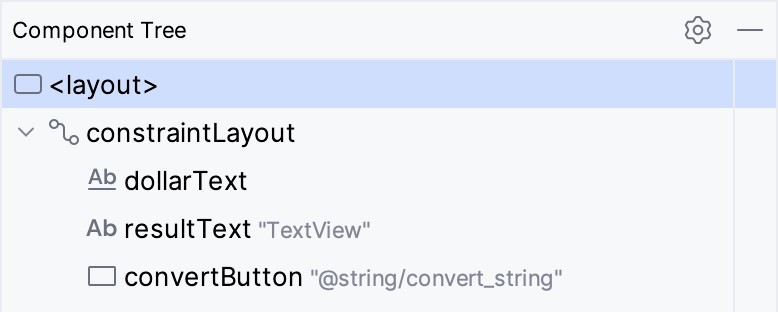
</layout>Code language: HTML, XML (xml)Once these changes have been made, switch back to Design mode and note that the new root view, though invisible in the layout canvas, is now listed in the component tree, as shown in Figure 43-1:
Build and run the app to verify that adding the layout element has not changed the user interface appearance.
When building the project, you may encounter an error that reads in part:
org.gradle.api.GradleException: 'compileDebugJavaWithJavac' task (current target is 1.8) and 'kaptGenerateStubsDebugKotlin' task (current target is 17)Code language: plaintext (plaintext)This error is caused by a bug in the Android Studio build toolchain and can be resolved by making the following changes to the build.gradle.kts (Module: app) file:
compileOptions {
    sourceCompatibility JavaVersion.VERSION_17
    targetCompatibility JavaVersion.VERSION_17
}
kotlinOptions {
    jvmTarget = '17'
}Code language: Gradle (gradle)
Adding the Data Element to Layout File
The next step in converting the layout file to a data binding layout file is to add the data element. For this example, the layout will be bound to MainViewModel, so edit the fragment_first.xml file to add the data element as follows:
|
You are reading a sample chapter from an old edition of the Android Studio Essentials – Kotlin Edition book.
Purchase the fully updated Android Studio Ladybug Kotlin Edition of this publication in eBook or Print format. The full book contains 100 chapters and over 878 pages of in-depth information. |
<?xml version="1.0" encoding="utf-8"?>

<layout xmlns:app="http://schemas.android.com/apk/res-auto"
    xmlns:tools="http://schemas.android.com/tools"
    xmlns:android="http://schemas.android.com/apk/res/android">

    <data>
        <variable
            name="myViewModel"
            type="com.ebookfrenzy.viewmodeldemo.MainViewModel" />
    </data>

    <androidx.constraintlayout.widget.ConstraintLayout
        android:id="@+id/main"
        android:layout_width="match_parent"
        android:layout_height="match_parent"
        tools:context=".FirstFragment">
.
.
</layout>Code language: HTML, XML (xml)
Build and rerun the app to ensure these changes take effect.
Working with the Binding Class
The next step is to modify the FirstFragment.kt file code to inflate the data binding. This is best achieved by rewriting the onCreateView() method:
.
.
import androidx.databinding.DataBindingUtil
.
.
class FirstFragment : Fragment() {

    // private var _binding: FragmentMainBinding? = null
    // private val binding get() = _binding!!

    private lateinit var viewModel: MainViewModel
    lateinit var binding: FragmentFirstBinding

    override fun onCreateView(inflater: LayoutInflater, container: ViewGroup?,
                              savedInstanceState: Bundle?): View {

        // _binding = FragmentMainBinding.inflate(inflater, container, false)
        binding = DataBindingUtil.inflate(
                inflater, R.layout.fragment_first, container, false)

        binding.lifecycleOwner = this
        return binding.root
    }

    // override fun onDestroyView() {
    //    super.onDestroyView()
    //    _binding = null
    // }
.
.Code language: Kotlin (kotlin)
The old code inflated the fragment_first.xml layout file (in other words, created the layout containing all of the view objects) and returned a reference to the root view (the top-level layout container). The Data Binding Library contains a utility class that provides a special inflation method which, in addition to constructing the UI, also initializes and returns an instance of the layout‘s data binding class. The new code calls this method and stores a reference to the binding class instance in a variable:
binding.lifecycleOwner = this
return binding.getRootCode language: Kotlin (kotlin)
The binding object must only remain in memory for as long as the fragment is present. To ensure that the instance is destroyed when the fragment goes away, the current fragment is declared as the lifecycle owner for the binding object.
binding.lifecycleOwner = this
return binding.getRootCode language: Kotlin (kotlin)
Assigning the ViewModel Instance to the Data Binding Variable
At this point, the data binding knows it will be binding to an instance of a class of type MainViewModel but has yet to be connected to an actual MainViewModel object. This requires the additional step of assigning the MainViewModel instance used within the app to the viewModel variable declared in the layout file. Add this code to the onViewCreated() method in the FirstFragment.kt file as follows:
|
You are reading a sample chapter from an old edition of the Android Studio Essentials – Kotlin Edition book.
Purchase the fully updated Android Studio Ladybug Kotlin Edition of this publication in eBook or Print format. The full book contains 100 chapters and over 878 pages of in-depth information. |
.
.
import com.ebookfrenzy.viewmodeldemo.BR.myViewModel
.
.
override fun onViewCreated(view: View, savedInstanceState: Bundle?) {
    super.onViewCreated(view, savedInstanceState)
    binding.setVariable(myViewModel, viewModel)
}
.
.Code language: Kotlin (kotlin)
If Android Studio reports myViewModel as undefined, rebuild the project using the Build -> Make Project menu option to force the class to be generated. With these changes made, the next step is to insert some binding expressions into the view elements of the data binding layout file.
Adding Binding Expressions
The first binding expression will bind the resultText TextView to the result value within the model view. Edit the fragment_first.xml file, locate the resultText element, and modify the text property so that the element reads as follows:
<TextView
    android:id="@+id/resultText"
    android:layout_width="wrap_content"
    android:layout_height="wrap_content"
    android:text='@{safeUnbox(myViewModel.result) == 0.0 ? "Enter value" : String.valueOf(safeUnbox(myViewModel.result)) + " euros"}'
    app:layout_constraintBottom_toBottomOf="parent"
    app:layout_constraintEnd_toEndOf="parent"
    app:layout_constraintStart_toStartOf="parent"
    app:layout_constraintTop_toTopOf="parent" />Code language: HTML, XML (xml)
The expression begins by checking if the result value is currently zero and, if it is, displays a message instructing the user to enter a value. However, if the result is not zero, the value is converted to a string and concatenated with the word “euros” before being displayed to the user.
The result value only requires a one-way binding in that the layout does not ever need to update the value stored in the ViewModel. The dollarValue EditText view, on the other hand, needs to use two-way binding so that the data model can be updated with the latest value entered by the user and to allow the current value to be redisplayed in the view in the event of a lifecycle event such as that triggered by a device rotation. The dollarText element should now be declared as follows:
<EditText
    android:id="@+id/dollarText"
    android:layout_width="wrap_content"
    android:layout_height="wrap_content"
    android:layout_marginTop="96dp"
    android:ems="10"
    android:importantForAutofill="no"
    android:inputType="numberDecimal"
    android:text="@={myViewModel.dollarValue}"
    app:layout_constraintEnd_toEndOf="parent"
    app:layout_constraintHorizontal_bias="0.502"
    app:layout_constraintStart_toStartOf="parent"
    app:layout_constraintTop_toTopOf="parent" />Code language: HTML, XML (xml)
Now that these initial binding expressions have been added, a method must be written to perform the conversion when the user clicks on the Button widget.
|
You are reading a sample chapter from an old edition of the Android Studio Essentials – Kotlin Edition book.
Purchase the fully updated Android Studio Ladybug Kotlin Edition of this publication in eBook or Print format. The full book contains 100 chapters and over 878 pages of in-depth information. |
Adding the Conversion Method
When the Convert button is clicked, it will call a method on the ViewModel to perform the conversion calculation and place the euro value in the result LiveData variable. Add this method now within the MainViewModel.kt file:
.
.
class MainViewModel : ViewModel() {

    private val rate = 0.74f
    var dollarValue: MutableLiveData<String> = MutableLiveData()
    var result: MutableLiveData<Float> = MutableLiveData()

    fun convertValue() {
        dollarValue.let {
            if (!it.value.equals("")) {
                result.value = it.value?.toFloat()?.times(rate)
            } else {
                result.value = 0f
            }
        }
    }
}Code language: Kotlin (kotlin)
Note that a zero value is assigned to the result LiveData variable in the absence of a valid dollar value. This ensures that the binding expression assigned to the resultText TextView displays the “Enter value” message if no value has been entered by the user.
Adding a Listener Binding
The final step before testing the project is to add a listener binding expression to the Button element within the layout file to call the convertValue() method when the button is clicked. Edit the fragment_first.xml file in Code mode once again, locate the convertButton element, and add an onClick entry as follows:
<Button
    android:id="@+id/convertButton"
    android:layout_width="wrap_content"
    android:layout_height="wrap_content"
    android:onClick="@{() -> myViewModel.convertValue()}"
    android:text="@string/convert_text"
    app:layout_constraintBottom_toBottomOf="parent"
    app:layout_constraintEnd_toEndOf="parent"
    app:layout_constraintHorizontal_bias="0.5"
    app:layout_constraintStart_toStartOf="parent"
    app:layout_constraintTop_toBottomOf="@+id/resultText" />Code language: HTML, XML (xml)
Testing the App
Compile and run the app and test that entering a value into the dollar field and clicking on the Convert button displays the correct result on the TextView (together with the “euros” suffix) and that the “Enter value” prompt appears if a conversion is attempted while the dollar field is empty. Also, verify that information displayed in the user interface is retained through a device rotation.
Summary
The primary goal of this chapter has been to work through the steps involved in setting up a project to use data binding and to demonstrate the use of one-way, two-way, and listener binding expressions. The chapter also provided a practical example of how much code writing is saved by using data binding in conjunction with LiveData to connect the user interface views with the back-end data and logic of the app.
|
You are reading a sample chapter from an old edition of the Android Studio Essentials – Kotlin Edition book.
Purchase the fully updated Android Studio Ladybug Kotlin Edition of this publication in eBook or Print format. The full book contains 100 chapters and over 878 pages of in-depth information. |