In several of the example projects created in preceding chapters, changes have been made to the AndroidManifest.xml file to request permission for the app to perform a specific task. In a couple of instances, for example, internet access permission has been requested to allow the app to download and display web pages. In each case up until this point, adding the request to the manifest was all that was required for the app to obtain permission from the user to perform the designated task.
However, there are several permissions for which additional steps are required for the app to function when running on Android 6.0 or later. The first of these so-called “dangerous” permissions will be encountered in the next chapter. Before reaching that point, however, this chapter will outline the steps involved in requesting such permissions when running on the latest generations of Android.
Understanding Normal and Dangerous Permissions
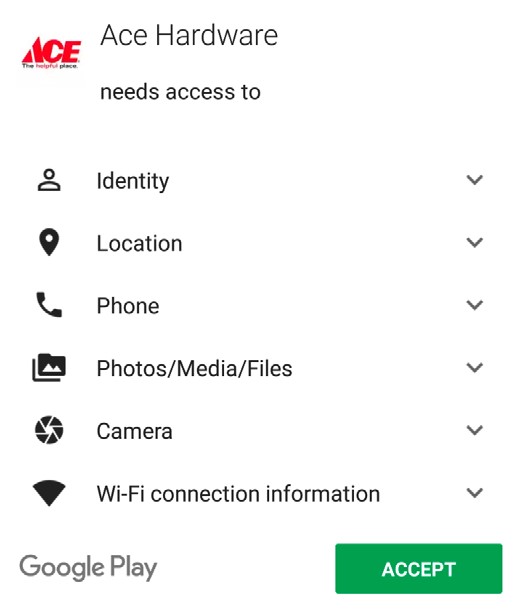
Android enforces security by requiring the user to grant permission for an app to perform certain tasks. Before the introduction of Android 6, permission was always sought when the app was installed on the device. Figure 75-1, for example, shows a typical screen seeking a variety of permissions while installing an app via Google Play.

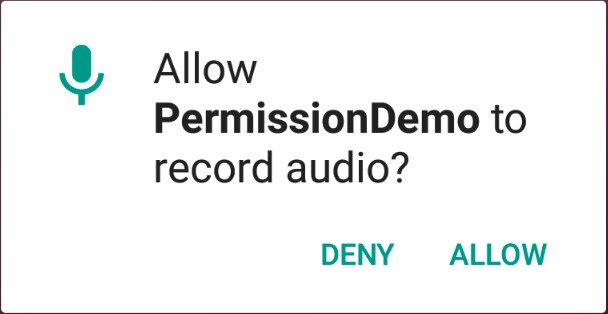
For many types of permissions, this scenario still applies to apps on Android 6.0 or later. These permissions are referred to as normal permissions and are still required to be accepted by the user at the point of installation. A second type of permission, called dangerous permissions, must also be declared within the manifest file in the same way as a normal permission but must also be requested from the user when the application is first launched. When such a request is made, it appears in the form of a dialog box, as illustrated in Figure 75-2:

The full list of permissions that fall into the dangerous category is contained in Table 75-1:
|
Permission Group |
Permission |
|
Calendar | READ_CALENDAR WRITE_CALENDAR |
|
Camera | CAMERA |
|
Contacts | READ_CONTACTS WRITE_CONTACTS GET_ACCOUNTS |
|
Location | ACCESS_FINE_LOCATION ACCESS_COARSE_LOCATION |
|
Microphone | RECORD_AUDIO |
|
Notifications | POST_NOTIFICATIONS |
|
Phone | READ_PHONE_STATE CALL_PHONE READ_CALL_LOG WRITE_CALL_LOG ADD_VOICEMAIL USE_SIP PROCESS_OUTGOING_CALLS |
|
Sensors | BODY_SENSORS |
|
SMS | SEND_SMS RECEIVE_SMS READ_SMS RECEIVE_WAP_PUSH RECEIVE_MMS |
|
Storage | MANAGE_EXTERNAL_STORAGE READ_EXTERNAL_STORAGE WRITE_EXTERNAL_STORAGE |
The MANAGE_EXTERNAL_STORAGE permission gives the app access to all files on the device’s external storage, including those belonging to other apps. Consequently, permission will only be enabled for your app once Google has verified during the review process that this level of access is needed. To test your app in advance of submitting it to the Google Play store, the following adb command can be executed to enable access for the app on the testing device temporarily:
adb shell appops set --uid <package name> MANAGE_EXTERNAL_STORAGE allowCode language: plaintext (plaintext)This mode can be turned off as follows:
adb shell appops set --uid <package name> MANAGE_EXTERNAL_STORAGE defaultCode language: plaintext (plaintext)Creating the Permissions Example Project
Select the New Project option from the welcome screen and, within the resulting new project dialog, choose the Empty Views Activity template before clicking on the Next button.
Enter PermissionDemo into the Name field and specify com.ebookfrenzy.permissiondemo as the package name. Before clicking on the Finish button, change the Minimum API level setting to API 26: Android 8.0 (Oreo) and the Language menu to Kotlin.
Checking for a Permission
The Android Support Library contains several methods that can be used to seek and manage dangerous permissions within the code of an Android app. These API calls can be made safely regardless of the version of Android on which the app is running but will only perform meaningful tasks when executed on Android 6.0 or later.
Before an app attempts to use a feature that requires approval of a dangerous permission, and regardless of whether or not permission was previously granted, the code must check that the permission has been granted. This can be achieved via a call to the checkSelfPermission() method of the ContextCompat class, passing through as arguments a reference to the current activity and the requested permission. The method will check whether the permission has been previously granted and return an integer value matching PackageManager.PERMISSION_ GRANTED or PackageManager.PERMISSION_DENIED.
Within the MainActivity.kt file of the example project, modify the code to check whether permission has been granted for the app to record audio:
package com.ebookfrenzy.permissiondemo
.
.
import android.Manifest
import android.content.pm.PackageManager
import androidx.core.content.ContextCompat
import android.util.Log

class MainActivity : AppCompatActivity() {

    private val TAG = "PermissionDemo"

    override fun onCreate(savedInstanceState: Bundle?) {
        super.onCreate(savedInstanceState)
        setContentView(R.layout.activity_main)

        setupPermissions()
    }

    private fun setupPermissions() {
        val permission = ContextCompat.checkSelfPermission(this,
                Manifest.permission.RECORD_AUDIO)

        if (permission != PackageManager.PERMISSION_GRANTED) {
            Log.i(TAG, "Permission to record denied")
        }
    }
}Code language: Kotlin (kotlin)
Edit the AndroidManifest.xml file (located in the Project tool window under app -> manifests) and add a line to request recording permission as follows:
<?xml version="1.0" encoding="utf-8"?>
<manifest xmlns:android="http://schemas.android.com/apk/res/android"
    package="com.ebookfrenzy.permissiondemoactivity" >

    <uses-permission android:name="android.permission.RECORD_AUDIO" />

    <application
        android:allowBackup="true"
        android:icon="@mipmap/ic_launcher"
        android:label="@sxtring/app_name"
        android:supportsRtl="true"
        android:theme="@style/AppTheme" >
        <activity android:name=".MainActivity" >
            <intent-filter>
                <action android:name="android.intent.action.MAIN" />

                <category
                  android:name="android.intent.category.LAUNCHER" />
            </intent-filter>
        </activity>
    </application>
</manifest>Code language: HTML, XML (xml)
Run the app on a device or emulator and open the Logcat tool window. Note that even though the permission has been added to the manifest file, the permission denied message appears. This is because Android requires that in addition to adding the request to the manifest file, the app must also request dangerous permissions at runtime.
Requesting Permission at Runtime
A permission request is made via a call to the requestPermissions() method of the ActivityCompat class. When this method is called, the permission request is handled asynchronously, and a method named onRequestPermissionsResult() is called when the task is completed.
The requestPermissions() method takes as arguments a reference to the current activity, the identifier of the requested permission, and a request code. The request code can be any integer value and will be used to identify which request has triggered the call to the onRequestPermissionsResult() method. Modify the MainActivity.kt file to declare a request code and request recording permission if the permission check fails:
.
.
import androidx.core.app.ActivityCompat

class MainActivity : AppCompatActivity() {

    private val TAG = "PermissionDemo"
    private val RECORD_REQUEST_CODE = 101
.
.
    private fun setupPermissions() {
        val permission = ContextCompat.checkSelfPermission(this,
                Manifest.permission.RECORD_AUDIO)

        if (permission != PackageManager.PERMISSION_GRANTED) {
            Log.i(TAG, "Permission to record denied")
            makeRequest()
        }
    }

    private fun makeRequest() {
        ActivityCompat.requestPermissions(this,
                arrayOf(Manifest.permission.RECORD_AUDIO),
                RECORD_REQUEST_CODE)
    }
}Code language: Kotlin (kotlin)
Next, implement the onRequestPermissionsResult() method so that it reads as follows:
override fun onRequestPermissionsResult(requestCode: Int,
              permissions: Array<String>, grantResults: IntArray) {
    super.onRequestPermissionsResult(requestCode, permissions, grantResults)

    when (requestCode) {
        RECORD_REQUEST_CODE -> {

            if (grantResults.isEmpty() || grantResults[0] !=
                              PackageManager.PERMISSION_GRANTED) {

                Log.i(TAG, "Permission has been denied by user")
            } else {
                Log.i(TAG, "Permission has been granted by user")
            }
        }
    }
}Code language: Kotlin (kotlin)
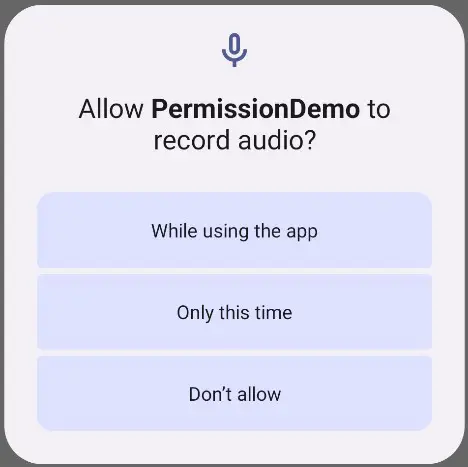
Compile and run the app on an emulator or device and note that a dialog seeking permission to record audio appears as shown in Figure 75-3:

Tap the While using the app button and check that the “Permission has been granted by user” message appears in the Logcat panel.
Once the user has granted the requested permission, the checkSelfPermission() method call will return a PERMISSION_GRANTED result on future app invocations until the user uninstalls and re-installs the app or changes the permissions for the app in Settings.
Providing a Rationale for the Permission Request
As evident from Figure 75-3, the user can deny the requested permission. In this case, the app will continue to request permission each time the user launches it unless the user selects the “Never ask again” option before clicking the Deny button. Repeated denials by the user may indicate that the user doesn’t understand why the app requires permission. The user might, therefore, be more likely to grant permission if the reason for the requirements is explained when the request is made. Unfortunately, it is not possible to change the content of the request dialog to include such an explanation.
An explanation is best included in a separate dialog which can be displayed before the request dialog is presented to the user. This raises the question of when to display this explanation dialog. The Android documentation recommends that an explanation dialog only be shown if the user has previously denied the permission and provides a method to identify when this is the case.
A call to the shouldShowRequestPermissionRationale() method of the ActivityCompat class will return a true result if the user has previously denied a request for the specified permission and a false result if the request has not previously been made. In the case of a true result, the app should display a dialog containing a rationale for needing permission, and once the dialog has been read and dismissed by the user, the permission request should be repeated.
To add this functionality to the example app, modify the onCreate() method so that it reads as follows:
.
.
import android.app.AlertDialog
.
.
private fun setupPermissions() {
    val permission = ContextCompat.checkSelfPermission(this,
            Manifest.permission.RECORD_AUDIO)

    if (permission != PackageManager.PERMISSION_GRANTED) {
        Log.i(TAG, "Permission to record denied")
        if (ActivityCompat.shouldShowRequestPermissionRationale(this,
                Manifest.permission.RECORD_AUDIO)) {
            val builder = AlertDialog.Builder(this)
            builder.setMessage("Permission to access the microphone is required
for this app to record audio.")
                    .setTitle("Permission required")

            builder.setPositiveButton("OK") { dialog, id ->
                makeRequest()
            }

            val dialog = builder.create()
            dialog.show()
        } else {
            makeRequest()
        }
    }
}Code language: Kotlin (kotlin)
The method still checks whether or not the permission has been granted but now also identifies whether a rationale needs to be displayed. If the user has previously denied the request, a dialog is displayed containing an explanation and an OK button on which a listener is configured to call the makeRequest() method when the button is tapped. If the permission request has not previously been made, the code moves directly to seeking permission.
Testing the Permissions App
On the device or emulator session on which testing is being performed, launch the Settings app, select the Apps option, and scroll to and select the PermissionDemo app. On the app settings screen, tap the uninstall button to remove the app.
Rerun the app, and click on the Don’t allow button when the permission request dialog appears. Stop and restart the app and verify that the rationale dialog appears. Tap the OK button, and tap the While using the app button when the permission request dialog appears.
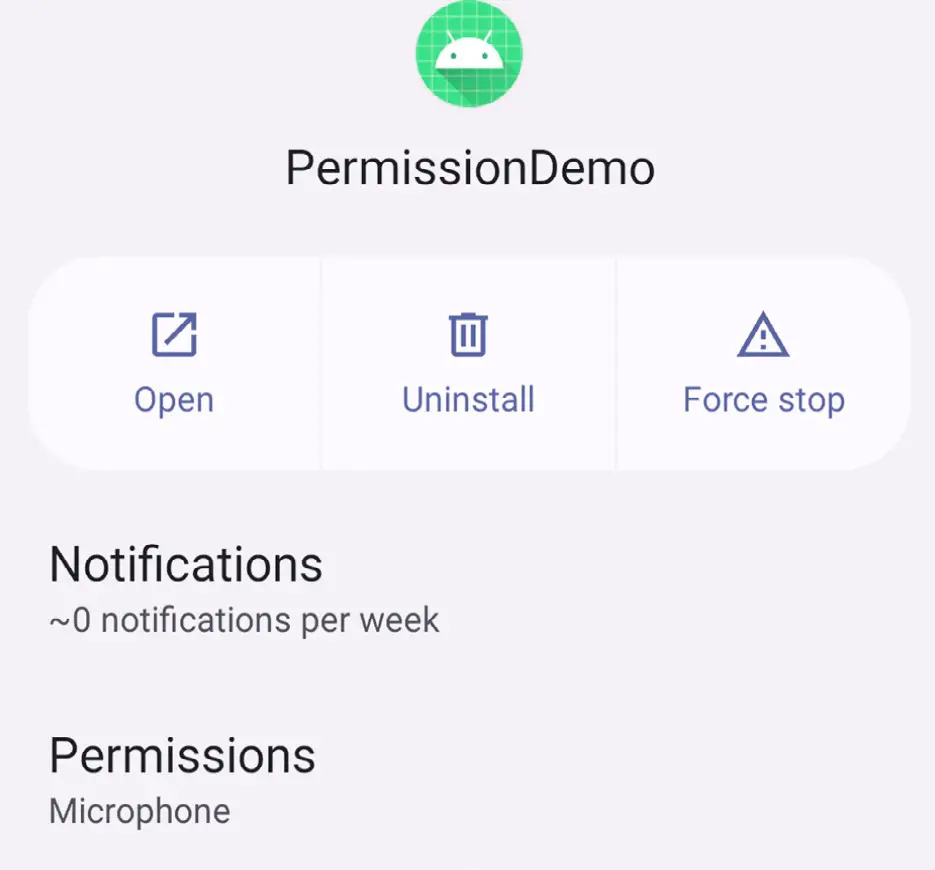
Return to the Settings app, select the Apps option, and choose the PermissionDemo app again from the list. Once the settings for the app are listed, verify that the Permissions section lists the Microphone permission.
Return to the Settings app, select the Apps option, and choose the PermissionDemo app again from the list. Once the settings for the app are listed, verify that the Permissions section lists the Microphone permission:

Summary
Before the introduction of Android 6.0, the only step necessary for an app to request permission to access certain functionality was to add an appropriate line to the application’s manifest file. The user would then be prompted to approve the permission when installing the app. This is still the case for most permissions, except for a set of permissions considered dangerous. Permissions that are considered dangerous usually have the potential to allow an app to violate the user’s privacy, such as allowing access to the microphone, contacts list, or external storage.
As outlined in this chapter, apps based on Android 6 or later must now request dangerous permission approval from the user when the app launches and include the permission request in the manifest file.

