
Posted: 2024-04-08
KVM-based virtual machines can easily be configured on AlmaLinux 9 using the virt-install command-line tool, the virt-manager GUI tool, or the Virtual Machines module of the Cockpit web console. This chapter will use Cockpit to install an operating system as a KVM guest on an AlmaLinux 9 host. The chapter titled “Creating KVM Virtual Machines on AlmaLinux 9 using virt-manager” will cover using the virt-manager tool to create new virtual machines.
The next chapter, “Creating KVM Virtual Machines with virt-install and virsh” will cover the command-line approach to virtual machine creation.
Installing the Cockpit Virtual Machines Module
The virtual machines module may not be included in a standard Cockpit installation by default. Assuming that Cockpit is installed and configured, the virtual machines module may be installed as follows:
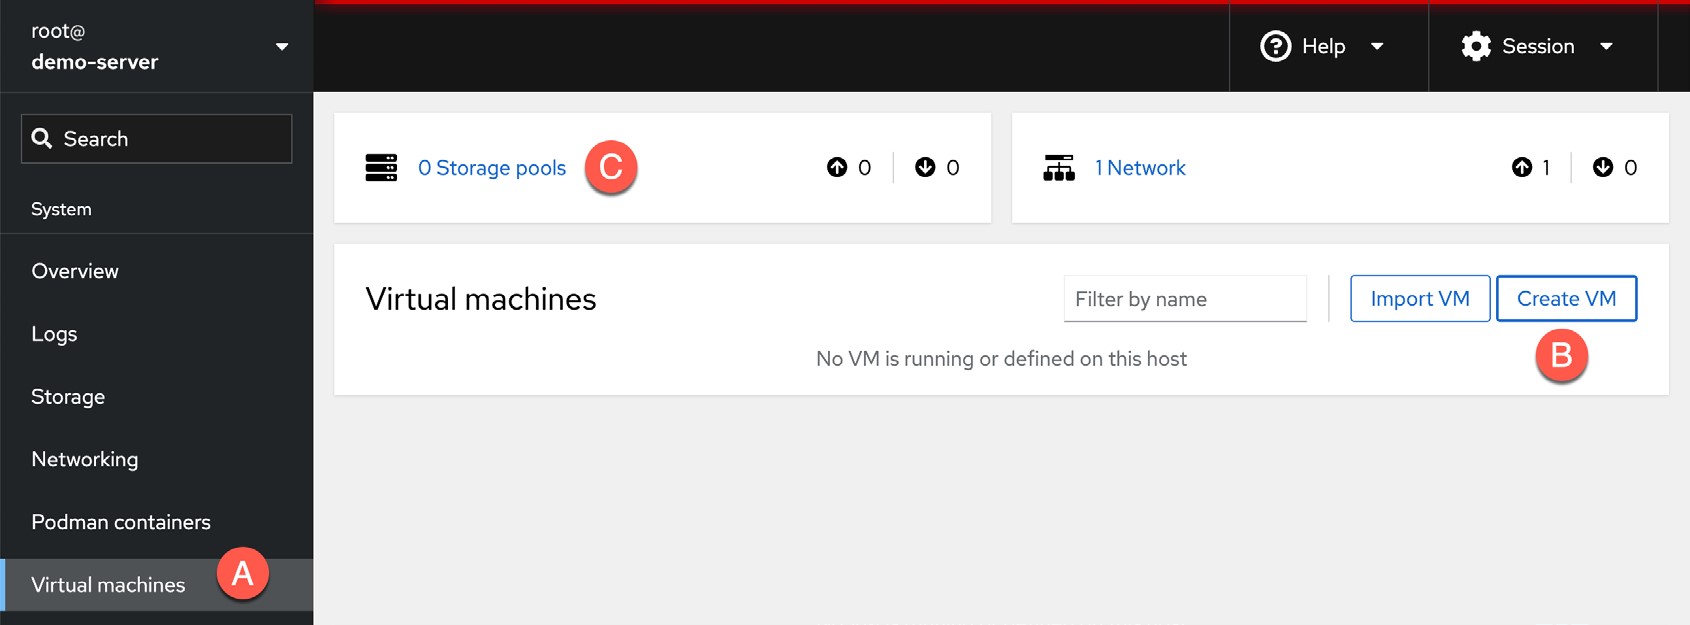
# dnf install cockpit-machinesCode language: plaintext (plaintext)Once installed, the Virtual Machines option (marked A in Figure 22-1) will appear in the navigation panel the next time you log into the Cockpit interface:
 |
You are reading a sample chapter from AlmaLinux 9 Essentials. Buy the full book now in eBook format.
Full book includes 34 chapters and 290 pages. Learn more. |
Creating a Virtual Machine in Cockpit
To create a virtual machine in Cockpit, click the Create VM button marked B in Figure 22-1 to display the creation dialog.
Within the dialog, enter a name for the machine and choose whether the installation media is in the form of an ISO accessible via a URL or a local filesystem path, or select the operating system information for the guest and choose the Download an OS option to have the installation image downloaded automatically during the installation process.
Also, specify the size of the virtual disk drive to be used for the operating system installation and the amount of memory to be allocated to the virtual machine:
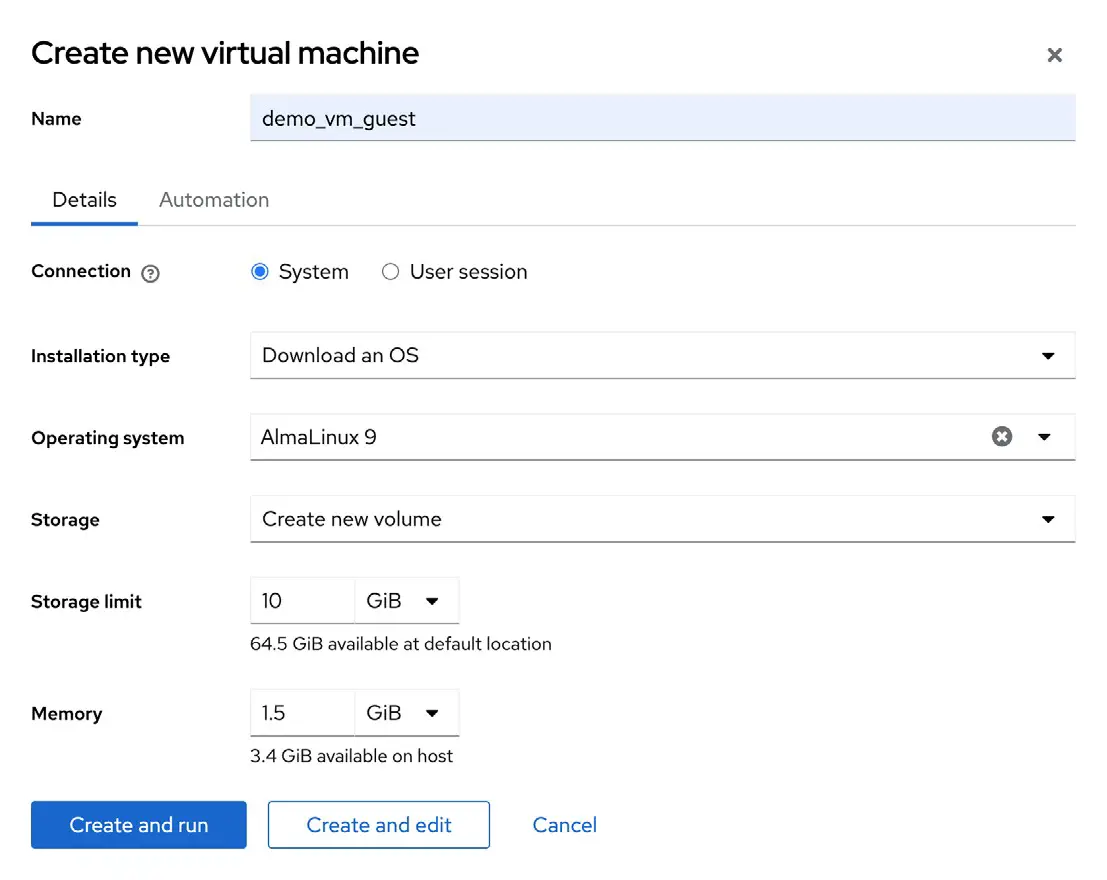
KVM provides a choice of System or User session virtual machines. System virtual machines run with root privileges and full access to hardware devices and networks but are prevented from storing disk images in user folders. User sessions, on the other hand, are restricted to the user’s privileges with restricted network and device access. Disk images, however, can be stored in the user’s home directory. For this tutorial, select the System option.
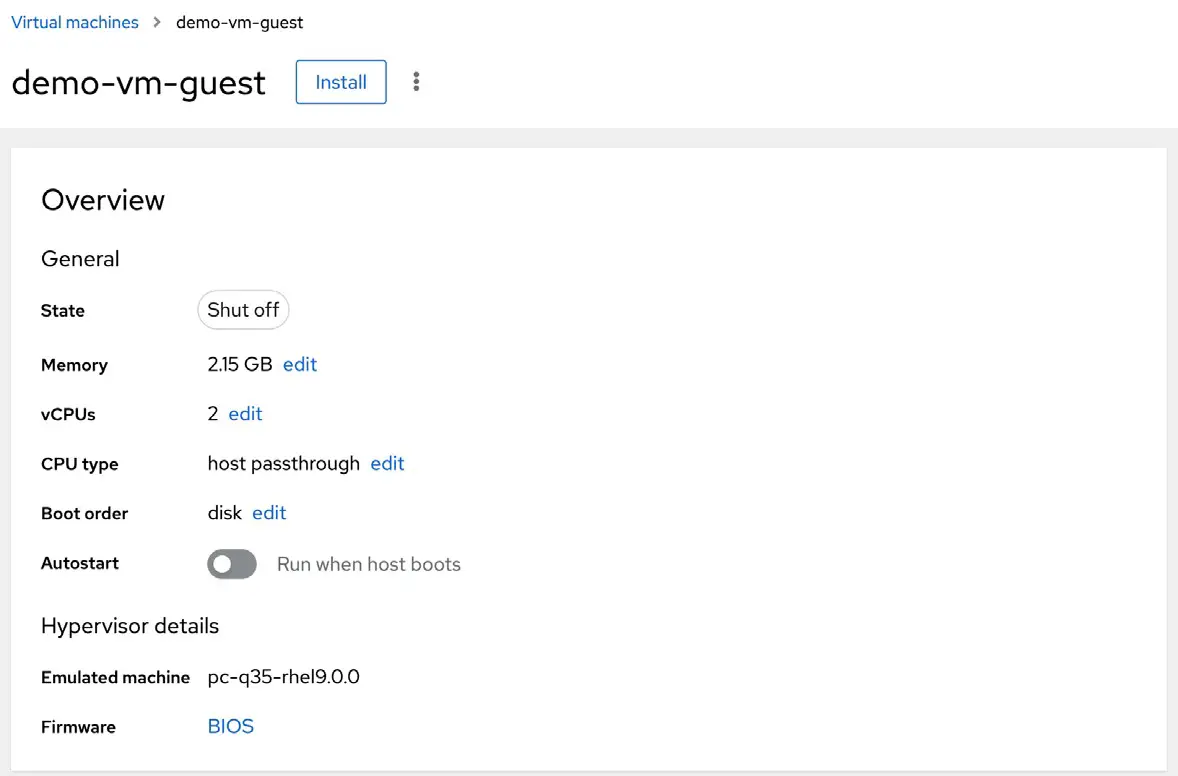
Click on the Create and Edit button to build the virtual machine. After the creation process is complete, select the new VM from the list to display the configuration details, as shown in Figure 22-3:
|
You are reading a sample chapter from AlmaLinux 9 Essentials. Buy the full book now in eBook format.
Full book includes 34 chapters and 290 pages. Learn more. |
As described in “An Overview of Virtualization Techniques” KVM provides virtual machines with several options in terms of network configuration. To view and change the network settings of a virtual machine, scroll down to the Network interfaces section of the guest overview screen and click the Edit button:
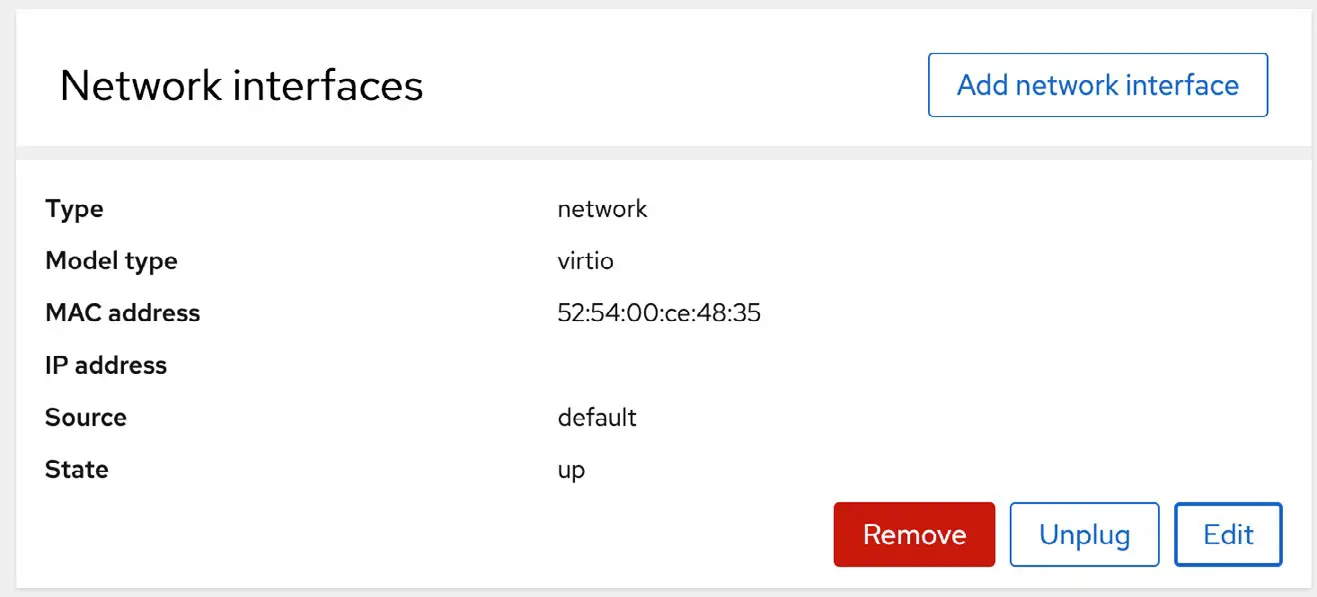
In the resulting dialog, the Network Type menu may be used to change the type of network connection, for example, from Virtual network (NAT) to direct attachment (MacVTap) or Bridge to LAN.
Starting the Installation
To start the new virtual machine and install the guest operating system from the designated installation media, click the Install button at the top of the overview page. Cockpit will start the virtual machine and update the Console view where the guest OS screen will appear:

If the installation fails, check the message to see if an error occurred when opening the installation image. This usually occurs because the QEMU emulator runs as a user named qemu, which does not have access to the directory in which the ISO installation image is located. To resolve this issue, open a terminal window (or connect with SSH if the system is remote), change directory to the location of the ISO image file, and add the qemu user to the access control list (ACL) of the parent directory as follows:
# cd /path/to/iso/directory
# setfacl --modify u:qemu:x ..Code language: plaintext (plaintext)
After making this change, check the settings as follows:
|
You are reading a sample chapter from AlmaLinux 9 Essentials. Buy the full book now in eBook format.
Full book includes 34 chapters and 290 pages. Learn more. |
# getfacl ..
# file: ..
# owner: demo
# group: demo
user::rwx
user:qemu:--x
group::---
mask::--x
other::---
Code language: plaintext (plaintext)
Once these changes have been made, click the Install button again to complete the installation.
To complete the installation, interact with the screen in the Consoles view just as you would if you were installing the operating system on physical hardware. If the console is too small to accommodate the entire guest operating system screen, click the Expand button in the top right-hand corner.
It is also possible to connect with and display the graphical console for the VM from outside the Cockpit browser session using the virt-viewer tool. To install virt-viewer on an AlmaLinux 9 system, run the following command:
# dnf install virt-viewerCode language: plaintext (plaintext)The virt-viewer tool is also available for Windows systems and can be downloaded from the following URL:
https://virt-manager.org/download/
|
You are reading a sample chapter from AlmaLinux 9 Essentials. Buy the full book now in eBook format.
Full book includes 34 chapters and 290 pages. Learn more. |
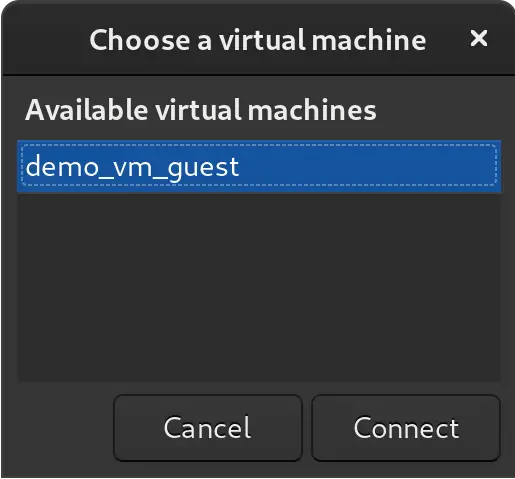
Run virt-viewer as follows to connect with a system-based virtual machine running on the local host:
$ sudo virt-viewerCode language: plaintext (plaintext)After virt-viewer has started, select the virtual machine you wish to connect to from the resulting dialog:
To list and access session-based guests, launch virt-viewer as follows:
$ virt-viewer --connect qemu:///sessionCode language: plaintext (plaintext)Alternatively, it is also possible to specify the virtual machine name and bypass the selection dialog entirely, for example:
$ sudo virt-viewer demo-vm-guestCode language: plaintext (plaintext)To connect a virt-viewer instance to a virtual machine running on a remote host using SSH, the following command can be used:
|
You are reading a sample chapter from AlmaLinux 9 Essentials. Buy the full book now in eBook format.
Full book includes 34 chapters and 290 pages. Learn more. |
$ virt-viewer --connect qemu+ssh://<user>@<host>/system <guest name>Code language: plaintext (plaintext)For example:
$ virt-viewer --connect qemu+ssh://[email protected]/system demo_vm_guestCode language: plaintext (plaintext)When using this technique, it is important to note that you will be prompted twice for the user password before the connection is fully established.
Once the virtual machine has been created, the Cockpit interface can monitor the machine and perform tasks such as rebooting, shutting down, or deleting the guest system. An option is also included on the Disks panel to add disks to the virtual machine configuration.
Working with Storage Volumes and Storage Pools
When a virtual machine is created, it will usually have at least one virtual disk drive. The images that represent these virtual disk drives are stored in storage pools. A storage pool can be an existing directory on a local filesystem, a filesystem partition, a physical disk device, Logical Volume Management (LVM) volume group, or even a remote network file system (NFS).
Each storage pool is divided into one or more storage volumes. Storage volumes are typically individual image files, each representing a single virtual disk drive, but they can also take the form of physical disk partitions, entire disk drives, or LVM volume groups.
|
You are reading a sample chapter from AlmaLinux 9 Essentials. Buy the full book now in eBook format.
Full book includes 34 chapters and 290 pages. Learn more. |
When a virtual machine was created using the previous steps, a default storage pool was created to store virtual machine images. This default storage pool occupies space on the root filesystem and can be reviewed from within the Cockpit Virtual Machine interface by selecting the Storage Pools option at the top of the panel marked C in Figure 22-1 above.
When selected, the screen shown in Figure 22-7 below will appear containing a list of storage pools currently configured on the system:
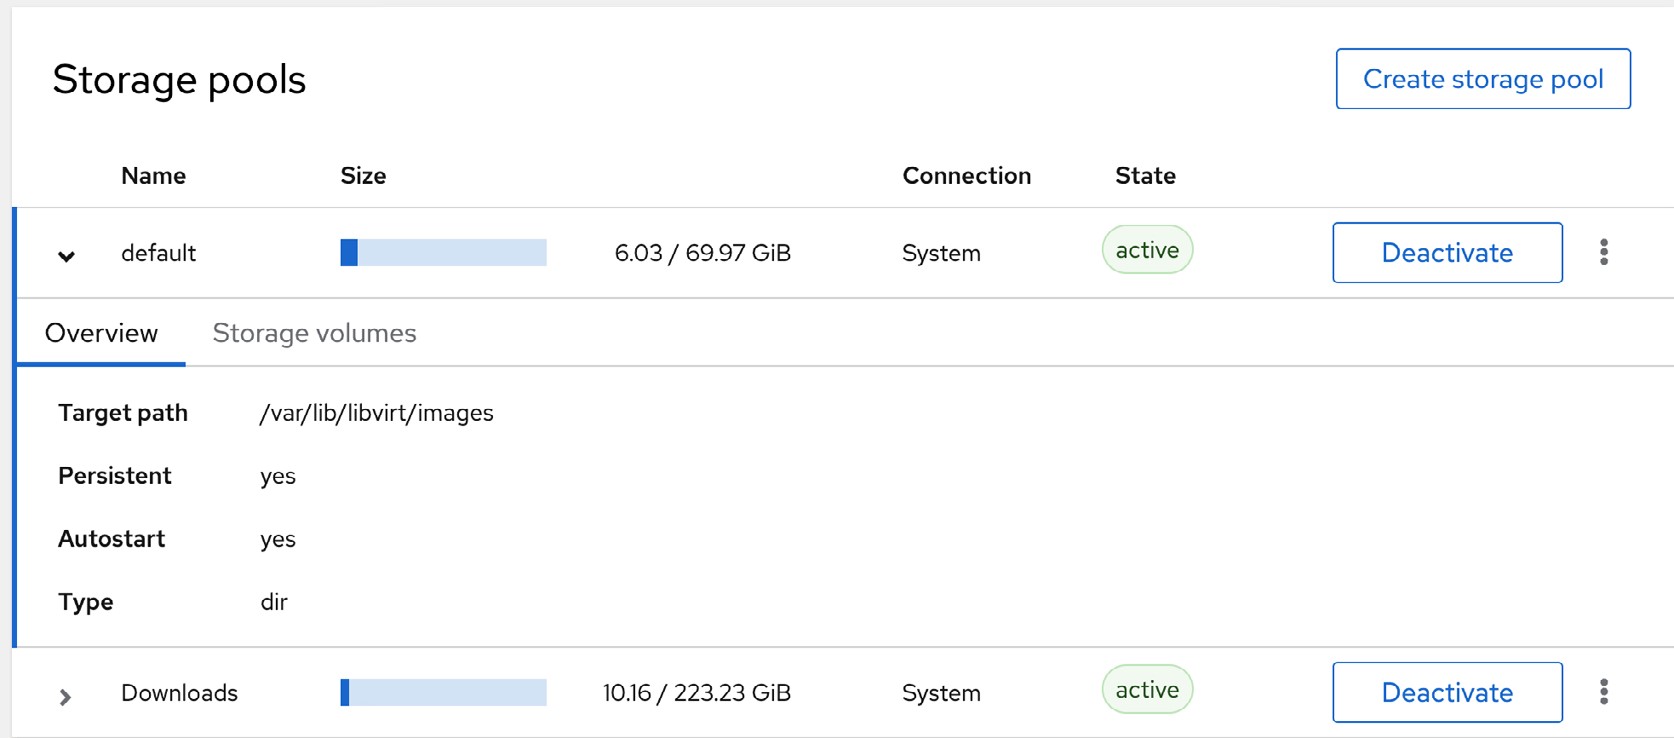
In the above example, the default storage pool is located on the root filesystem and stores the virtual machine image in the /var/lib/libvirtd/images directory. To view the storage volumes contained within the pool, select the Storage Volumes tab highlighted in Figure 22-8:
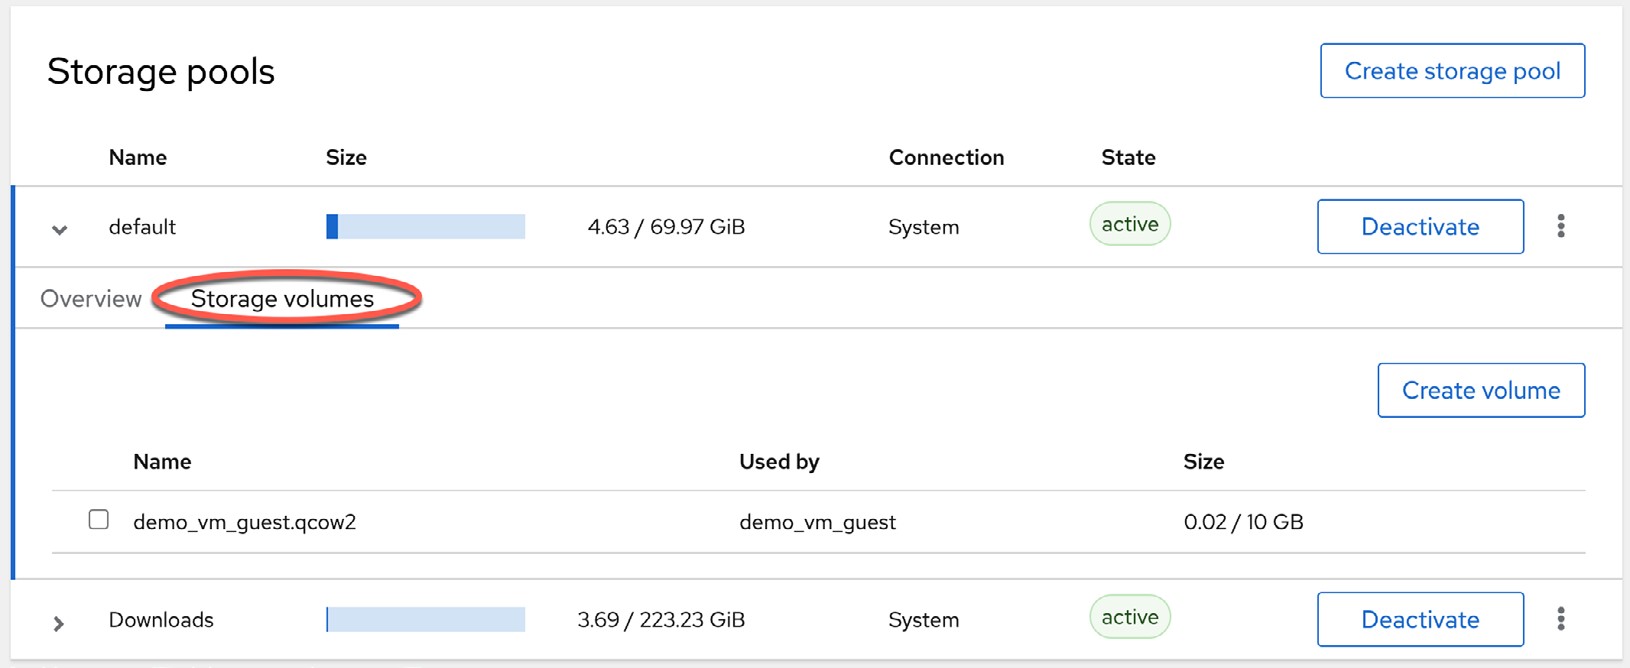
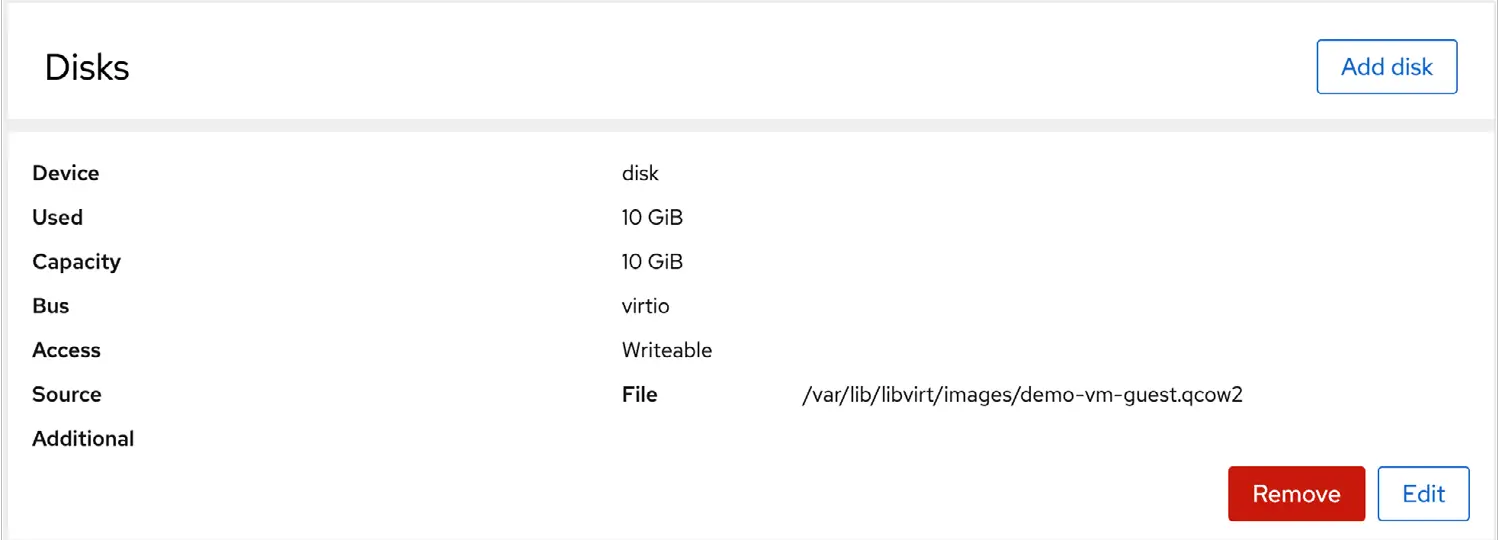
In the case of the demo guest, the storage volume takes the form of an image file named demovm-guest.qcow2. Depending on the selections made when the VM was created, the pool may also include a storage volume containing the installation ISO image. To find out which storage volume a particular virtual machine uses, return to the main Virtual machines screen, select the virtual machine, and scroll to the Disks panel, as shown in Figure 22-9:
Although using the default storage pool is acceptable for testing purposes and early experimentation, it is recommended that additional pools be created for general virtualization use. To create a new storage pool, display the Storage Pools screen within Cockpit and click on the Create storage pool button to display the dialog shown in Figure 22-10:
|
You are reading a sample chapter from AlmaLinux 9 Essentials. Buy the full book now in eBook format.
Full book includes 34 chapters and 290 pages. Learn more. |
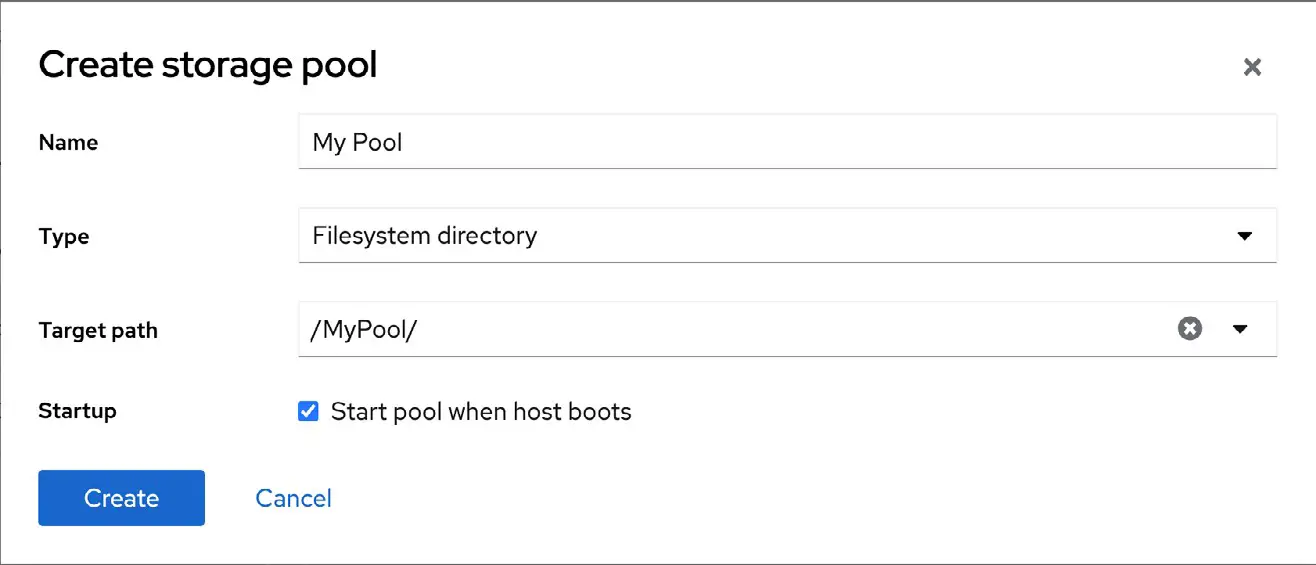
In the above example, a new storage pool is being created named MyPool using a file system partition mounted as /MyPool within the local filesystem (the topic of disk drives, partitions, and mount points is covered later in the chapter entitled “Adding a New Disk Drive to an AlmaLinux 9 System”). Once created, the pool will be listed within the Cockpit storage pool screen and can contain storage volumes as new virtual machines are created.
Summary
This chapter has outlined using the Cockpit web-based interface to create and manage KVM-based virtual machines. The Cockpit interface has the advantage of not requiring access to a desktop environment running on the host system. An alternative option is using the virt-manager graphical tool outlined in the next chapter.